'77 A2 - My first project
Moderators: rickf, raymond, Mr. Recovery
-
Vzike

- Sergeant Major of the "G"

- Posts: 729
- Joined: December 27th, 2013, 4:05 pm
- Location: Jupiter, Florida
Re: '77 A2 - My first project
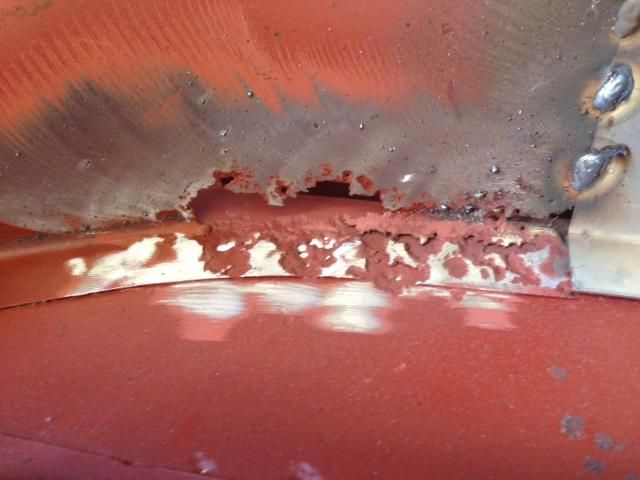
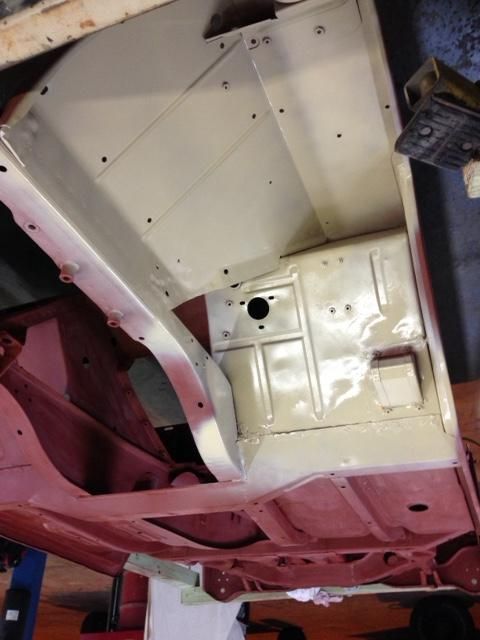
take a look at the picture in my above post on the rotisserie. The second from the last one shows the tub upside down and almost flat. See the area where the tool tray is? Along the seam to the outside of the vehicle, you can see a dark spot. That's the rust through I need to fix. Here is a pic of the area from the inside of the tool tray. it is curved to the outside, and curved up. I just don't have a way to fabricate that, so we are glassing it.
Vin Zike
-
Vzike
- Sergeant Major of the "G"
- Posts: 729
- Joined: December 27th, 2013, 4:05 pm
- Location: Jupiter, Florida
Re: '77 A2 - My first project
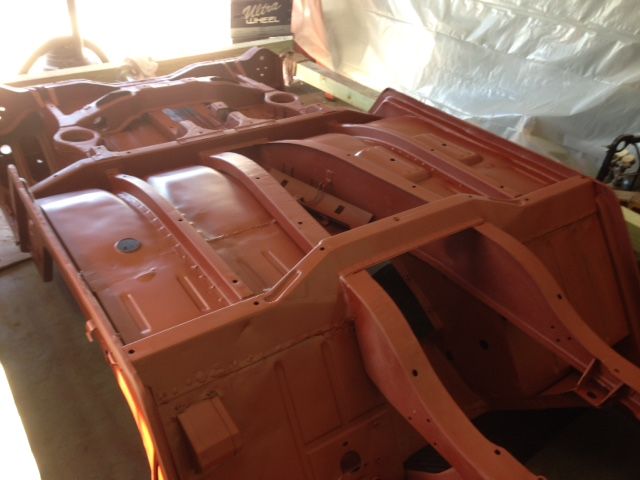
Making a lot of progress now. The body work is nearly done. Just finished priming it and will put three coats of desert sand on it this week. I'll start assembling it immediately after. I used a PG two part epoxy red oxide primer. I'm leaving the suspension parts satin black.

Vin Zike
-
lpcoating
- Brigadier General

- Posts: 2030
- Joined: February 19th, 2013, 11:38 pm
- Location: Mansfield, PA
- Contact:
Re: '77 A2 - My first project
Looks good. When you get it done you can come to PA and finish mine. 
M151 Body Panels - http://www.m151bodypanels.com/
'68 A1 - Under full resto
'68 A1 - Under full resto
-
Vzike
- Sergeant Major of the "G"
- Posts: 729
- Joined: December 27th, 2013, 4:05 pm
- Location: Jupiter, Florida
Re: '77 A2 - My first project
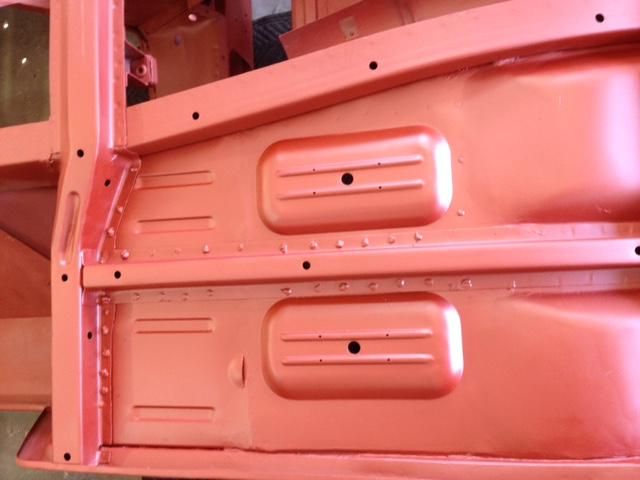
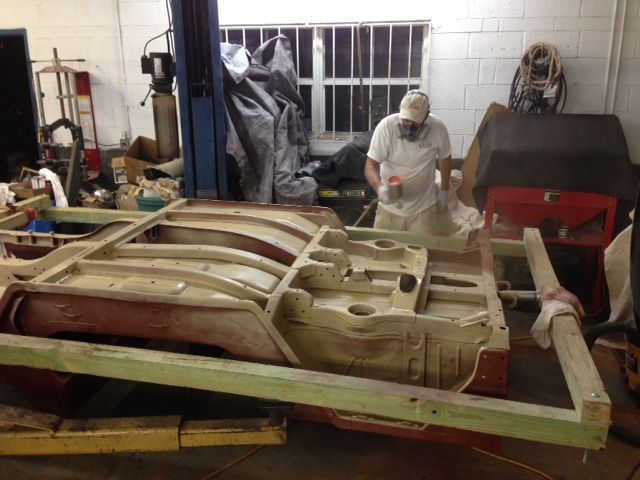
Started the day off with a hydraulic leak on the lift that spattered a few areas on the bottom with oil. Repaired the lift, then scrubbed the oil off. The entire primered tub was scuffed with the correct ScotchBrite pads, then washed/wiped down with alcohol three times. The rotisserie really helped with all of this. Once finished, we started the paint. The primer used was PG DP47LF with the DPLE/DP402LF catalyst. The paint was the RAPCO/GCI CARC 33446n 686 tan.
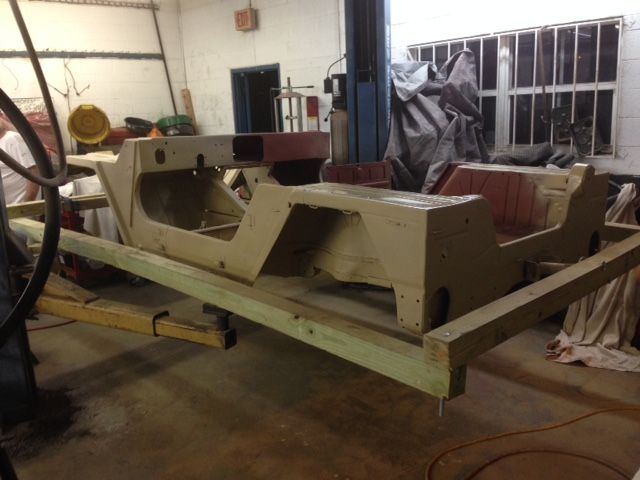
Paint went on well. Trying to get behind the dash was tough, and resulted in drips. We'll re-squirt that today after a little sanding. I found that painting with the tub up on its side, then flipping to the other side gave us the best angles for hitting all those crazy spots. Of course, every time we rotated it, a little more sand came out of some secrete places where it hides.
Assembly starts this weekend, after I finish cleaning up the garage area.
Here are the pics
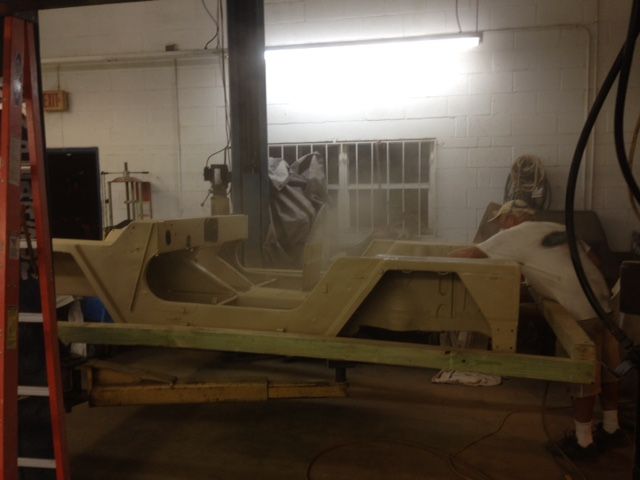
And finally, at 1130 at night.....
Paint went on well. Trying to get behind the dash was tough, and resulted in drips. We'll re-squirt that today after a little sanding. I found that painting with the tub up on its side, then flipping to the other side gave us the best angles for hitting all those crazy spots. Of course, every time we rotated it, a little more sand came out of some secrete places where it hides.
Assembly starts this weekend, after I finish cleaning up the garage area.
Here are the pics
And finally, at 1130 at night.....
Vin Zike

Re: '77 A2 - My first project
Vin: Nice job, that hydraulic spray had to make your day. What a PITA, but the outcome looks good.
Floyd
Floyd
1961 M151
1967 M416
1988 M35A2C
VFW Life Member
NRA Life Member
1967 M416
1988 M35A2C
VFW Life Member
NRA Life Member
-
halftracknut
- Brigadier General
- Posts: 2068
- Joined: December 11th, 2007, 2:28 pm
-
Vzike
- Sergeant Major of the "G"
- Posts: 729
- Joined: December 27th, 2013, 4:05 pm
- Location: Jupiter, Florida
Re: '77 A2 - My first project
We finished up at 2330 hours (11:30 at night for the Navy guys), and daylight showed us all the thin and missed spots. Tomorrow will be the second painting day, for the final coat. I'll rough the surface in the morning, and we'll have it finished by the end of the day. Putting it up on it's side allowed me to look at the back of the dash. The sandblaster got it, but the painter totally missed it. I was able to reach in and get a good coat on it.
I'll start the suspension assembly next week. I have all new wheel bearings, seals, bushings, and brake parts (including a new line kit from Army Jeep Parts). I'll probably pull the new wire assembly through the frame first.
Any suggestions on assembly order will be greatly appreciated!
I'll start the suspension assembly next week. I have all new wheel bearings, seals, bushings, and brake parts (including a new line kit from Army Jeep Parts). I'll probably pull the new wire assembly through the frame first.
Any suggestions on assembly order will be greatly appreciated!
Vin Zike
-
Fil Bonica
- Brigadier General
- Posts: 2607
- Joined: December 9th, 2007, 10:49 am
- Location: ~ Heaven ~
Re: '77 A2 - My first project
As I mentioned before, it would be wise to run the vent and gas lines before the brake clutch assembly goes .
It's easier to route everything that way.
Did you finally get the gas line kit for an Emissions style tank ?
Fil Bonica
I
It's easier to route everything that way.
Did you finally get the gas line kit for an Emissions style tank ?
Fil Bonica
I
K1ABW
-
Vzike
- Sergeant Major of the "G"
- Posts: 729
- Joined: December 27th, 2013, 4:05 pm
- Location: Jupiter, Florida
Re: '77 A2 - My first project
I have the brake line kit and the emissions fuel line kits on order from Army Jeep Parts. I'll post how they fit up as soon as they get here.
Vin Zike
-
Vzike
- Sergeant Major of the "G"
- Posts: 729
- Joined: December 27th, 2013, 4:05 pm
- Location: Jupiter, Florida
Re: '77 A2 - My first project
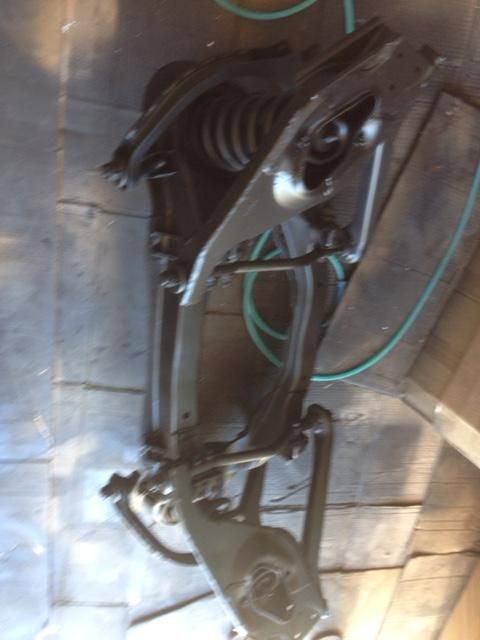
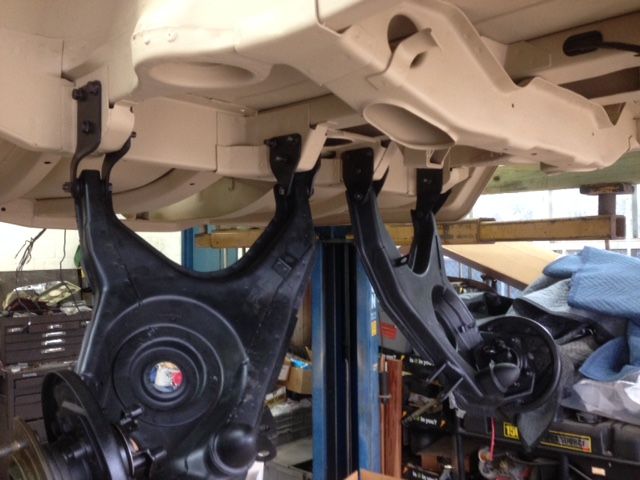
Starting the assembly. Put the new rear wiring harness in, and mounted the rear suspension. I also took it off the rotisserie to make it easier to get at everything. I now have a "Poor Mans Rotisserie" available, in case anyone has a need. You'll need a lift or a way to support it. I won't ship the wood, but the metal parts can be shipped.
So far, the brake lines are fitting up well. It's amazing working with clean, painted, or new parts. I did have some difficulty putting in the inner wheel seals.
I'm thinking this will go pretty quick.
So far, the brake lines are fitting up well. It's amazing working with clean, painted, or new parts. I did have some difficulty putting in the inner wheel seals.
I'm thinking this will go pretty quick.
Vin Zike
-
Fil Bonica
- Brigadier General
- Posts: 2607
- Joined: December 9th, 2007, 10:49 am
- Location: ~ Heaven ~
Re: '77 A2 - My first project
Its unfortunateyou couldnt have assembled things upside down.
It makes installing things faster.we lifted the boxy on end with two engine cranes.
The problem came when we raised it to right the vehicle.
Things happened quickly and someone could have been hurt.
In any event great progress .
You will be driving in no time.
Fil Bonica
It makes installing things faster.we lifted the boxy on end with two engine cranes.
The problem came when we raised it to right the vehicle.
Things happened quickly and someone could have been hurt.
In any event great progress .
You will be driving in no time.
Fil Bonica
K1ABW
-
lpcoating
- Brigadier General
- Posts: 2030
- Joined: February 19th, 2013, 11:38 pm
- Location: Mansfield, PA
- Contact:
Re: '77 A2 - My first project
Looks good!
M151 Body Panels - http://www.m151bodypanels.com/
'68 A1 - Under full resto
'68 A1 - Under full resto
-
Hambone
- Brigadier General
- Posts: 2506
- Joined: October 1st, 2010, 12:19 am
- Location: El Dorado, Arkansas
Re: '77 A2 - My first project
Looks great, :DI like that color, what color top are you putting on it?
-
Vzike
- Sergeant Major of the "G"
- Posts: 729
- Joined: December 27th, 2013, 4:05 pm
- Location: Jupiter, Florida
Re: '77 A2 - My first project
I opted not to leave the Rotisserie on. The long 4X4s had a lot of deflection, and being around the vehicle made it a chore to get around it to work. The lift works well now, and the parts are easy to get at. I have a lot of lift equipment and help at the garage, so it should not be a problem.
The sand color you see on the bottom is the color the truck will be. I have one question on this. If the vehicle is desert sand, are the markings (bumper, hood and other stenciled markings) black are dark brown?
Fil, I did get the brake and emissions line kits from Army Jeep Parts. So far, they do not line up exactly, but very close, and they are very flexible. I'm having the fuel take painted next. Once I mount it, I'll run the lines as best I can, along with the front wiring harness. I'll let you know how that goes.
At this stage, I have to hunt for parts on my shelves and bins. I keep finding something I need to sandblast and paint. I'm moving a bit slow since I want everything primed with the two part epoxy, and the finish color to NOT be from a puff can. We are putting Awlgrip hardner in the CARNC paint. Sets up very hard. My Encore is being significantly affected by the salt spray here on the island, so I want to get a really solid paint job on this puppy.
I'm using mostly new hardware on the assembly. I prime and paint the larger fasteners, and will do a final touch up on the rest when it's complete.
Vin Zike
-
Fil Bonica
- Brigadier General
- Posts: 2607
- Joined: December 9th, 2007, 10:49 am
- Location: ~ Heaven ~
Re: '77 A2 - My first project
The brake lines should line up correctly.
The fuel lines are for a non emissions tank.
Had a go around with George at Gilbert about that topic. He first told me that they would work as he said with some tweaking. He then conceded that they were for a non emissions system. You will also find that there is a fourth line you will have to fabricate.
Asyou get closer. I can describe it more accurately.
Fil Bonica
K1ABW