Yeh,
I just seen about the storm on the TV here in the UK. It sure looks bad, hope that everthing works out OK.
Dave
M38 - Nothing at all to do with M151s
Moderators: rickf, raymond, Mr. Recovery
-
jeepfinger
- civilian
- Posts: 5
- Joined: August 19th, 2017, 5:02 am


Re: M38 - Nothing at all to do with M151s
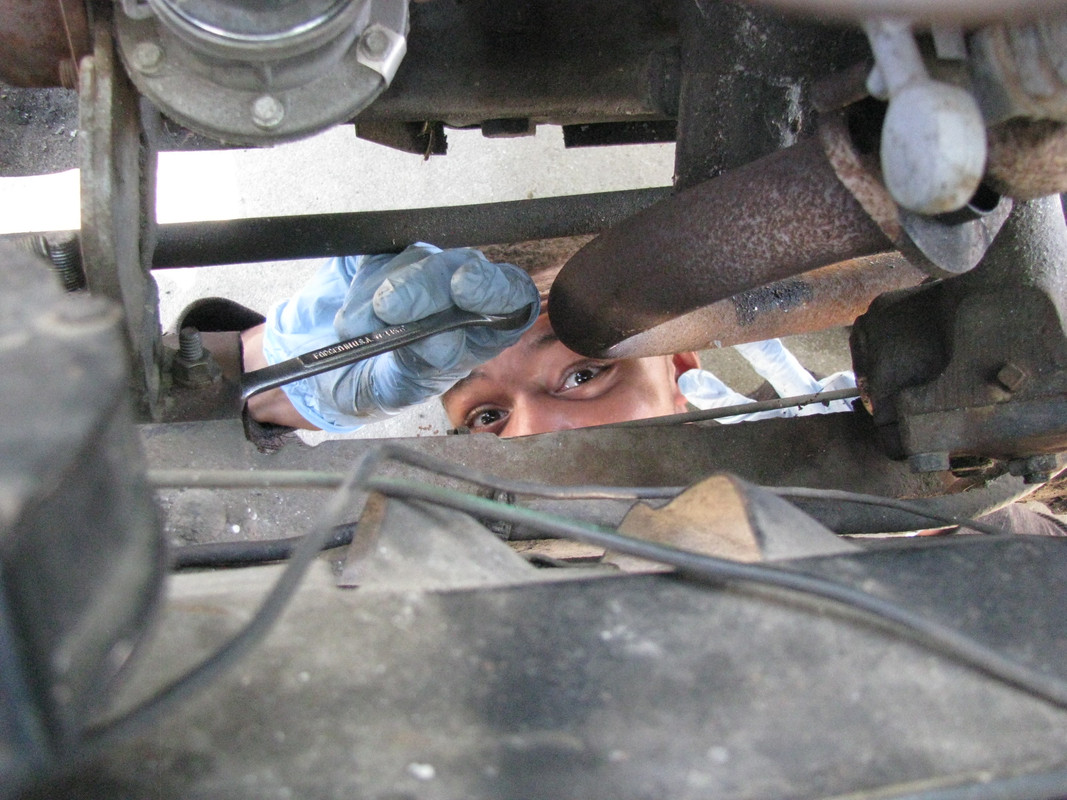
Oh, we're something like three- three 1/2 hours from the coast. The most we'll see is some wind and rain (and we could use some rain) probably for the next few days. That'll give me time to try to resurrect some of the posts I've made here with new photos and maybe do some homework on the Jeep in preparation for getting into the front axle group. Forward. Always forward.
Our very own agwrangler is the guy whose fat is in the fire being as he lives on Galveston Island! I'm sure he's not having any fun at all at the moment, as he doesn't strike me as the type to cut and run, even when facing a hurricane and Harvey made landfall at Rockport (which isn't too far away) as a Category 4 which ain't no little thing.
I'll be making a thunder run to Africa starting on Monday so a few days of enforced rest, inside and out of the rain, isn't a bad thing at all.
Cheers,
TJ


Re: M38 - Nothing at all to do with M151s
Agwrangler made a post and said things were "dicey" so I am guessing he did not leave. Hope he is alright. The fact he could post is encouraging.
"Things are pretty dicey here in Galveston!!!!"
That was 08:20 this morning.
"Things are pretty dicey here in Galveston!!!!"
That was 08:20 this morning.
1964 M151A1
1984 M1008
1967 M416
04/1952 M100
12/1952 M100- Departed
AN/TSQ-114A Trailblazer- Gone
1984 M1008
1967 M416
04/1952 M100
12/1952 M100- Departed
AN/TSQ-114A Trailblazer- Gone
Re: M38 - Nothing at all to do with M151s
Ok, let's bring this project up to date. I had to step away from this owing to some work and some weather so we buttoned up the rear axle tubes against the threat of wind and rain, tidied up the work area and put everything away. When I got back I found that I needn't have cleaned up the work area. My work area was a shambles and covered in all the stuff that trees drop in strong winds, making it necessary to clean everything up all over again.
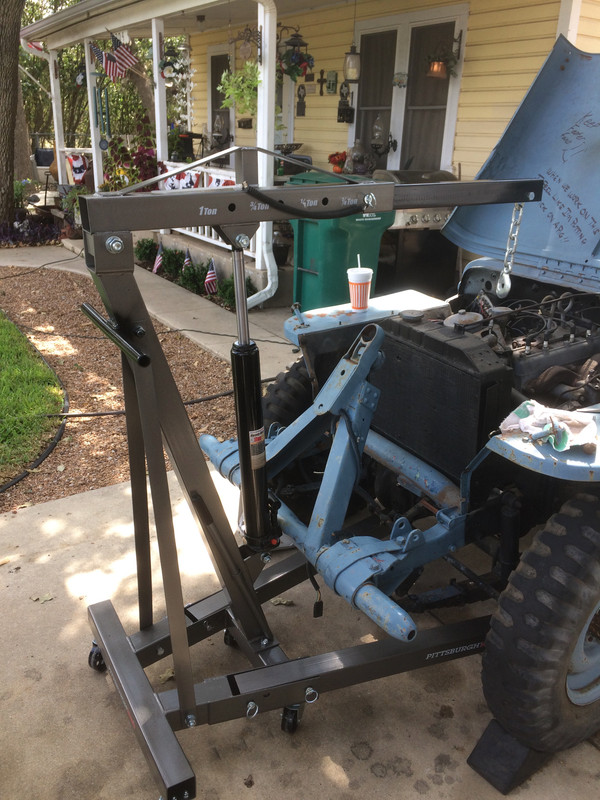
With the rear axle/bearing job nearly done and ready for reassembly, it was time to start making preparations for removing the power pack.
Normally, I hate going at these jobs in such a buckshot fashion but I had paint still drying and I wanted to knock out some of the small, time consuming stuff at the front end of the Jeep; all the little things that always seems to add up to something much larger. So the first order of business was rounding up what was necessary to actually get the engine out, then go at disconnecting engine/driveline peripherals.
With the Harbor Freight Labor Day sale going on, I trotted down there with my 25% off coupon in hand and purchased their 1-ton "folding shop crane" commonly known as a "cherry picker" or just plain "engine hoist". I have a large A-frame and chain hoist but its chief limitation is that it only pulls straight up and it takes a great deal of effort to get it over to the where we would need it (only to have to put it back again). We've pulled a tank turret with this thing so that should give you some idea of its size. Now, if you've been considering one of these Harbor freight models, I've a couple of thoughts I'd like to share with you. Here's the good, the bad, and the ugly on the Pittsburgh 1/2 ton Folding Shop Crane.
The good - Very easy to assemble, and if you' can tell a nut from a bolt, stuff like this is typically child's play anyway.
The bad - The instructions were quite incorrect in the placement of the straps that support the vertical mast under load. The photos and the diagram shows the bottoms of the straps bolted to the inside of the platform frame which was clearly not going to work with these straps. Repositioning them to the outside of the frame had them straight and properly placed to do their job. Naturally, when I got to the very end of the instruction manual, the parts diagram showed the straps where I finally placed them...on the outside of the frame.
The ugly - Having to deal with a design change and instructions that never got changed along with it.
The good - It folds up so it takes much less space to store it. Simply un-pin the long front legs and fold them up and put the pins back in the holes.
The bad - while the pins will prevent the legs from falling down all the way to the ground the pin system doesn't keep them from wobbling and the legs are free to move around quite a bit. For most of us you fold it put it in a corner and forget it until next use.
The ugly - If you have a kid (or grandkid) who sees the world as his/her personal jungle gym, stuff like this needs to be sorted out (more on that later).
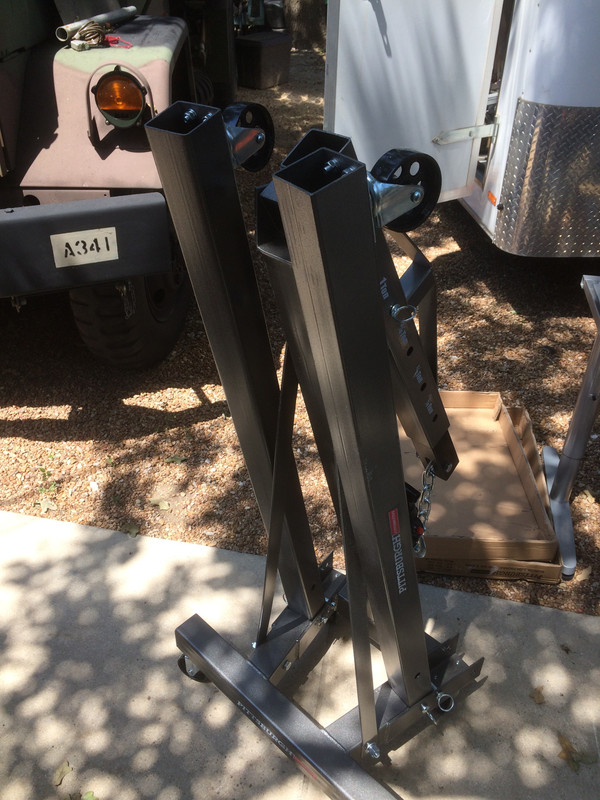
The good - Adjustable boom length comes with the recommended max loads nicely marked with stickers.
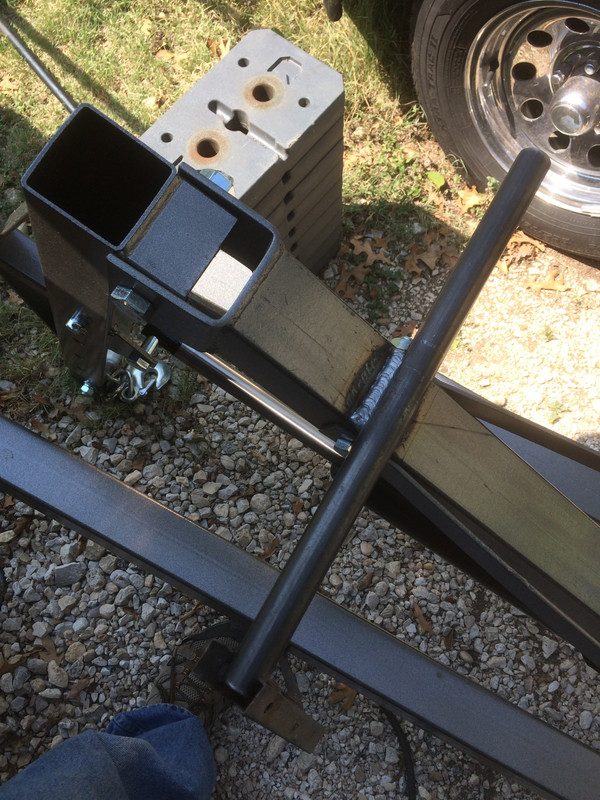
The bad - The stickers are already showing signs of wanting to come off, meaning I will need to stencil my boom (which is ok by me). And the boom is disappointingly short at full extension.
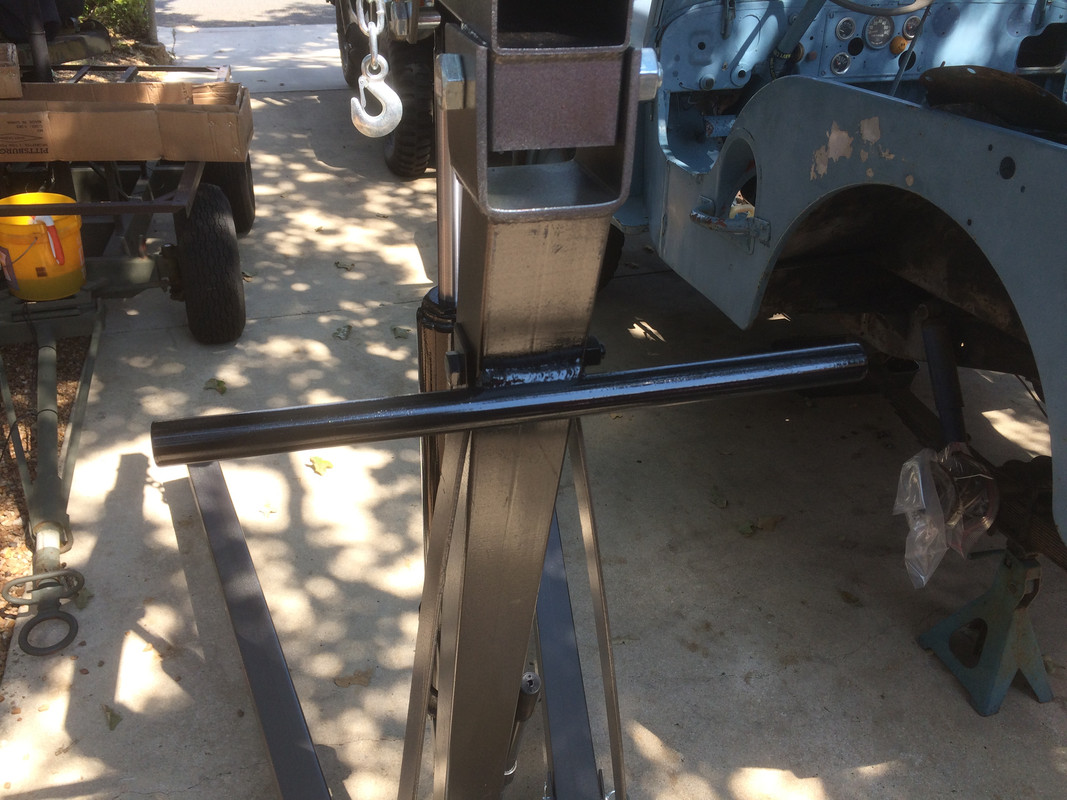
The ugly - I'll have to pull the front bumper on the Willys to get to the motor with this. Later, I'll probably replace the boom extension with a longer, heavier gauge square tubing; one that will have quite a bit of steel still in the sleeve at full extension.
The good - This rig rolls easily on large iron casters whether the legs are down or up and stowed provided you have a reasonably smooth, hard surface.
The bad - This has no horizontal handle bar as with more expensive brands so, in order to move it, particularly while loaded, you have to grab it where-ever you can. Not only would a horizontal handle bar be a vast improvement, it would also serve to support the legs when they are folded up.
The ugly - I welded a handle bar to mine and it is exactly what and where I wanted it to be but, not everyone has a welder!
All in all, I got exactly what I paid for. Purchasing the better one would have been a huge leap in price and I've said it before, every penny you save....
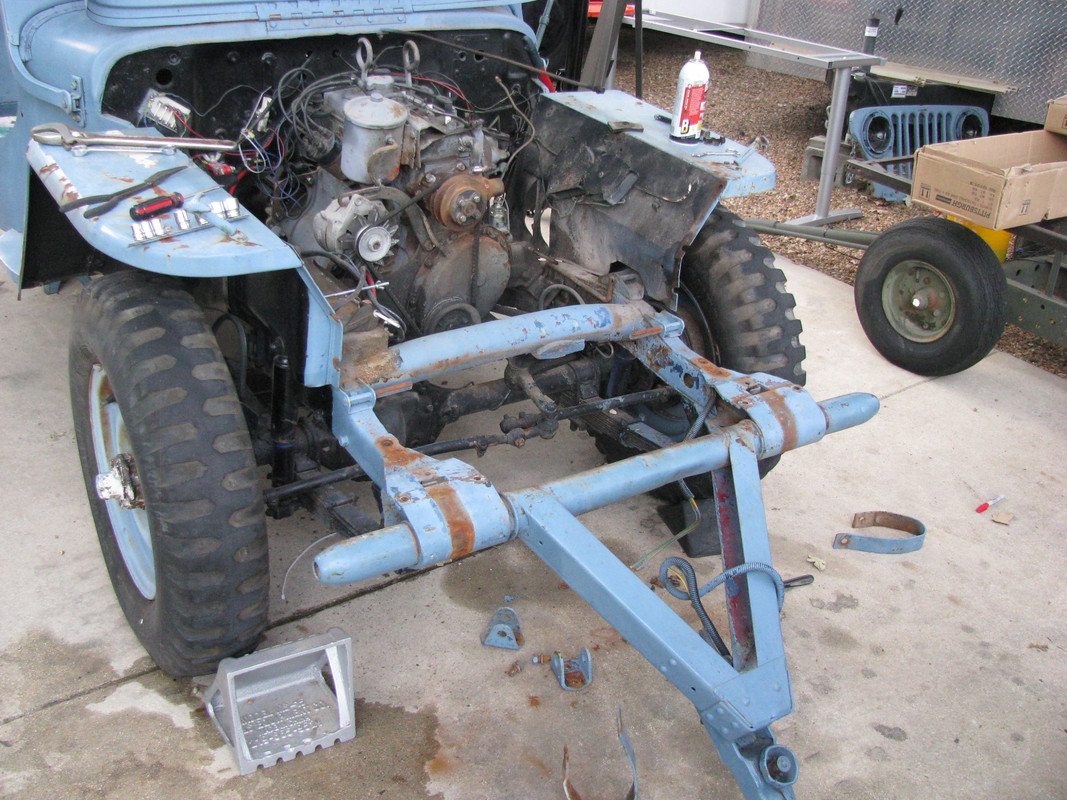
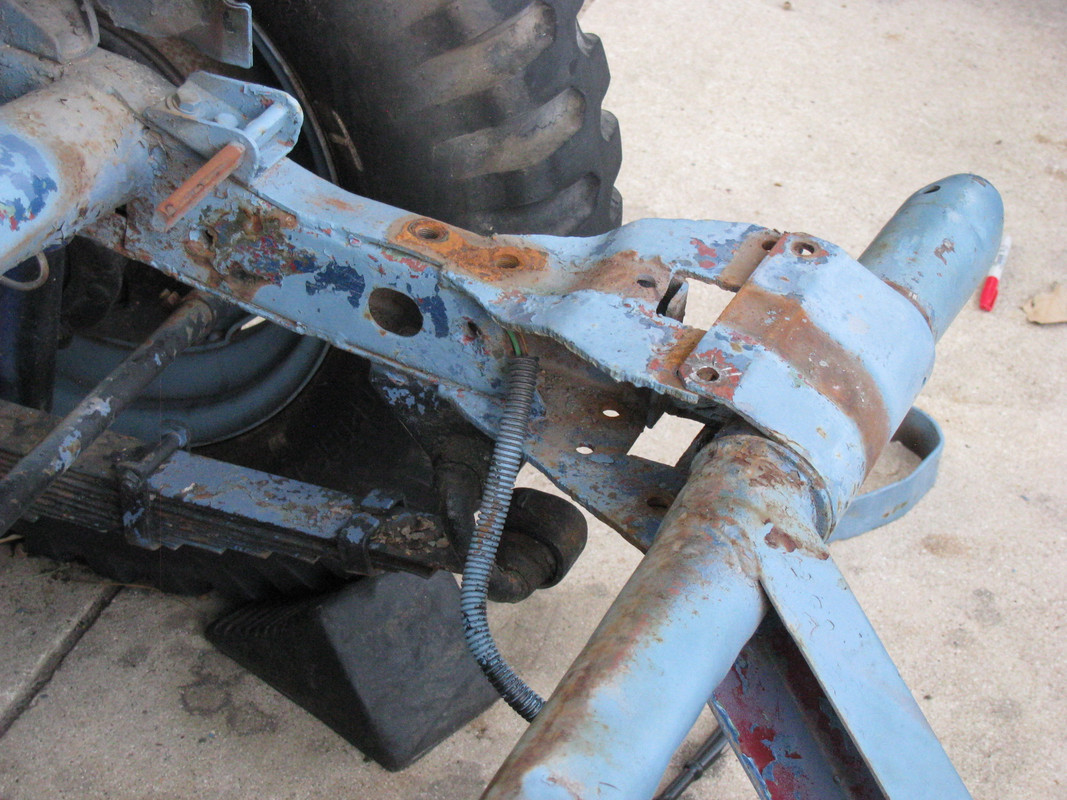
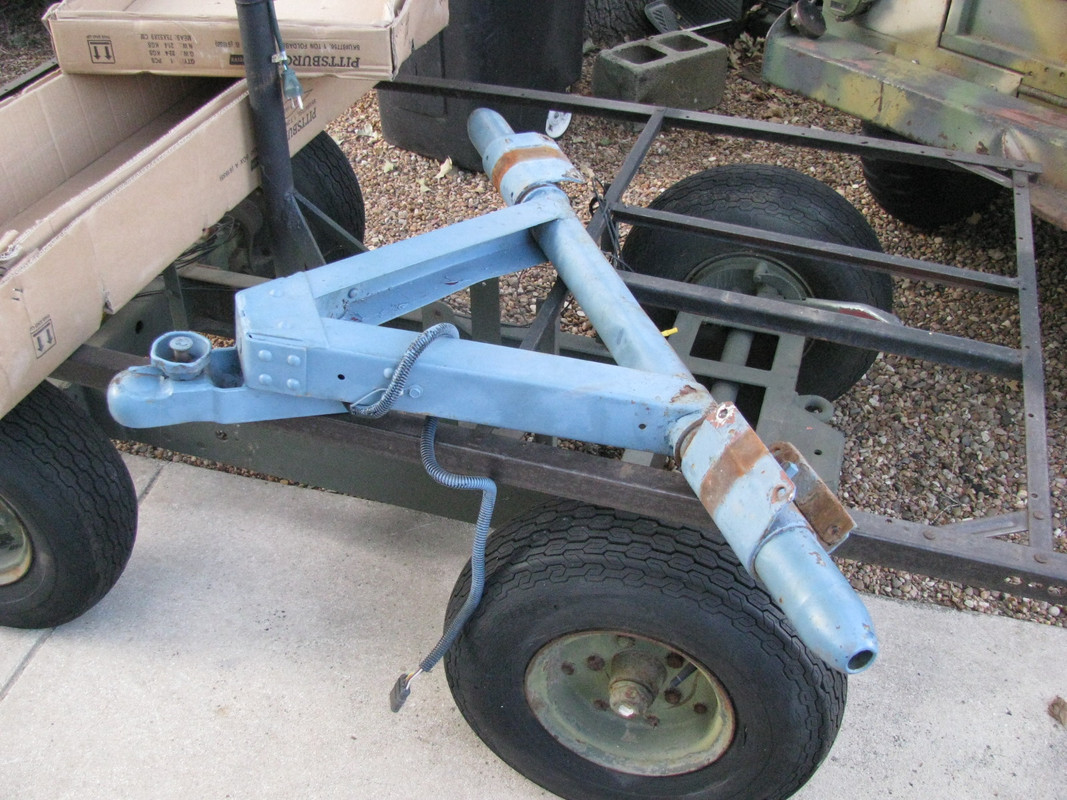
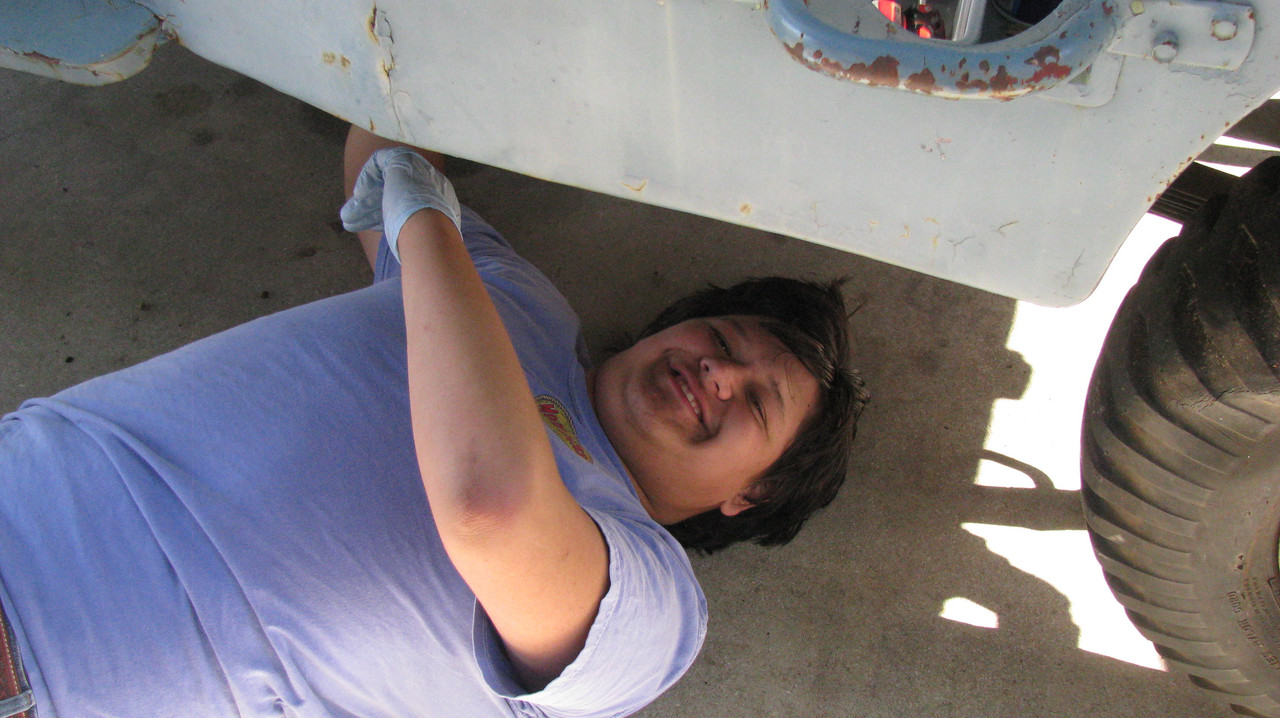
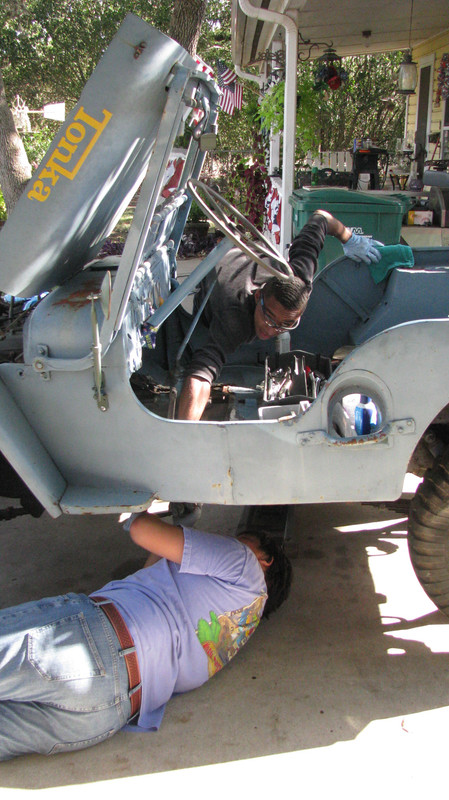
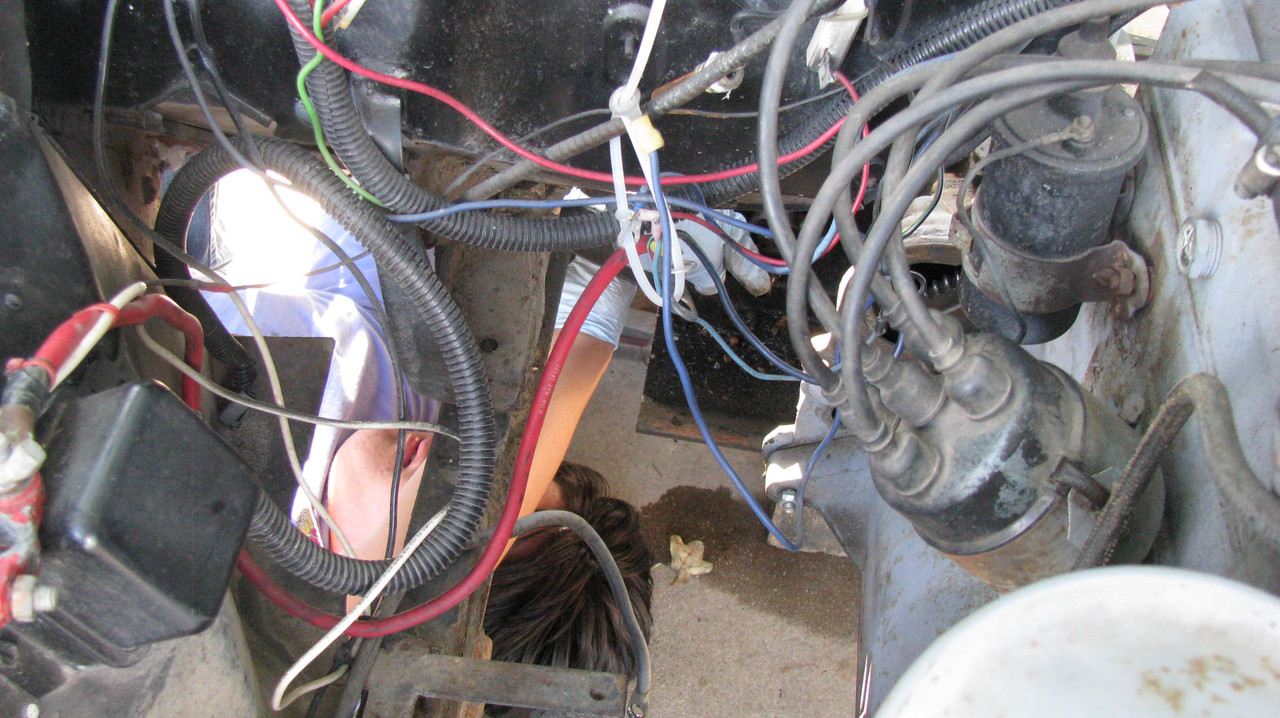
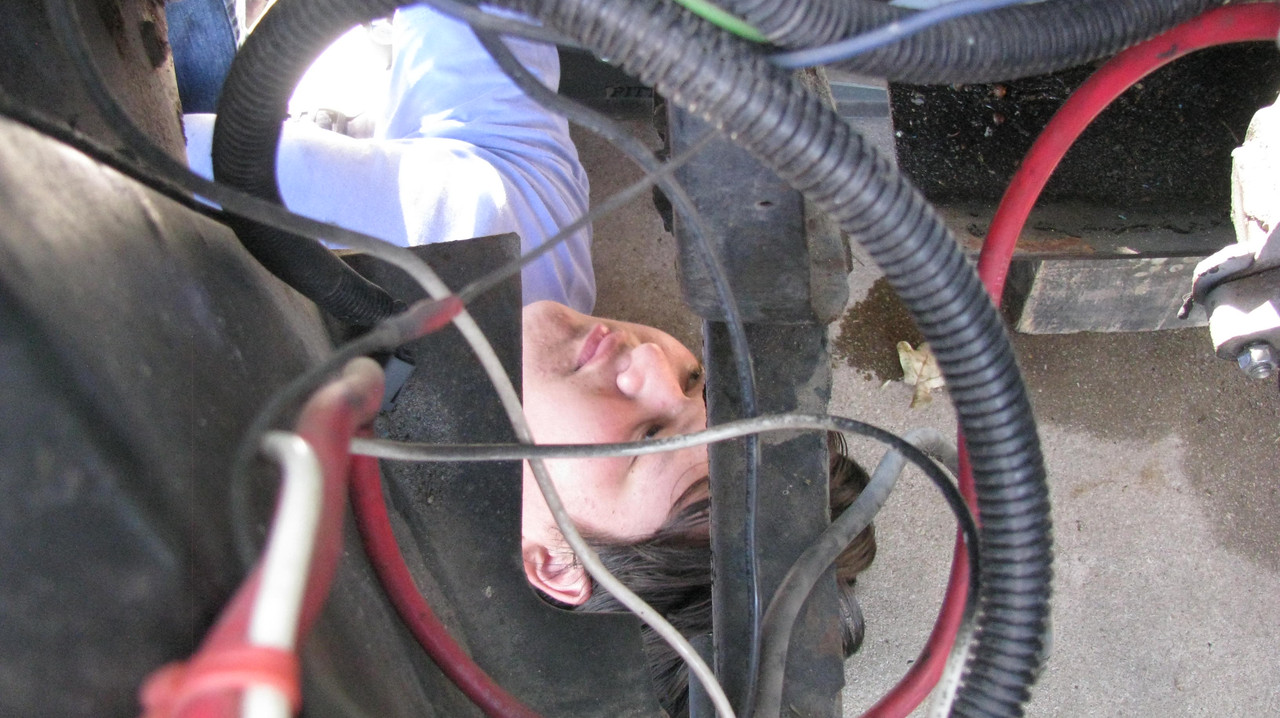
So, the front bumper / tow bar had to come off. Aside from its obvious utility, my son and I don't care for it's looks and it's heavy and really has nothing to keep it secured while the vehicle is being driven under its own power. But, I wanted to remove the grille first just in case things got a little dicey during the removal of the tow bar. To remove the grille, disconnect the wires, loosen 6 bolts (five in my case, as one was snapped off) and the whole shebang tilts forward a few degrees to remove it. The hinges at the bottom are constructed in such a way that at a specific angle one need only lift the grille up and off the hinge pins which are round stock with two flat surfaces machined into them. Very, very simple. The most interesting thing about getting your hands on one of these earlier trucks is you can start to see some of the thought processes that the designers are going through, leading up to the design of the M151.
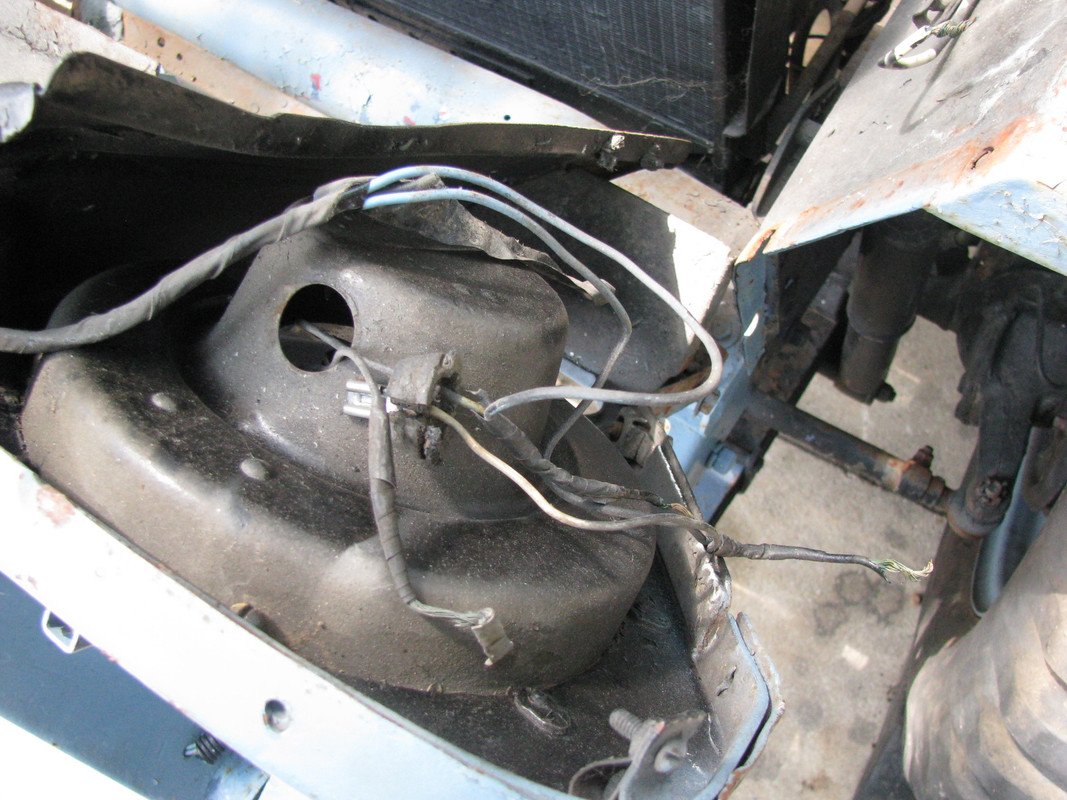
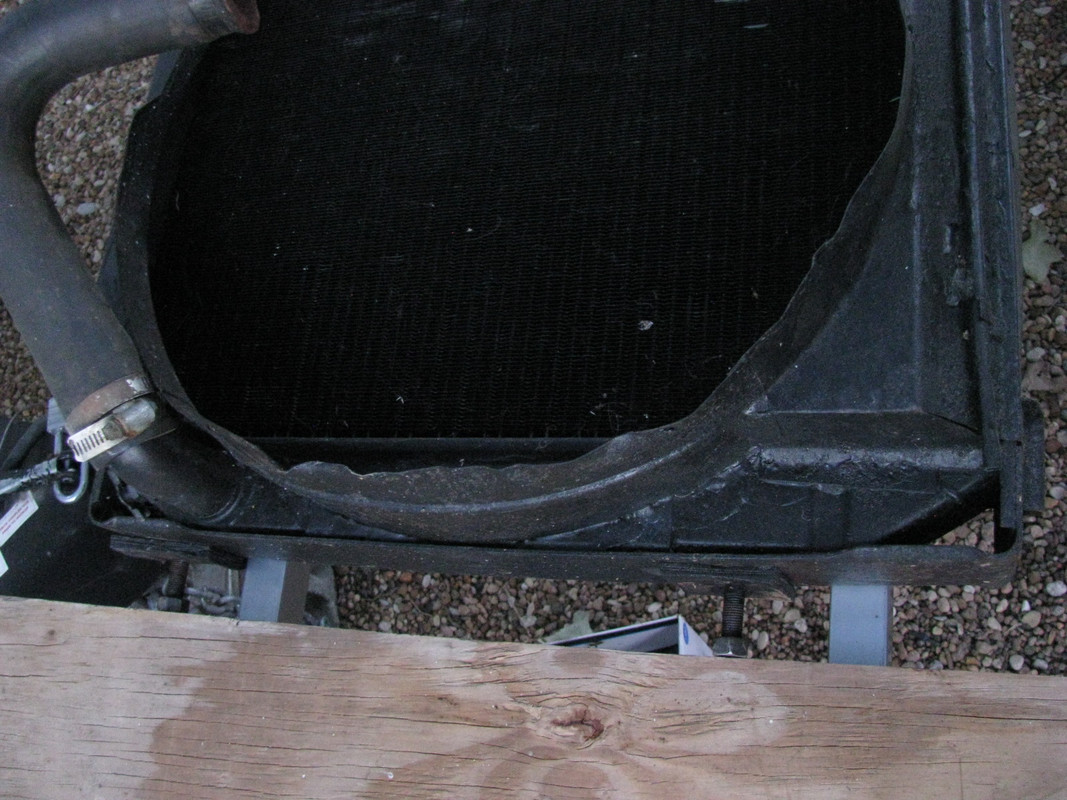
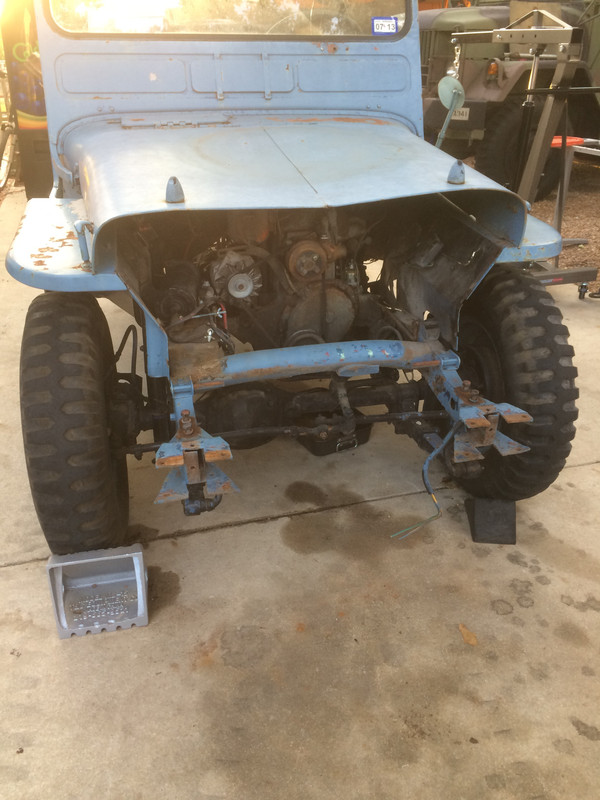
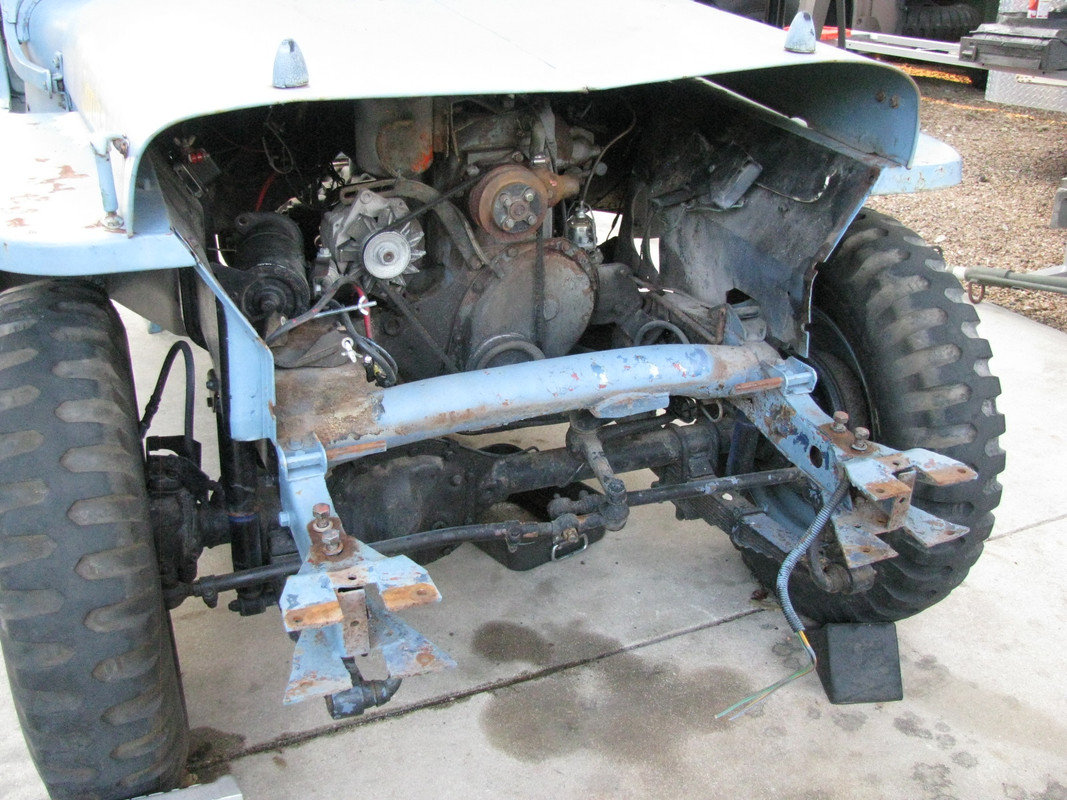
And with the removal of the grille, next comes the radiator. I wanted to get that out of the way as well.

Looks kind of like the radiator might have been gone over at some point. If it has, it's the one bright spot in the whole project. We'll have to spend some time straightening that shroud though. There are a million little things that need to be dealt with on this truck.
And now this business.. at a glance, probably a slightly tweaked left front frame horn. We'll check that out more carefully once the power pack is out. My son and I struggled with the bolts for a while and then I decided to show him a few tricks, so out came the zip saw and the air chisel. We made cruciform cuts on the heads and then chiseled them off. That made short work of those bolts. As for the four large bolts holding the shackle mounts to the top of the frame, well, they came right out without any difficulty whatsoever. Terrific!
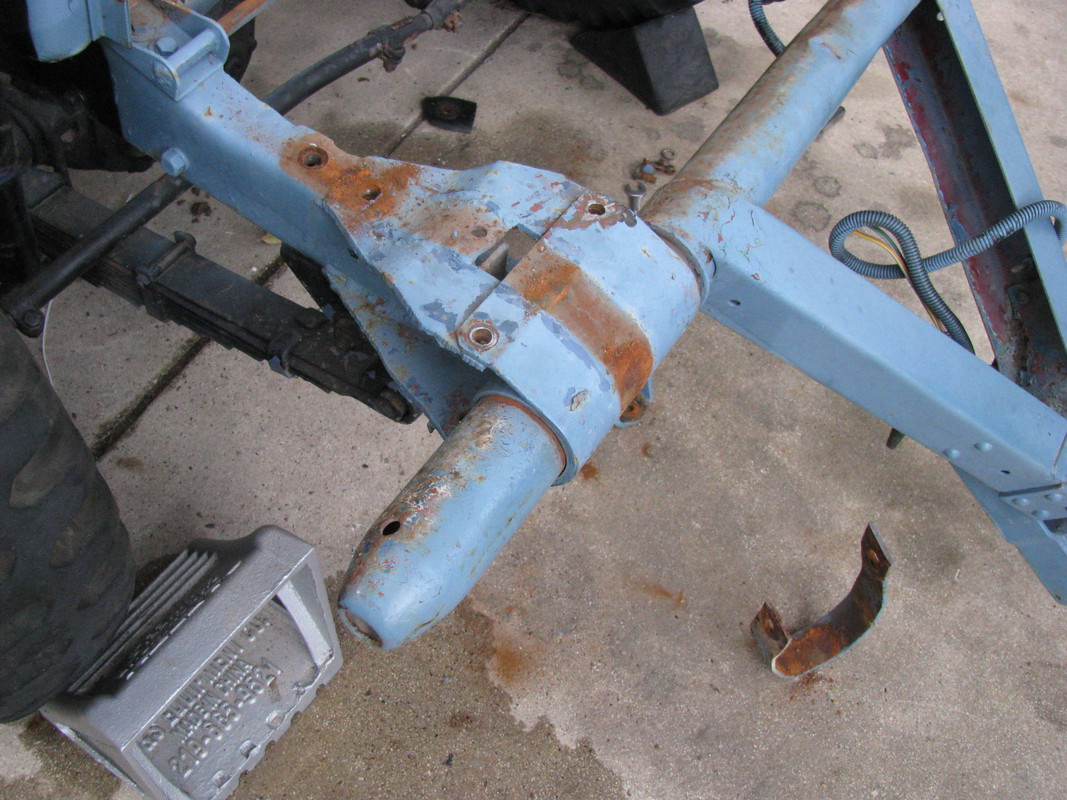
Just as an aside, the M38 frame has a large letter M stamped on the inside face of both right and left frame rails, directly forward of the large crossover tube. I am told, at a glance this is what distinguishes the military frame from the civilian CJ3A frame.
Ta-dah!
Dig the crazy gussets welded to the frame! Despite its rather dog-eared appearance, the frame is uncut an looks to be in pretty good shape throughout. There's something to be said about having 42,000 coats of old paint on your truck, no matter what it looks like! We'll plasma-cut those nasty gussets right off.
Remember this with its bondo, undercoating, paint and many layers of patches welded to it?
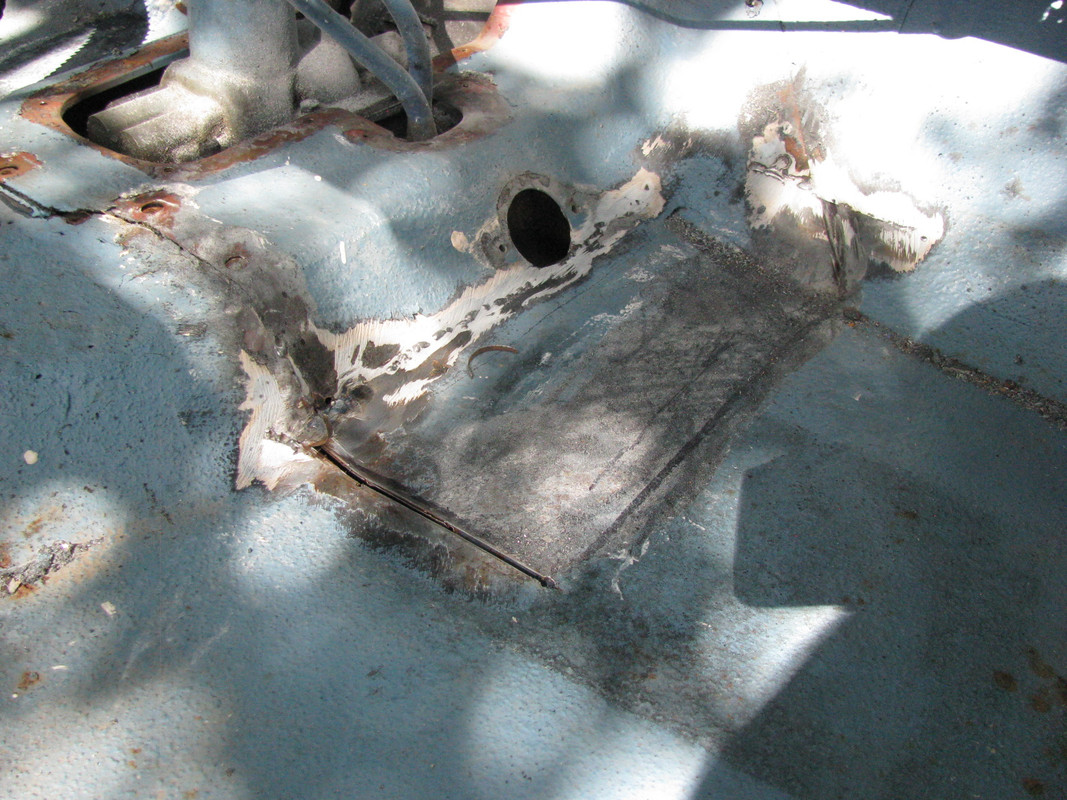
Now we're starting to be able to make some sense of it.
The bondo, undercoating and paint come right off once the metal is gently heated from behind. I had read others had done this and I was very pleased with how well this worked for me.
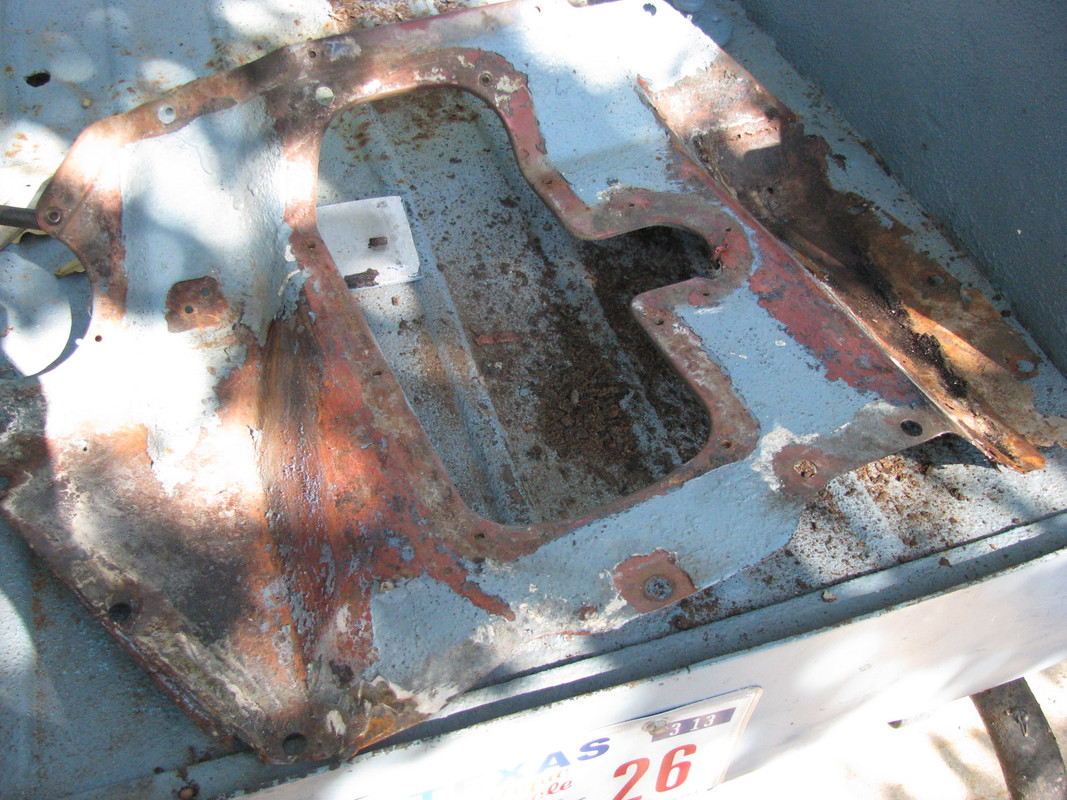
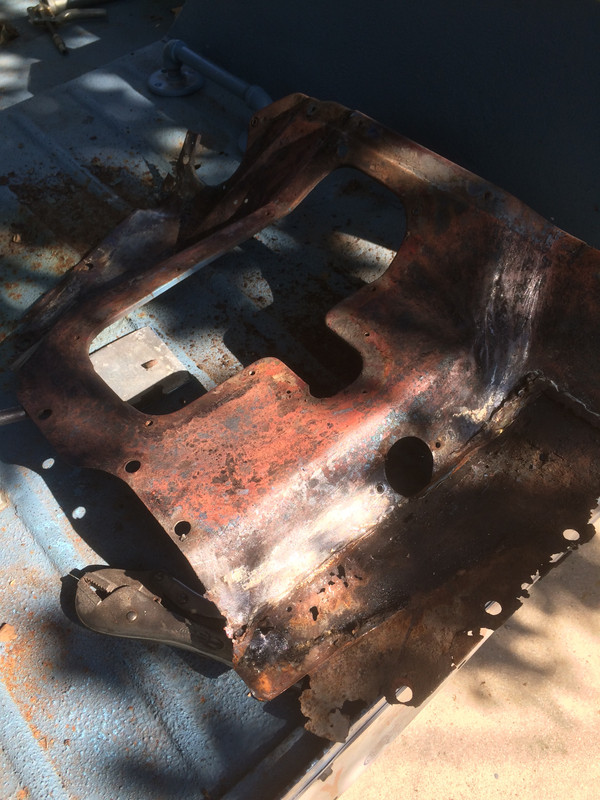
Carefully grinding off the welds just to see how much metal we need to cut out and replace.
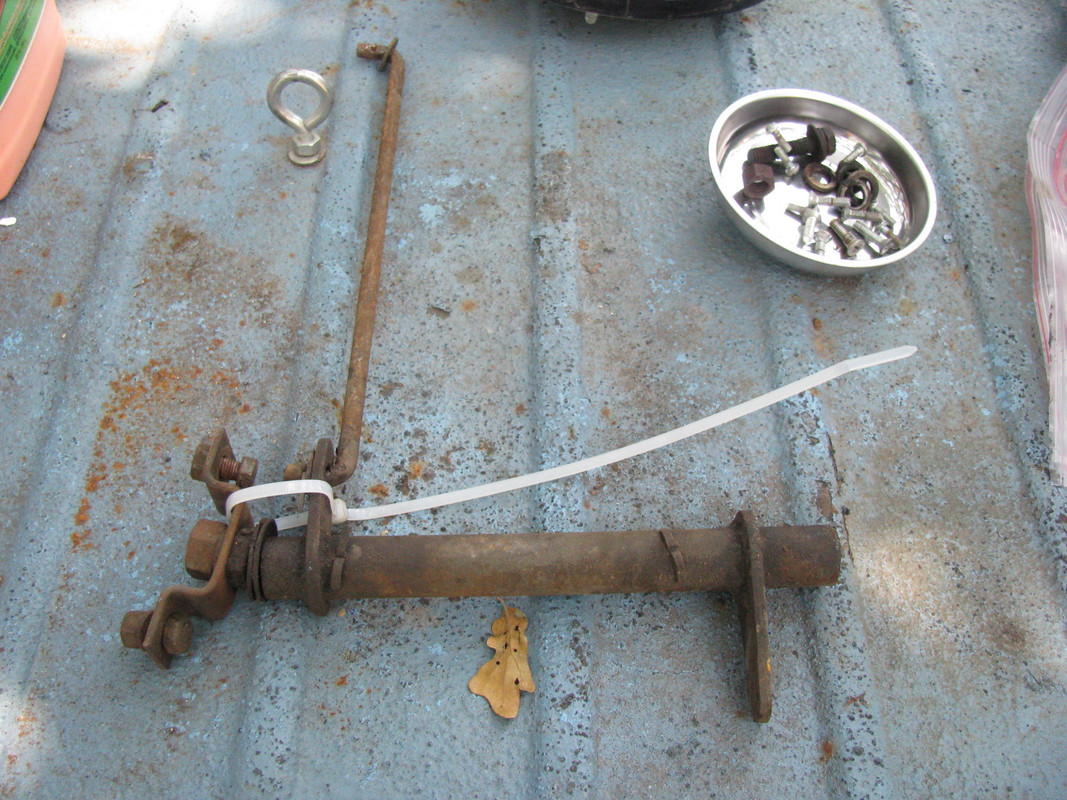
Some peripherals laid out in their proper orientation, then photographed. It's easy to forget stuff when there's this much going on. When it's time to put it back it, a picture is worth a thousand words.
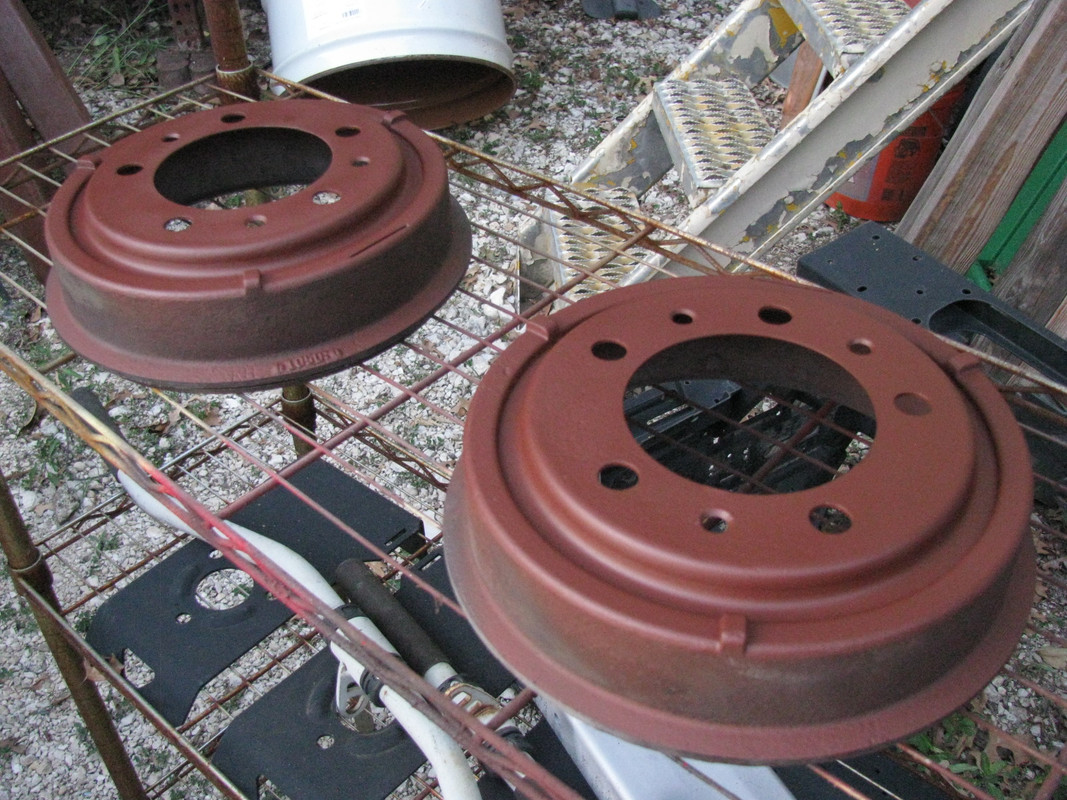
Rear brake shoes with their hubs blasted and in primer.
Rear axles reinstalled! This was fun. I kept getting the order of assembly wrong and/or forgetting parts. Finally done, and done right!
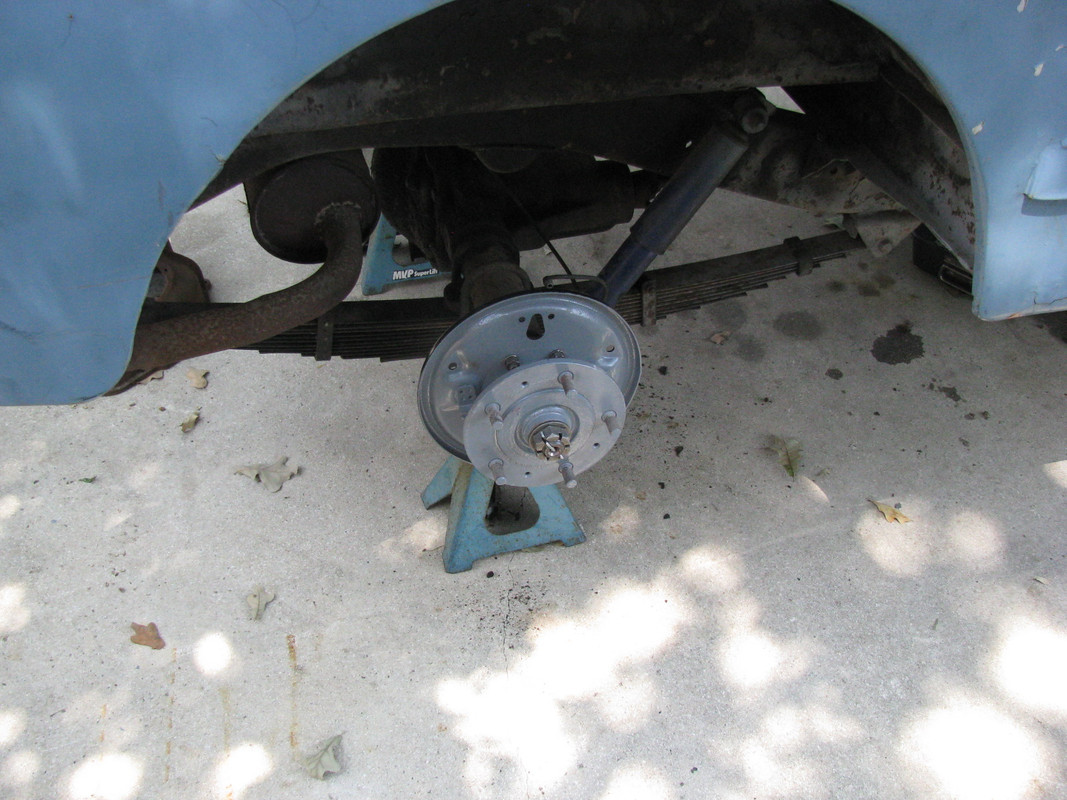
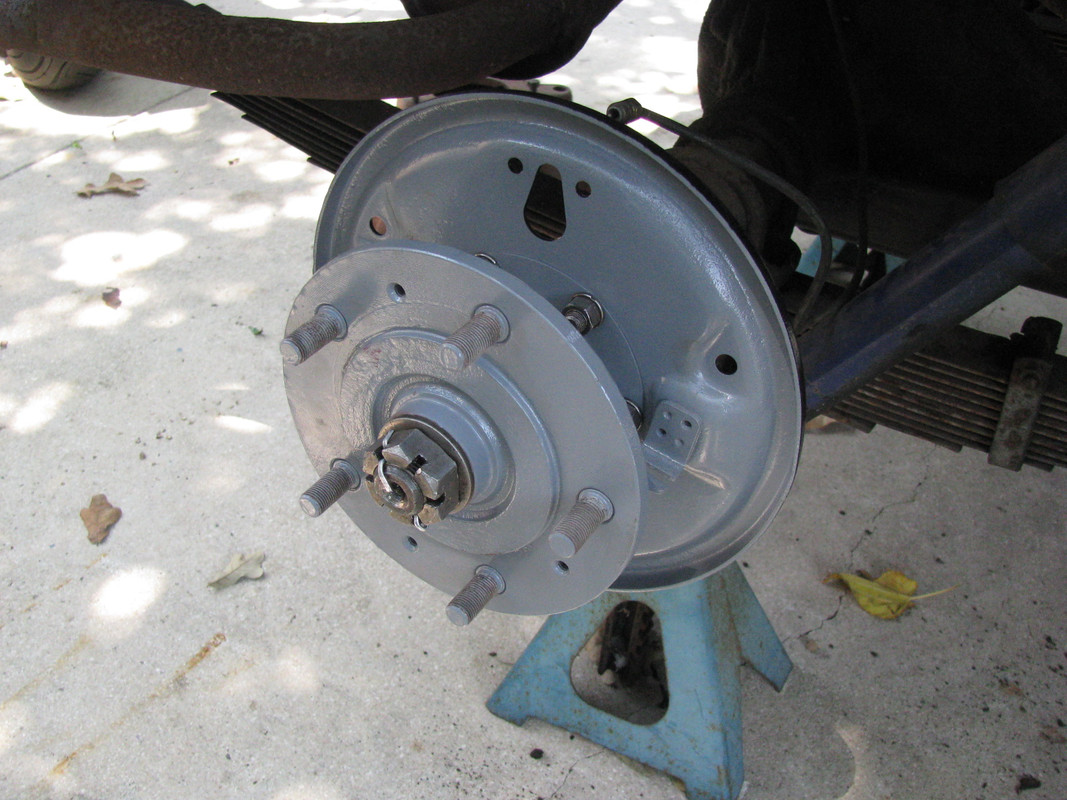
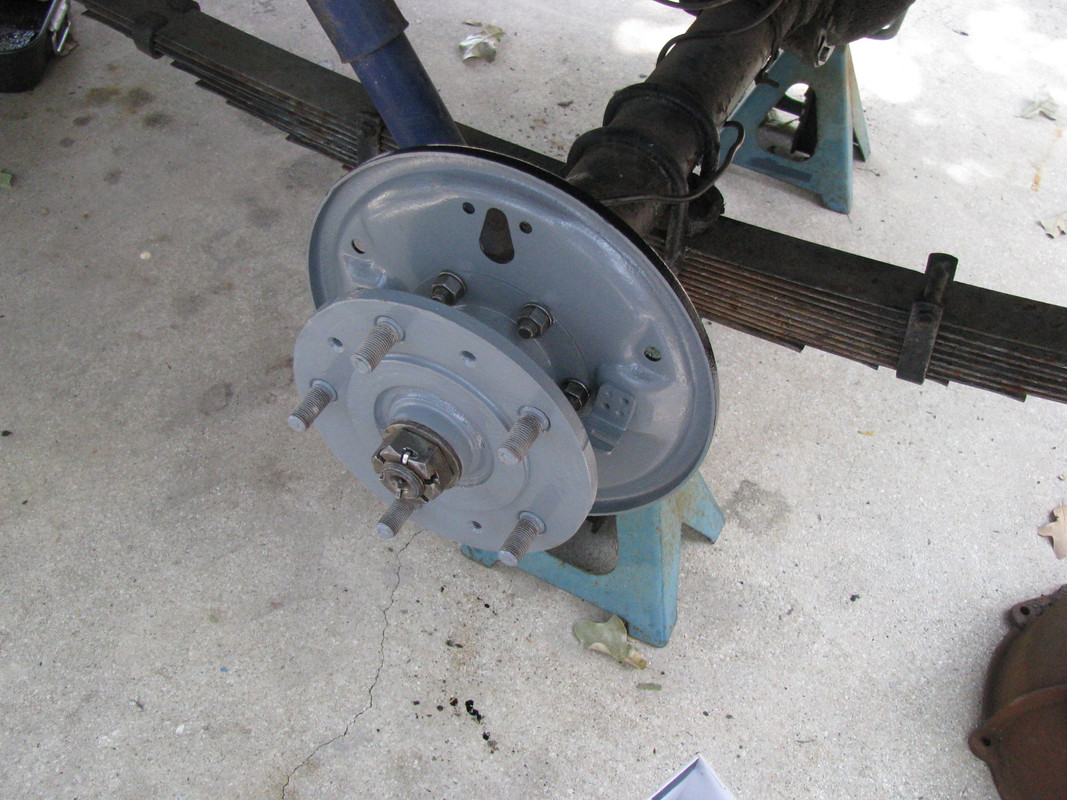
These axles are particularly interesting because the depth of the outer bearing in the race is set by a series of shims placed between the axle tube and the retaining ring. I put everything back as I found it but I will probably take more time later and have a look at it. Why? Because there's been some sketchy stuff done to this Jeep over the years. Having this thing apart has revealed many, many crimes. More on that, later.
Cheers,
TJ
With the rear axle/bearing job nearly done and ready for reassembly, it was time to start making preparations for removing the power pack.
Normally, I hate going at these jobs in such a buckshot fashion but I had paint still drying and I wanted to knock out some of the small, time consuming stuff at the front end of the Jeep; all the little things that always seems to add up to something much larger. So the first order of business was rounding up what was necessary to actually get the engine out, then go at disconnecting engine/driveline peripherals.
With the Harbor Freight Labor Day sale going on, I trotted down there with my 25% off coupon in hand and purchased their 1-ton "folding shop crane" commonly known as a "cherry picker" or just plain "engine hoist". I have a large A-frame and chain hoist but its chief limitation is that it only pulls straight up and it takes a great deal of effort to get it over to the where we would need it (only to have to put it back again). We've pulled a tank turret with this thing so that should give you some idea of its size. Now, if you've been considering one of these Harbor freight models, I've a couple of thoughts I'd like to share with you. Here's the good, the bad, and the ugly on the Pittsburgh 1/2 ton Folding Shop Crane.
The good - Very easy to assemble, and if you' can tell a nut from a bolt, stuff like this is typically child's play anyway.
The bad - The instructions were quite incorrect in the placement of the straps that support the vertical mast under load. The photos and the diagram shows the bottoms of the straps bolted to the inside of the platform frame which was clearly not going to work with these straps. Repositioning them to the outside of the frame had them straight and properly placed to do their job. Naturally, when I got to the very end of the instruction manual, the parts diagram showed the straps where I finally placed them...on the outside of the frame.
The ugly - Having to deal with a design change and instructions that never got changed along with it.
The good - It folds up so it takes much less space to store it. Simply un-pin the long front legs and fold them up and put the pins back in the holes.
The bad - while the pins will prevent the legs from falling down all the way to the ground the pin system doesn't keep them from wobbling and the legs are free to move around quite a bit. For most of us you fold it put it in a corner and forget it until next use.
The ugly - If you have a kid (or grandkid) who sees the world as his/her personal jungle gym, stuff like this needs to be sorted out (more on that later).
The good - Adjustable boom length comes with the recommended max loads nicely marked with stickers.
The bad - The stickers are already showing signs of wanting to come off, meaning I will need to stencil my boom (which is ok by me). And the boom is disappointingly short at full extension.
The ugly - I'll have to pull the front bumper on the Willys to get to the motor with this. Later, I'll probably replace the boom extension with a longer, heavier gauge square tubing; one that will have quite a bit of steel still in the sleeve at full extension.
The good - This rig rolls easily on large iron casters whether the legs are down or up and stowed provided you have a reasonably smooth, hard surface.
The bad - This has no horizontal handle bar as with more expensive brands so, in order to move it, particularly while loaded, you have to grab it where-ever you can. Not only would a horizontal handle bar be a vast improvement, it would also serve to support the legs when they are folded up.
The ugly - I welded a handle bar to mine and it is exactly what and where I wanted it to be but, not everyone has a welder!
All in all, I got exactly what I paid for. Purchasing the better one would have been a huge leap in price and I've said it before, every penny you save....
So, the front bumper / tow bar had to come off. Aside from its obvious utility, my son and I don't care for it's looks and it's heavy and really has nothing to keep it secured while the vehicle is being driven under its own power. But, I wanted to remove the grille first just in case things got a little dicey during the removal of the tow bar. To remove the grille, disconnect the wires, loosen 6 bolts (five in my case, as one was snapped off) and the whole shebang tilts forward a few degrees to remove it. The hinges at the bottom are constructed in such a way that at a specific angle one need only lift the grille up and off the hinge pins which are round stock with two flat surfaces machined into them. Very, very simple. The most interesting thing about getting your hands on one of these earlier trucks is you can start to see some of the thought processes that the designers are going through, leading up to the design of the M151.
And with the removal of the grille, next comes the radiator. I wanted to get that out of the way as well.
Looks kind of like the radiator might have been gone over at some point. If it has, it's the one bright spot in the whole project. We'll have to spend some time straightening that shroud though. There are a million little things that need to be dealt with on this truck.
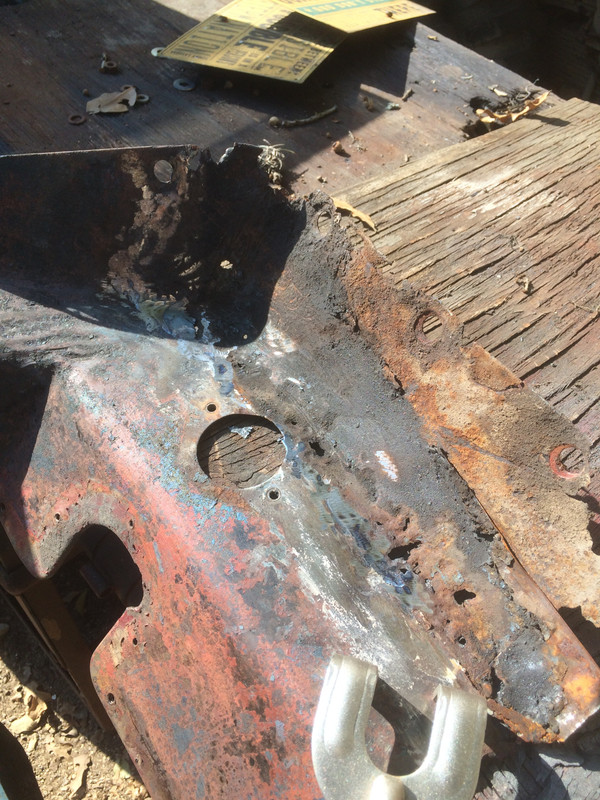
And now this business.. at a glance, probably a slightly tweaked left front frame horn.
Just as an aside, the M38 frame has a large letter M stamped on the inside face of both right and left frame rails, directly forward of the large crossover tube. I am told, at a glance this is what distinguishes the military frame from the civilian CJ3A frame.
Ta-dah!
Dig the crazy gussets welded to the frame! Despite its rather dog-eared appearance, the frame is uncut an looks to be in pretty good shape throughout. There's something to be said about having 42,000 coats of old paint on your truck, no matter what it looks like! We'll plasma-cut those nasty gussets right off.
Remember this with its bondo, undercoating, paint and many layers of patches welded to it?
Now we're starting to be able to make some sense of it.
The bondo, undercoating and paint come right off once the metal is gently heated from behind. I had read others had done this and I was very pleased with how well this worked for me.
Carefully grinding off the welds just to see how much metal we need to cut out and replace.
Some peripherals laid out in their proper orientation, then photographed. It's easy to forget stuff when there's this much going on. When it's time to put it back it, a picture is worth a thousand words.
Rear brake shoes with their hubs blasted and in primer.
Rear axles reinstalled! This was fun. I kept getting the order of assembly wrong and/or forgetting parts. Finally done, and done right!
These axles are particularly interesting because the depth of the outer bearing in the race is set by a series of shims placed between the axle tube and the retaining ring. I put everything back as I found it but I will probably take more time later and have a look at it. Why? Because there's been some sketchy stuff done to this Jeep over the years. Having this thing apart has revealed many, many crimes. More on that, later.
Cheers,
TJ
Last edited by m3a1 on April 12th, 2018, 7:13 pm, edited 3 times in total.
Re: M38 - Nothing at all to do with M151s
I'm going to have to take a day away from this truck so this posting will be a little short on pictures.
What I've been wanting to discuss with the readers (particularly for those of you who are just getting into your first project) is how I approach many of my vehicles in terms of their acquisition and what I like to do with them once I get my hands on them. Every bit of these projects is a balancing act and you should always be thinking about the value of your project at any stage. Value is the key and you always want value to go up.
First and foremost, keeping expenses down is a major factor in all of this and that includes the initial purchase price. Dad used to say, "Life is like a sh*t sandwich. The more 'bread' you have, the less s*it you have to eat." So you can spend a lot up front and go straight to the business of driving your purchase, if driving is your goal, or you can spend a little up front and go straight to the business of raising your purchase from the dead with actually driving it being the capstone of the project.
I have found that justifying these as "projects that keep me out of the bars at night" only works as long as they don't become a huge financial burden. Turning a vehicle such as this around is far quicker and easier if one has a lot of money to throw at it. There's certainly nothing wrong with having a lot of disposable income but a 16-year-old isn't one of those people. One of the things my son is learning with this project is the reality of balancing limited funds against what is absolutely necessary to repair, against how much time the vehicle is laid up, against what he wants to achieve with the truck. Real life stuff.
Also factor in how badly it is laid up and by that I mean how many things are going on with a vehicle at any one time. In this case, we presently have the floor cut open, the rear axle group partially torn down and an engine nearly ready to come out. That's a lot going on at one time. It's necessary because we want to continue moving forward on this every day that can be achieved. What we don't want is to have the project stalled or to end up with it as a basket case. Either one is the kiss of death for a project. A total commitment to being persistent on a project can greatly reduce the risk of failure because when you're persistent, you're always choppin' and the chips are always flyin'.
If you have followed this thread from the beginning you know this particular project was meant to be a father-son project from the gitty-up. Now that school has started, the kid's free time has been whittled down quite a bit so I will forge ahead on some things (mostly scut work) and make sure that he gets in on the important stuff and the things that will help him develop skills. Real life stuff, like school, comes first, project second...though since this is to be his daily driver, getting this truck up and running arguably does put it into the real life category.
Not only has his free time been reduced but he is also seeing the bright shiny things the other kids are driving to school so I'm guessing that soon after we get this thing going his desire for a vehicle that is a bit more practical will grow. His mother and I have allowed for that. If he wants to jump ship (insofar as it being his daily driver) there are no dramas. All that said, he did make a commitment to this project and to me (and I to him). I will hold up my end and I intend to have him honor his commitment.
The best part about this truck is that it is really a blank slate. It is not in a condition where one would give any great pause to changing it up a bit. Sometimes when you have something that's really nice or rare or has tremendous potential, there are certain things you really don't want to do with it for fear of reducing it's value. In a strict financial sense, a project of this nature never breaks even so we're going to have some real fun with it and stop worrying about it's value in any sense other than the enjoyment we can squeeze out of it without absolutely closing the door on any possibility of its going back to becoming an M38.
So, our equations are as follows -
Expense vs Enjoyment
Available Funds vs Down Time & Project Goals
Project Advancement vs Risk of Becoming a Basket Case
Real Life vs Project Time
Overall Value vs Enjoyment
Automotive Archeology -
Here is the broad strokes assessment of this truck. It started it's life as an M38. I wouldn't say these are necessarily rare but there aren't that many around. As a representative example of a former military vehicle, simply put....it sucks. Almost every vestige of its military lineage is gone. So now, it is a representative example of someone with limited skills moving heaven and earth to have a Willys Jeep to drive which, when you think about it, is still pretty cool.
There seem to be no two bolts alike on this truck and in some cases the fastener consists of a piece of all-thread and two nuts. For example, take the four bolts that held the fan on the pulley. One was tight but, without a lock washer. Three had lock washers but were too long (and of varying lengths), could not be run in far enough and thus, were loose. The truck is, quite literally, a bucket of bolts. Who does stuff like that?
And there are things like the front grille being bent inward in the middle making the headlights cross-eyed. Instead of straightening the grille, someone simply ran the adjustments of the headlights back to the point where they are at such an extreme angle the headlights bug out of their bezels in the center. I can't imagine what they were thinking. Contrary to that, someone welded in another floor pan (right over the old floor pan). I can only presume the owner who put the floor in comes before the guy who can't straighten a simple piece of stamped steel (but can turn a screw).
Even with problems to overcome like broken bell housings, and giant holes in the floor somehow, these people were able to make it all work. I cannot explain how one is capable of properly welding up a broken bell housing but is incapable of procuring a suitable bolt. I suppose I am seeing evidence of many previous owners who had one thing in common. They really wanted to keep this Jeep going.
All of that (and more that I haven't written about) brings me to this. Love (or lust ) for a particular vehicle, plus a little creativity and the willingness to roll up one's sleeves and be persistent (there's that word again!) is sometimes all a person needs to enjoy a vehicle. You don't need a lot of money (though having some disposable income is absolutely necessary) but you do need the willingness and the desire.
Cheers,
TJ
What I've been wanting to discuss with the readers (particularly for those of you who are just getting into your first project) is how I approach many of my vehicles in terms of their acquisition and what I like to do with them once I get my hands on them. Every bit of these projects is a balancing act and you should always be thinking about the value of your project at any stage. Value is the key and you always want value to go up.
First and foremost, keeping expenses down is a major factor in all of this and that includes the initial purchase price. Dad used to say, "Life is like a sh*t sandwich. The more 'bread' you have, the less s*it you have to eat." So you can spend a lot up front and go straight to the business of driving your purchase, if driving is your goal, or you can spend a little up front and go straight to the business of raising your purchase from the dead with actually driving it being the capstone of the project.
I have found that justifying these as "projects that keep me out of the bars at night" only works as long as they don't become a huge financial burden. Turning a vehicle such as this around is far quicker and easier if one has a lot of money to throw at it. There's certainly nothing wrong with having a lot of disposable income but a 16-year-old isn't one of those people. One of the things my son is learning with this project is the reality of balancing limited funds against what is absolutely necessary to repair, against how much time the vehicle is laid up, against what he wants to achieve with the truck. Real life stuff.
Also factor in how badly it is laid up and by that I mean how many things are going on with a vehicle at any one time. In this case, we presently have the floor cut open, the rear axle group partially torn down and an engine nearly ready to come out. That's a lot going on at one time. It's necessary because we want to continue moving forward on this every day that can be achieved. What we don't want is to have the project stalled or to end up with it as a basket case. Either one is the kiss of death for a project. A total commitment to being persistent on a project can greatly reduce the risk of failure because when you're persistent, you're always choppin' and the chips are always flyin'.
If you have followed this thread from the beginning you know this particular project was meant to be a father-son project from the gitty-up. Now that school has started, the kid's free time has been whittled down quite a bit so I will forge ahead on some things (mostly scut work) and make sure that he gets in on the important stuff and the things that will help him develop skills. Real life stuff, like school, comes first, project second...though since this is to be his daily driver, getting this truck up and running arguably does put it into the real life category.
Not only has his free time been reduced but he is also seeing the bright shiny things the other kids are driving to school so I'm guessing that soon after we get this thing going his desire for a vehicle that is a bit more practical will grow. His mother and I have allowed for that. If he wants to jump ship (insofar as it being his daily driver) there are no dramas. All that said, he did make a commitment to this project and to me (and I to him). I will hold up my end and I intend to have him honor his commitment.
The best part about this truck is that it is really a blank slate. It is not in a condition where one would give any great pause to changing it up a bit. Sometimes when you have something that's really nice or rare or has tremendous potential, there are certain things you really don't want to do with it for fear of reducing it's value. In a strict financial sense, a project of this nature never breaks even so we're going to have some real fun with it and stop worrying about it's value in any sense other than the enjoyment we can squeeze out of it without absolutely closing the door on any possibility of its going back to becoming an M38.
So, our equations are as follows -
Expense vs Enjoyment
Available Funds vs Down Time & Project Goals
Project Advancement vs Risk of Becoming a Basket Case
Real Life vs Project Time
Overall Value vs Enjoyment
Automotive Archeology -
Here is the broad strokes assessment of this truck. It started it's life as an M38. I wouldn't say these are necessarily rare but there aren't that many around. As a representative example of a former military vehicle, simply put....it sucks. Almost every vestige of its military lineage is gone. So now, it is a representative example of someone with limited skills moving heaven and earth to have a Willys Jeep to drive which, when you think about it, is still pretty cool.
There seem to be no two bolts alike on this truck and in some cases the fastener consists of a piece of all-thread and two nuts. For example, take the four bolts that held the fan on the pulley. One was tight but, without a lock washer. Three had lock washers but were too long (and of varying lengths), could not be run in far enough and thus, were loose. The truck is, quite literally, a bucket of bolts. Who does stuff like that?
And there are things like the front grille being bent inward in the middle making the headlights cross-eyed. Instead of straightening the grille, someone simply ran the adjustments of the headlights back to the point where they are at such an extreme angle the headlights bug out of their bezels in the center. I can't imagine what they were thinking. Contrary to that, someone welded in another floor pan (right over the old floor pan). I can only presume the owner who put the floor in comes before the guy who can't straighten a simple piece of stamped steel (but can turn a screw).
Even with problems to overcome like broken bell housings, and giant holes in the floor somehow, these people were able to make it all work. I cannot explain how one is capable of properly welding up a broken bell housing but is incapable of procuring a suitable bolt. I suppose I am seeing evidence of many previous owners who had one thing in common. They really wanted to keep this Jeep going.
All of that (and more that I haven't written about) brings me to this. Love (or lust
Cheers,
TJ
Re: M38 - Nothing at all to do with M151s
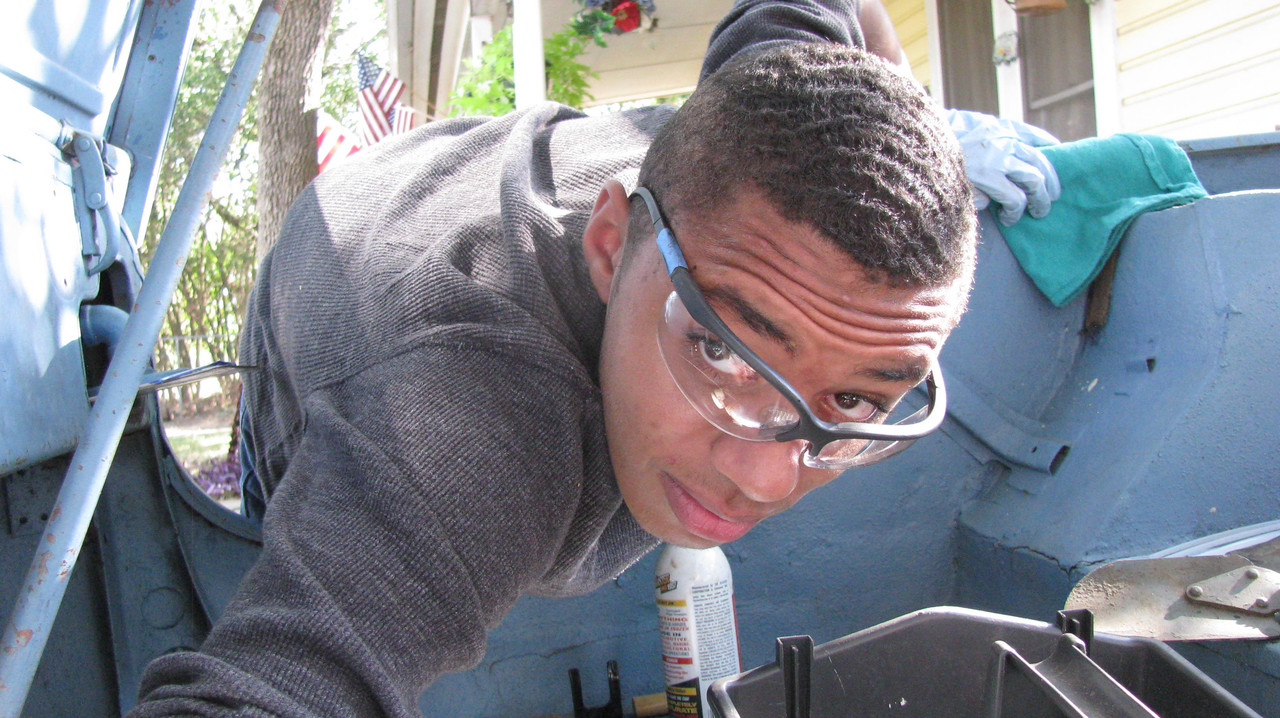
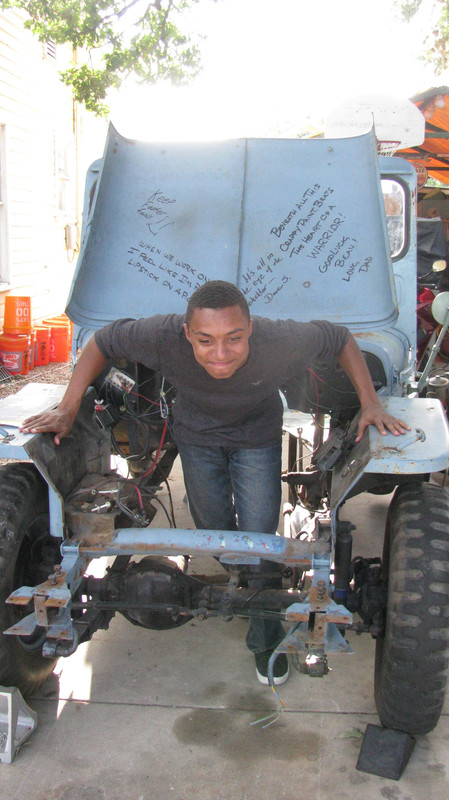
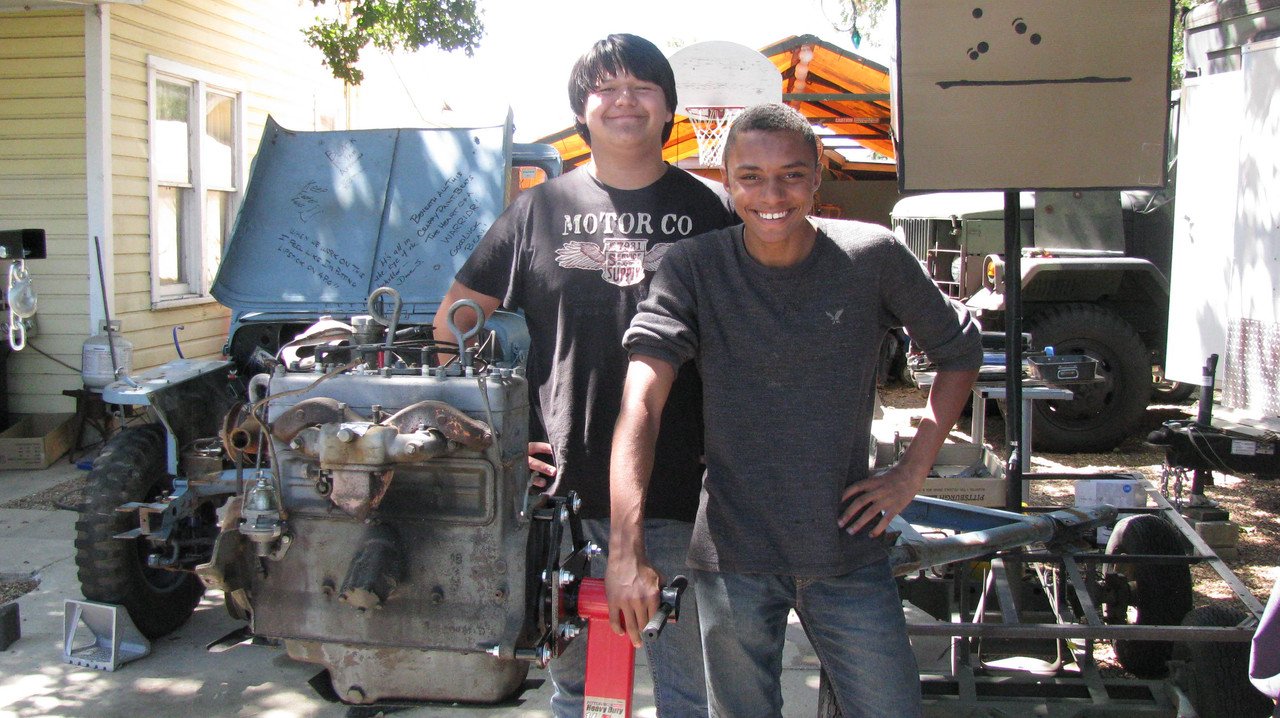
A BIG STEP forward today. This being Friday, my son brought a buddy home from school. They gravitated to the X-Box (naturally) and when I caught 'em at it, I suggested we go pluck that power pack out of the Jeep. They jumped at the chance and we went to work. So without further comment (other than to speak of the decided lack of safety glasses) here we go.
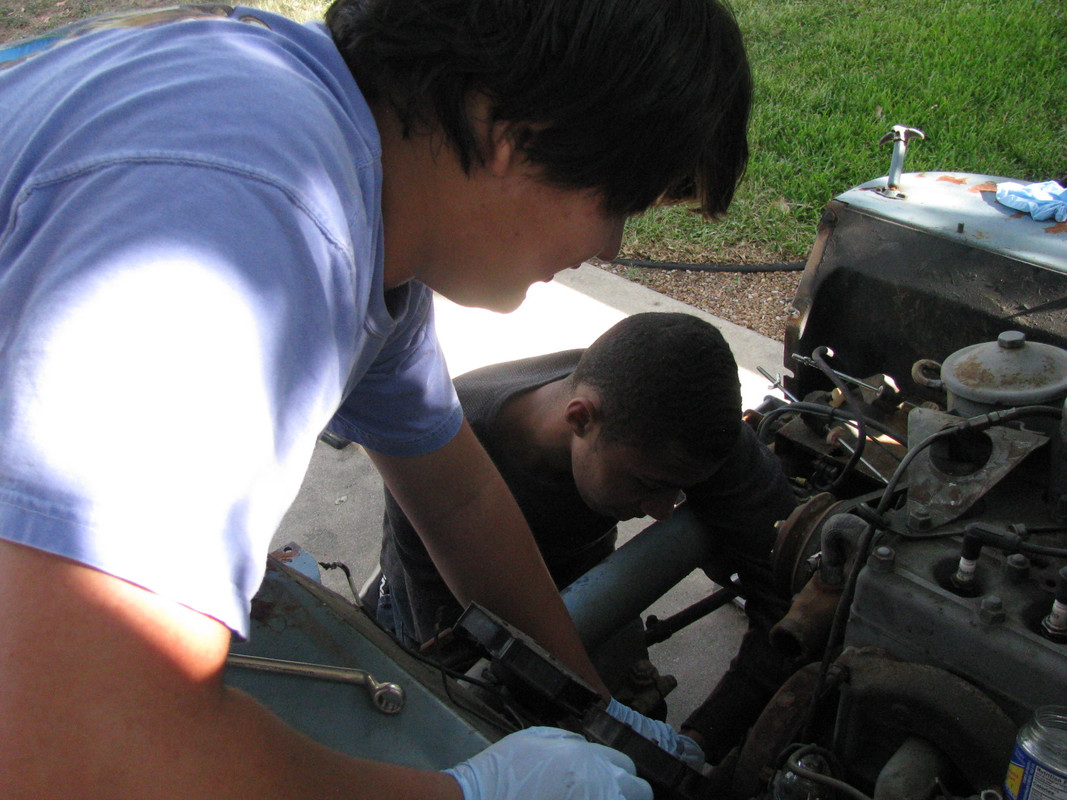
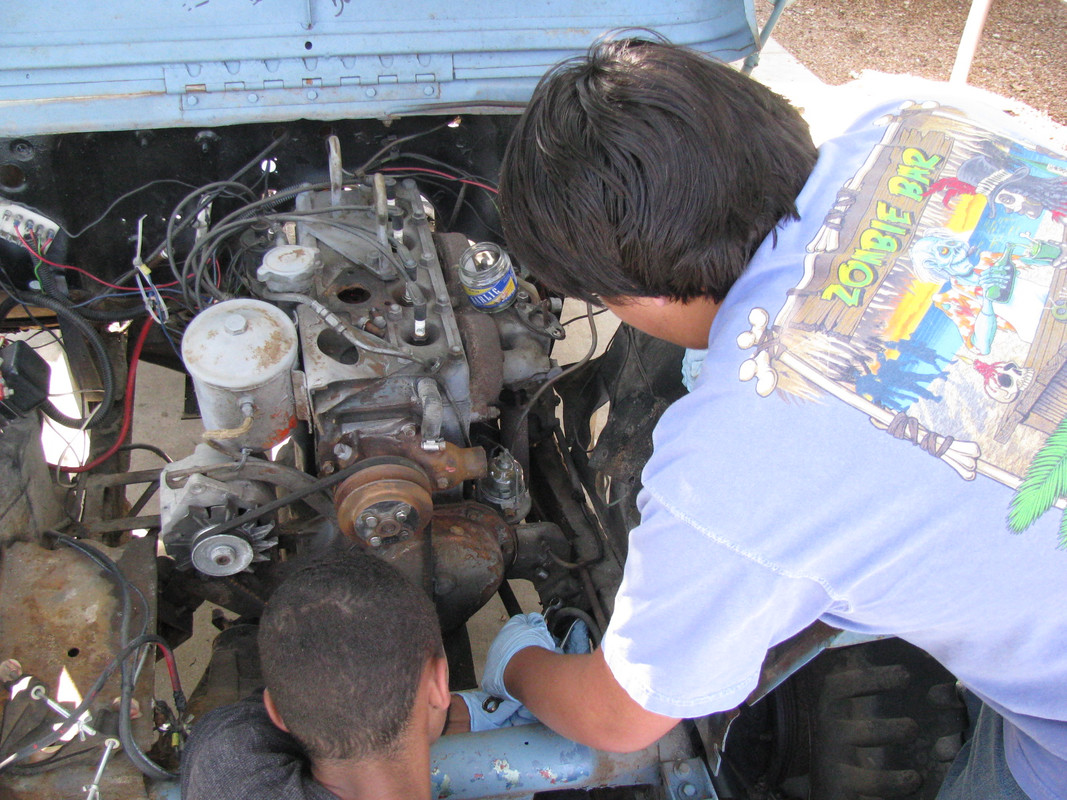
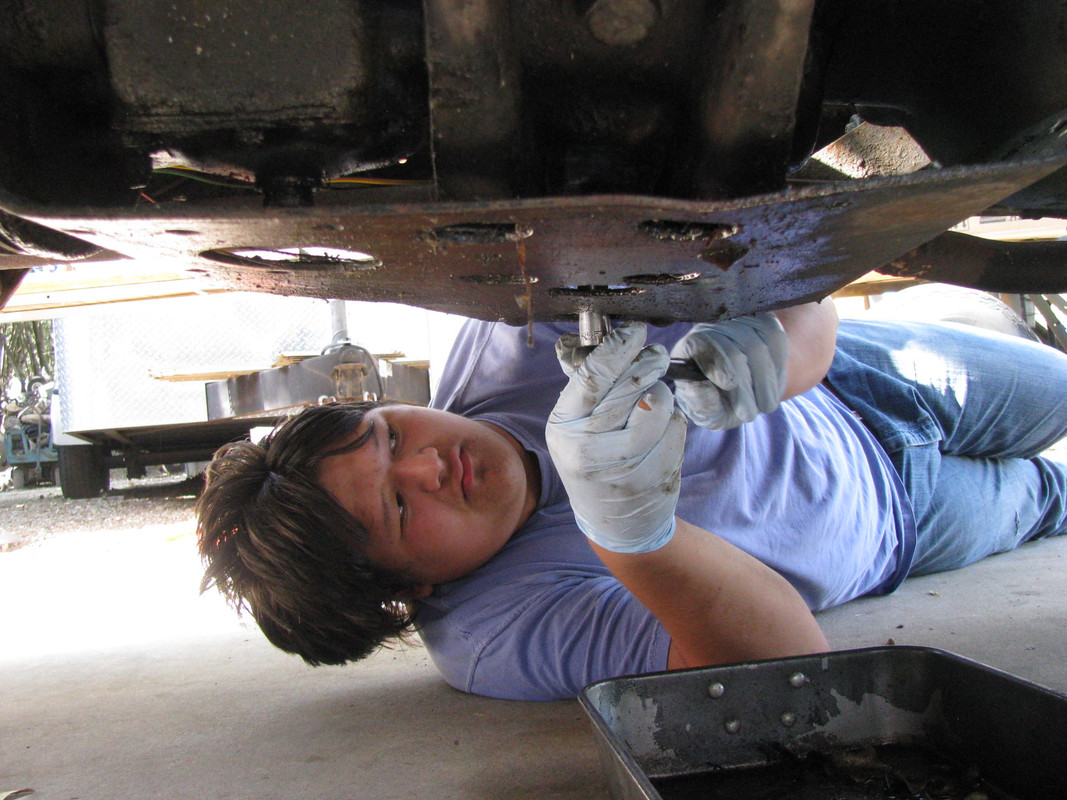
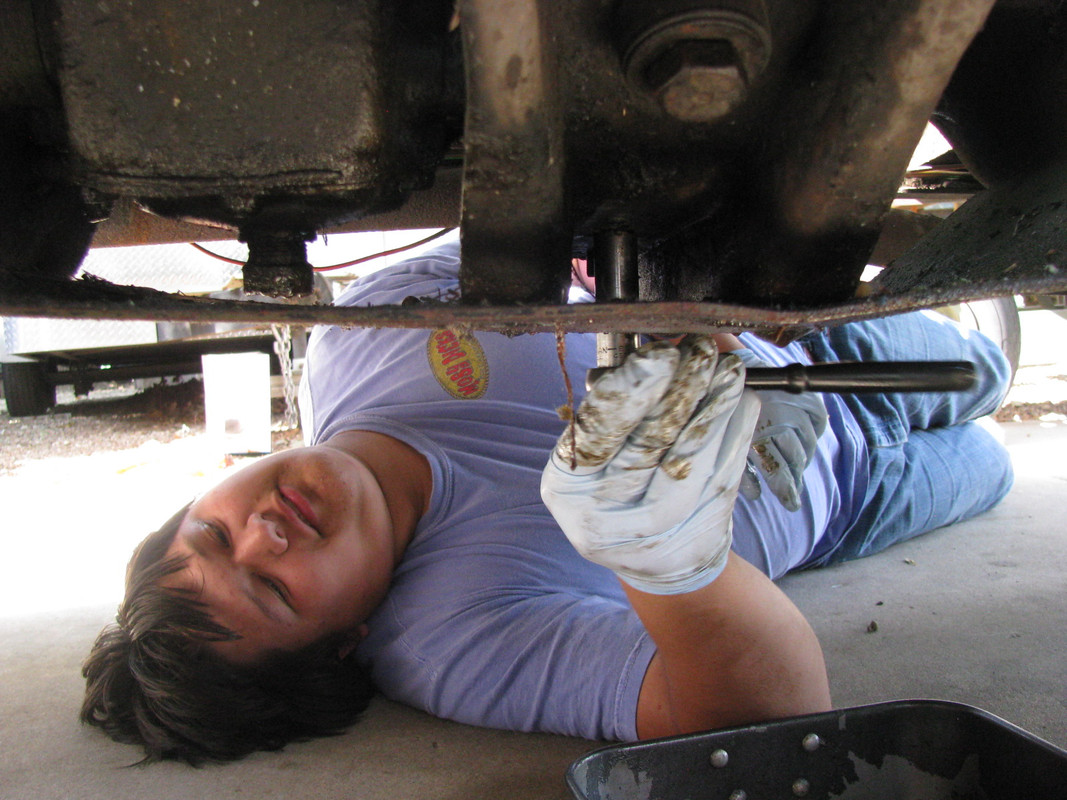
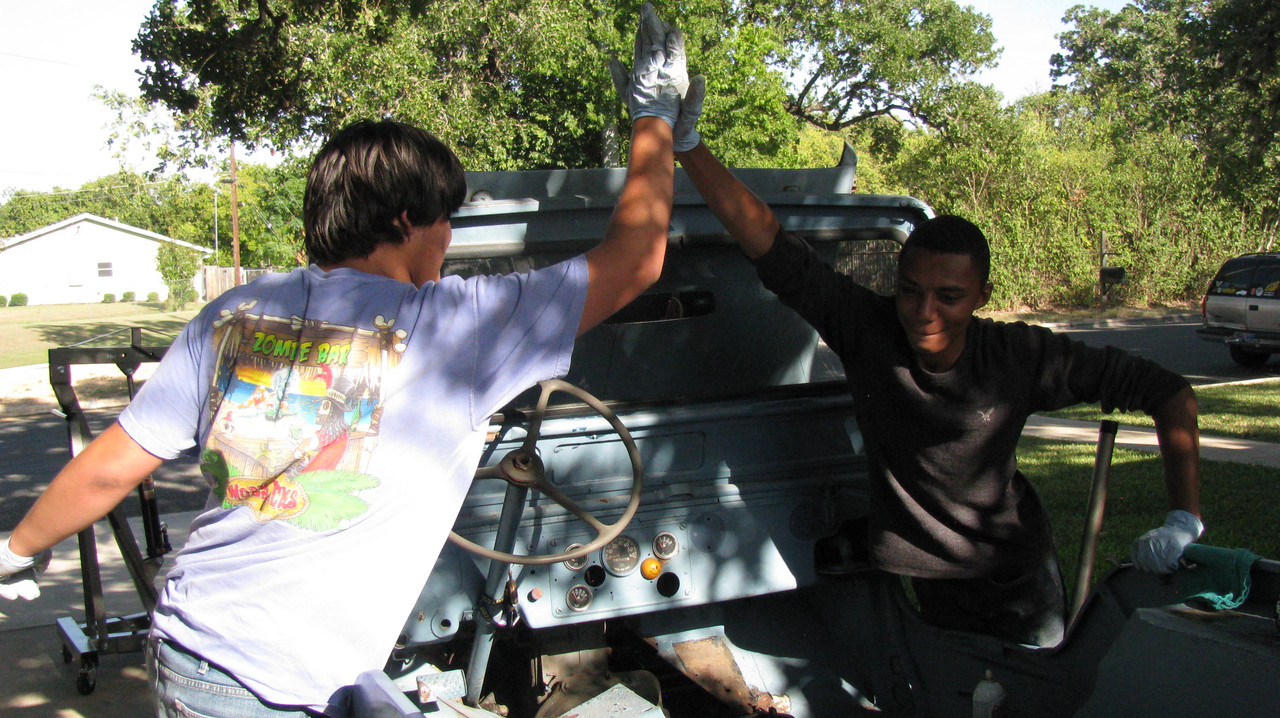
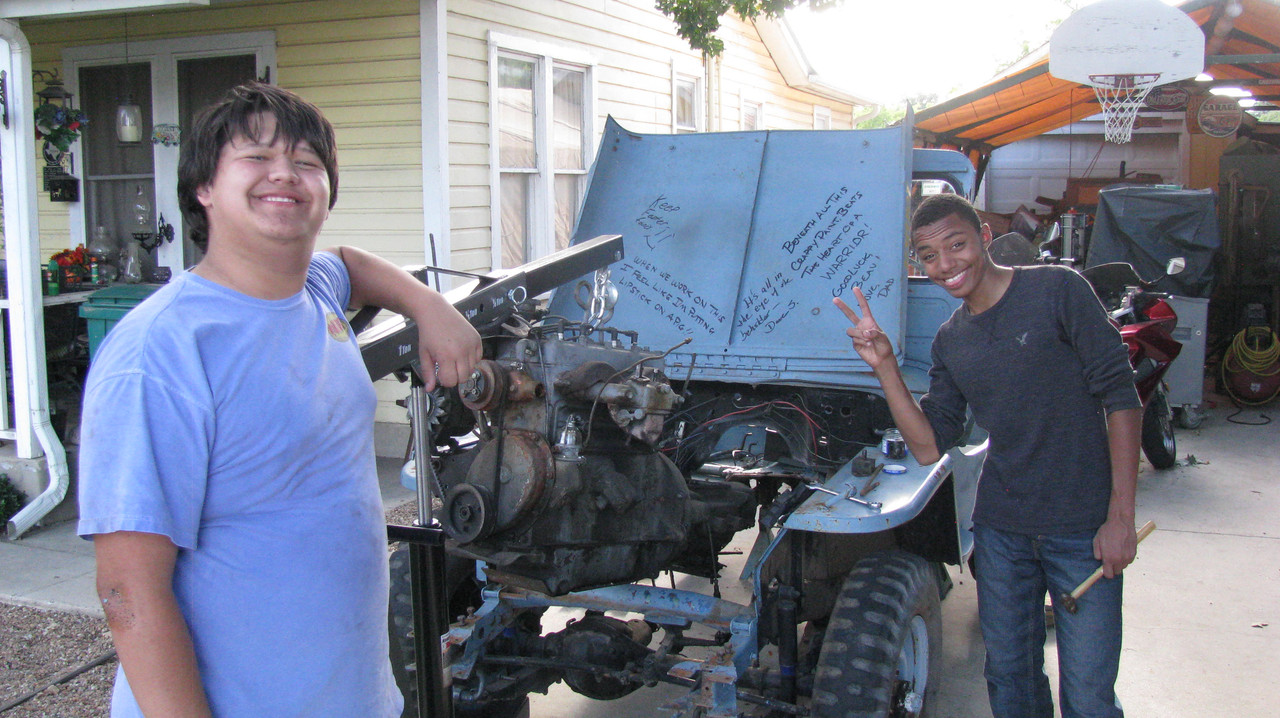
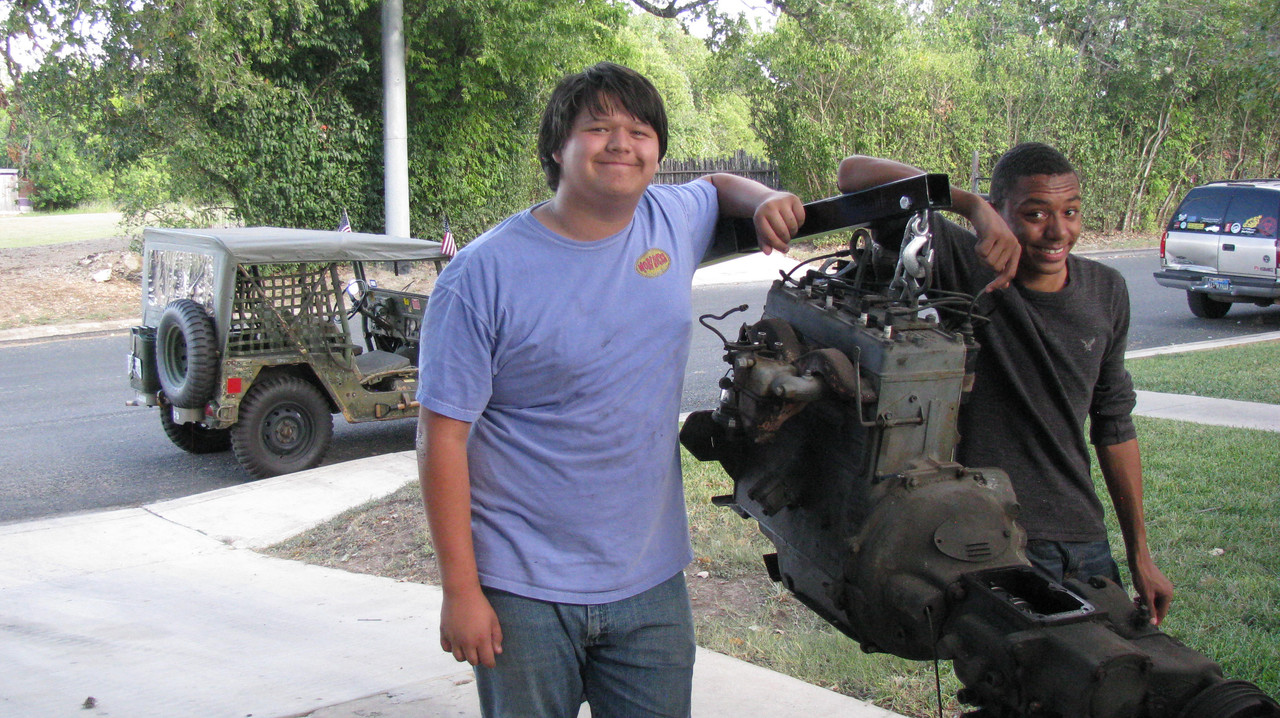
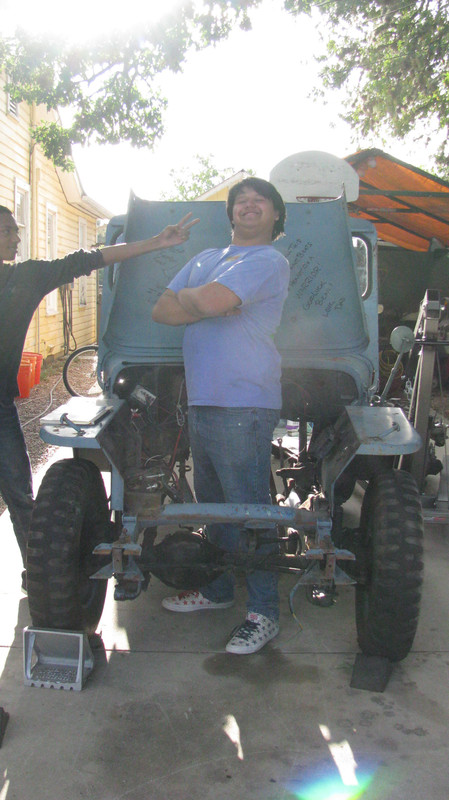
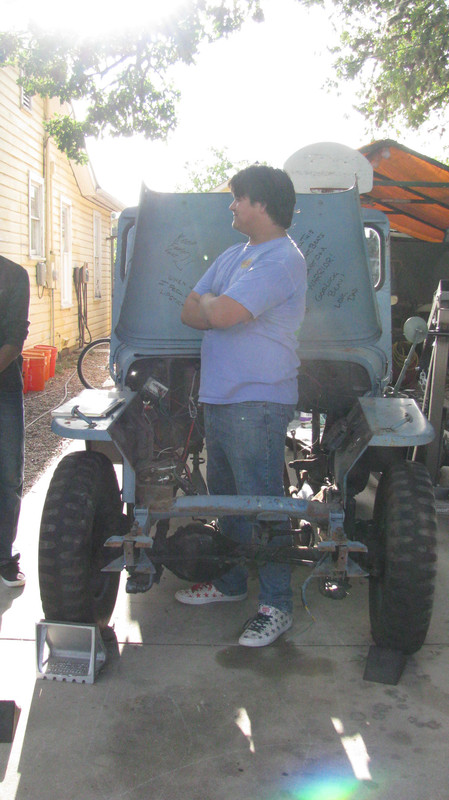
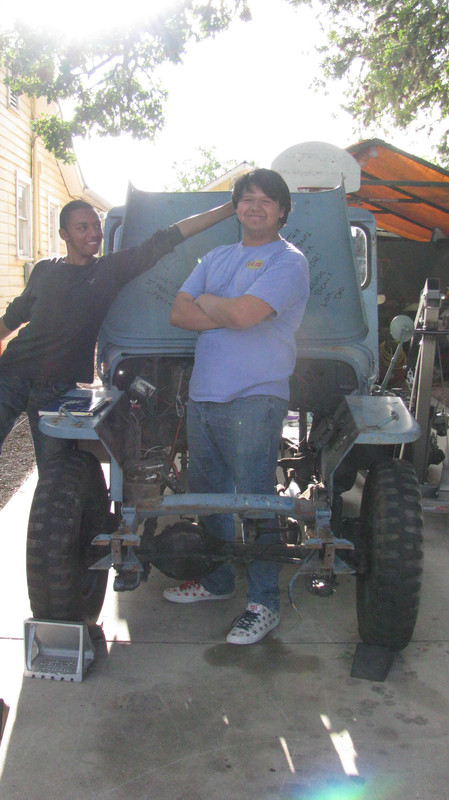
Wrenching is hard work. Ya gotta keep your strength up!
Wrenching is hard work. Ya gotta keep your strength up!
Last edited by m3a1 on April 12th, 2018, 7:25 pm, edited 1 time in total.

Re: M38 - Nothing at all to do with M151s
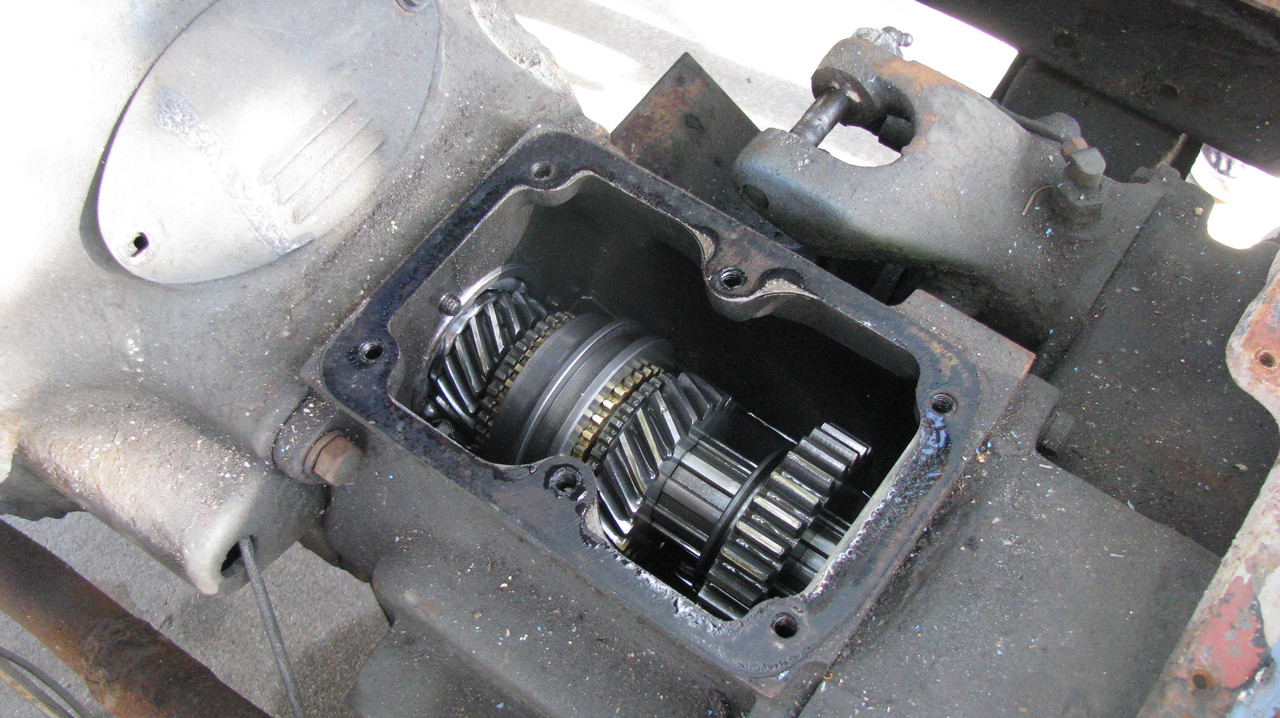
That transmission appears to be in REALLY good shape internally! The sliding gear for first/reverse is usually worn a LOT worse than that from grinding gears when shifting. Second gear, which is notorious for popping out of gear when decelerating when those transmissions get a lot of wear, appears to be in really good shape as well, as well as its synchronizer ring. I have rebuilt many of those transmissions because of the second gear problem, and I think all of them looked far worse internally and I have not had any problems reusing the gears, with the exception of second gear. I think you will be really happy with how that transmission operates assuming second isn't excessively worn.
1942 Willys MB "slat grille"
1943 Ford GPW
1953 M38A1
1952 M38A1
1951? M38
1st run M151
1953 M37
Ford G8T
2 Ford GTBs
1943 Ford GPW
1953 M38A1
1952 M38A1
1951? M38
1st run M151
1953 M37
Ford G8T
2 Ford GTBs
Re: M38 - Nothing at all to do with M151s
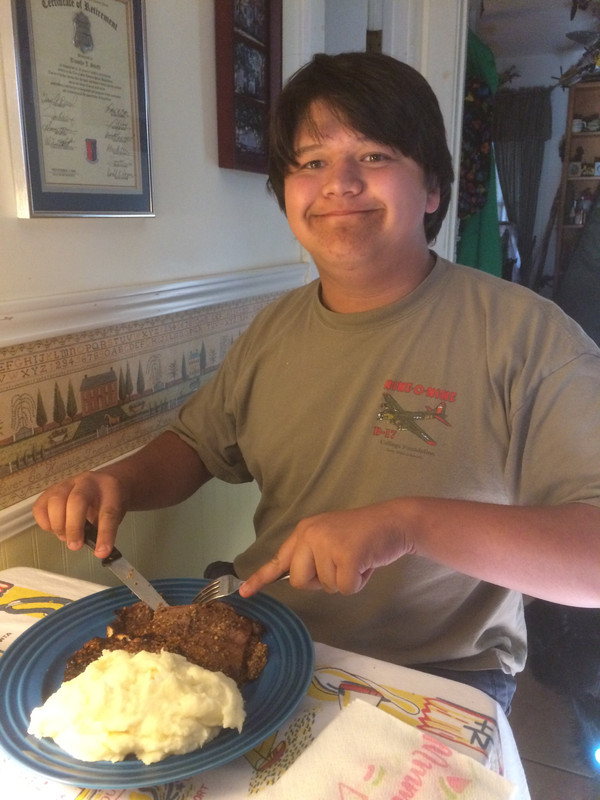
That boy of yours seems to be growing exponentially! You are going to need bigger steaks!!  Reminds me of me when I was that age. I was 6'1" in 8th grade and by my Junior year in high school I was 6'3" and weighed a solid 205. He appears to be headed the same route.
1964 M151A1
1984 M1008
1967 M416
04/1952 M100
12/1952 M100- Departed
AN/TSQ-114A Trailblazer- Gone
1984 M1008
1967 M416
04/1952 M100
12/1952 M100- Departed
AN/TSQ-114A Trailblazer- Gone
Re: M38 - Nothing at all to do with M151s
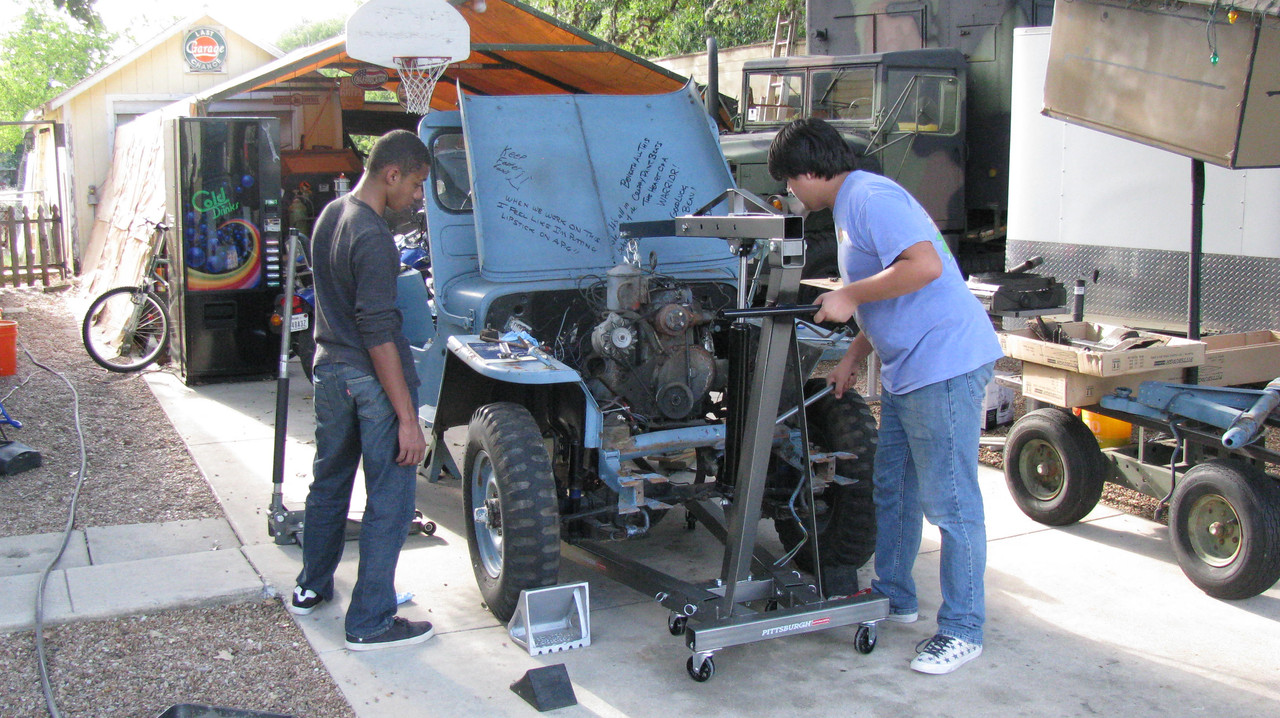
Once again, it was off the Harbor Freight, this time for an engine stand. The lads were fooling around while we were assembling the stand and the whole thing nearly fell off our work surface while they were goofing off. I had to point out to them that when you're working, you keep your eye on the ball or people get hurt. Working around these guys is like herding gerbils. Small wonder the high school shop teachers are famous for stressing safety at every turn!
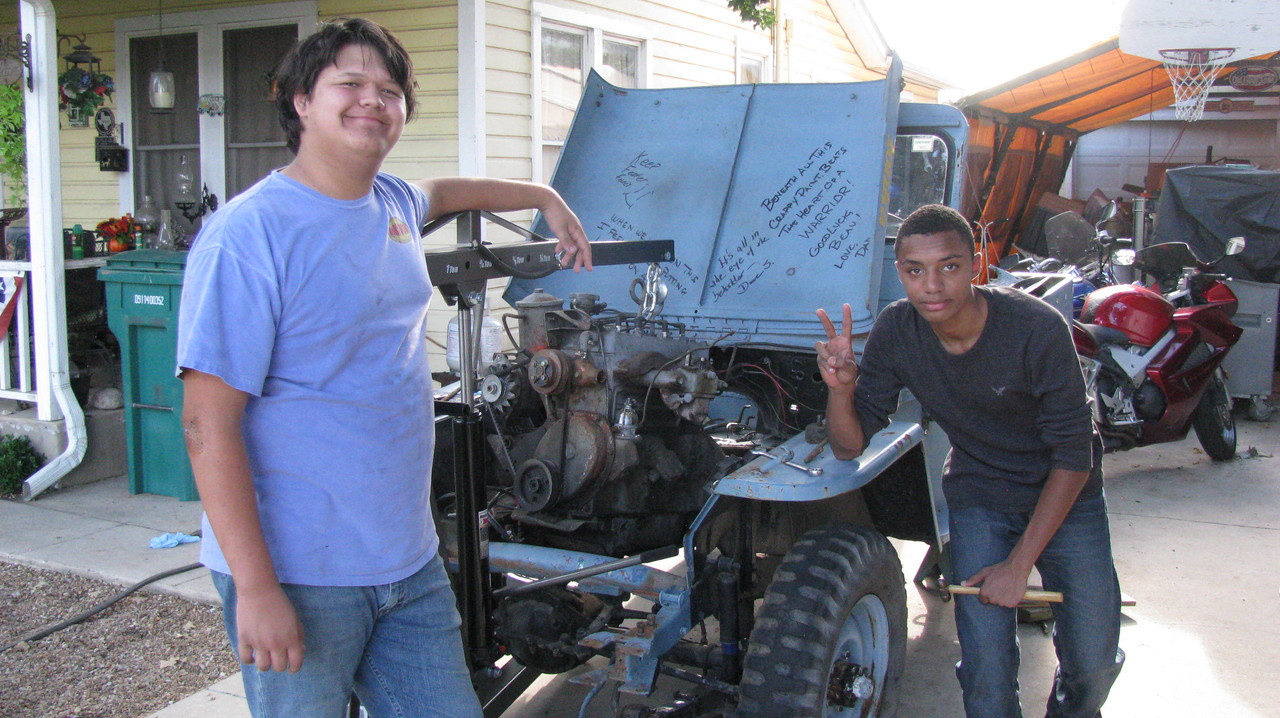
Separated the engine from the bell housing and the pressure plate, clutch disk and flywheel from the engine. There is evidence of a slipping clutch (disk appears to be greasy) but the wear pattern across the flywheel and pressure plate is excellent in that the pattern is extraordinarily even throughout. There's just not much to crow about on this truck, but we'll get it straightened out.
Our little Go-Devil engine, finally on the stand...
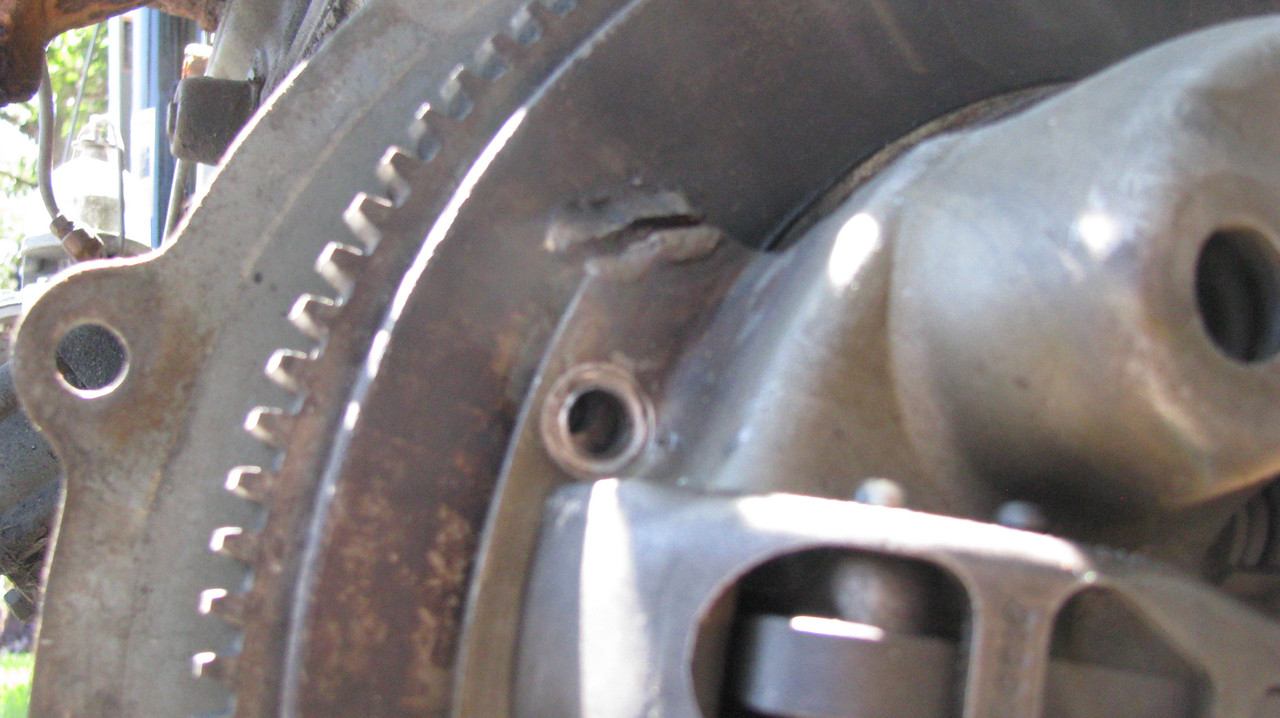
Oh! The things we've been uncovering on this truck! And take a look at the exhaust flange. It had been broken before, welded and then snapped off again at the bolt hole. If I can afford to, I'm replacing both intake and exhaust manifolds.
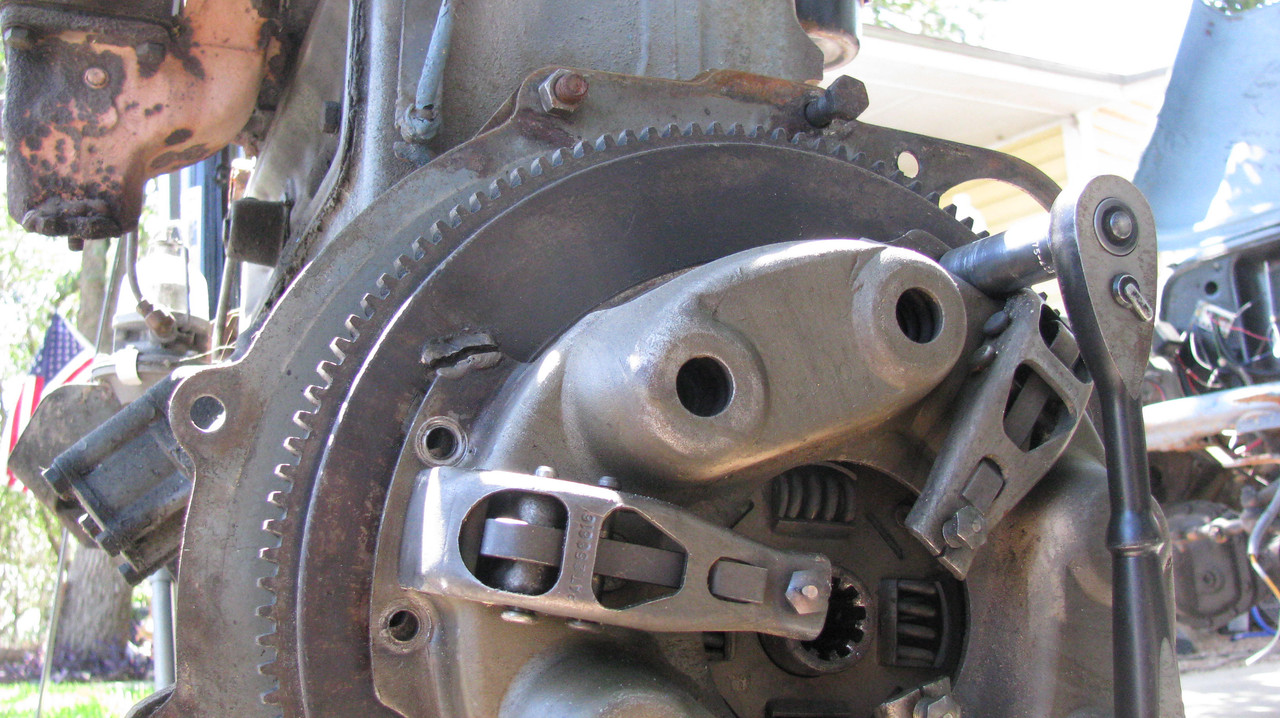
All the threads of the fasteners for the pressure plate and flywheel were installed greasy. Grease and oil simply doesn't migrate into fine thread fasteners that way. But who the heck does THIS? Oh, that's right....the dude who can't bother with degreasing his fasteners!
Separated the engine from the bell housing and the pressure plate, clutch disk and flywheel from the engine. There is evidence of a slipping clutch (disk appears to be greasy) but the wear pattern across the flywheel and pressure plate is excellent in that the pattern is extraordinarily even throughout. There's just not much to crow about on this truck, but we'll get it straightened out.
Our little Go-Devil engine, finally on the stand...
Oh! The things we've been uncovering on this truck! And take a look at the exhaust flange. It had been broken before, welded and then snapped off again at the bolt hole. If I can afford to, I'm replacing both intake and exhaust manifolds.
All the threads of the fasteners for the pressure plate and flywheel were installed greasy. Grease and oil simply doesn't migrate into fine thread fasteners that way. But who the heck does THIS? Oh, that's right....the dude who can't bother with degreasing his fasteners!
Last edited by m3a1 on April 12th, 2018, 7:28 pm, edited 1 time in total.
-
Hambone
- Brigadier General

- Posts: 2506
- Joined: October 1st, 2010, 12:19 am
- Location: El Dorado, Arkansas
Re: M38 - Nothing at all to do with M151s
[quote="rickf"]That boy of yours seems to be growing exponentially! You are going to need bigger steaks!! Reminds me of me when I was that age. I was 6'1" in 8th grade and by my Junior year in high school I was 6'3" and weighed a solid 205.
And 23 years old!!
Nice to see the boys involved, most kids can't change a flat tire these days.
And 23 years old!!
Nice to see the boys involved, most kids can't change a flat tire these days.
Re: M38 - Nothing at all to do with M151s
m3a1 wrote:Once again, it was off the Harbor Freight, this time for an engine stand. The lads were fooling around while we were assembling the stand and the whole thing nearly fell off our work surface while they were goofing off. I had to point out to them that when you're working, you keep your eye on the ball or people get hurt. Working around these guys is like herding gerbils. Small wonder the high school shop teachers are famous for stressing safety at every turn!
Separated the engine from the bell housing and the pressure plate, clutch disk and flywheel from the engine. There is evidence of a slipping clutch (disk appears to be greasy) but the wear pattern across the flywheel and pressure plate is excellent in that the pattern is extraordinarily even throughout. There's just not much to crow about on this truck, but we'll get it straightened out.
Our little Go-Devil engine, finally on the stand...
Oh! The things we've been uncovering on this truck! And take a look at the exhaust flange. It had been broken before, welded and then snapped off again at the bolt hole. If I can afford to, I'm replacing both intake and exhaust manifolds.
All the threads of the fasteners for the pressure plate and flywheel were installed greasy. Grease and oil simply doesn't migrate into fine thread fasteners that way. But who the heck does THIS? Oh, that's right....the dude who can't bother with degreasing his fasteners!


Herding gerbils, I love it. And were you any different at that age? I doubt it. Probably worse because oversight and safety was not such an issue as it is today. I know I was a holy terror at that age.
The welded pressure plate is a classic, I thought I had seen or even done it all in emergencies but that is a new one.
1964 M151A1
1984 M1008
1967 M416
04/1952 M100
12/1952 M100- Departed
AN/TSQ-114A Trailblazer- Gone
1984 M1008
1967 M416
04/1952 M100
12/1952 M100- Departed
AN/TSQ-114A Trailblazer- Gone
Re: M38 - Nothing at all to do with M151s
KMA Ham.Hambone wrote:rickf wrote:That boy of yours seems to be growing exponentially! You are going to need bigger steaks!!
And 23 years old!!
1964 M151A1
1984 M1008
1967 M416
04/1952 M100
12/1952 M100- Departed
AN/TSQ-114A Trailblazer- Gone
1984 M1008
1967 M416
04/1952 M100
12/1952 M100- Departed
AN/TSQ-114A Trailblazer- Gone
Re: M38 - Nothing at all to do with M151s
Actually, yes...I was different. I have been employed since I was 12 and by 16, was working at a service station after school and on weekends, with grown men who had served in WWII and Korea; men who didn't tolerate that kind of nonsense.
-
Hambone
- Brigadier General
- Posts: 2506
- Joined: October 1st, 2010, 12:19 am
- Location: El Dorado, Arkansas
Re: M38 - Nothing at all to do with M151s
"Damn, where did I put all those bolts", you ever heard of redneck engineering, that may take the cake.
Re: M38 - Nothing at all to do with M151s
Find any welds on the block yet? That is about the only thing so far that has not been welded, or at least found to have been welded.
1964 M151A1
1984 M1008
1967 M416
04/1952 M100
12/1952 M100- Departed
AN/TSQ-114A Trailblazer- Gone
1984 M1008
1967 M416
04/1952 M100
12/1952 M100- Departed
AN/TSQ-114A Trailblazer- Gone