Pioneer tools

A place to post pics and descriptions of ongoing restoration projects

Moderators: rickf, raymond, Mr. Recovery

Post Reply
User avatar
m3a1
Lt. General
Lt. General
Posts: 4038
Joined: August 7th, 2014, 6:36 pm

Pioneer tools

Unread post by m3a1 » February 22nd, 2019, 3:12 pm

Weather is lousy and I'm bored so (lucky you) you get to be bored with me.

Here's a little tutorial on salvaging pioneer kit. We are beginning with some very old stuff (both, circa 1942). These are entrenching tools (part of an individual soldier's kit) and as you can imagine, they've been through hell and high water. Obviously, these aren't exactly the kind of tools you'd find on your military vehicle but the principles for restoring these to a far better condition than when found are the same. My goal is to make these tools look as though someone really appreciated their value for every year of their life despite the fact that they haven't been cared for, or cared about for a very long time.

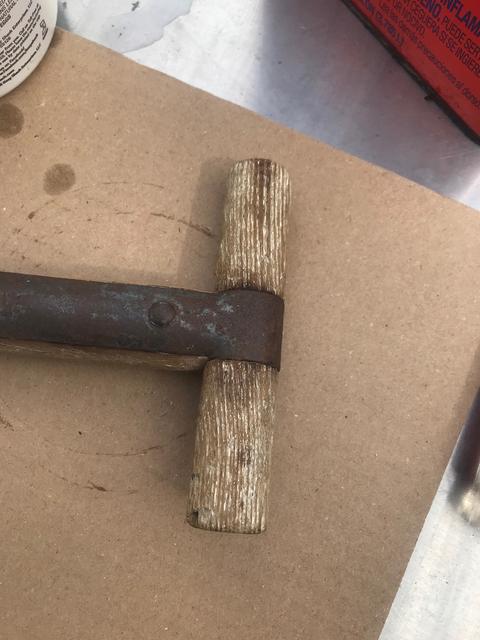
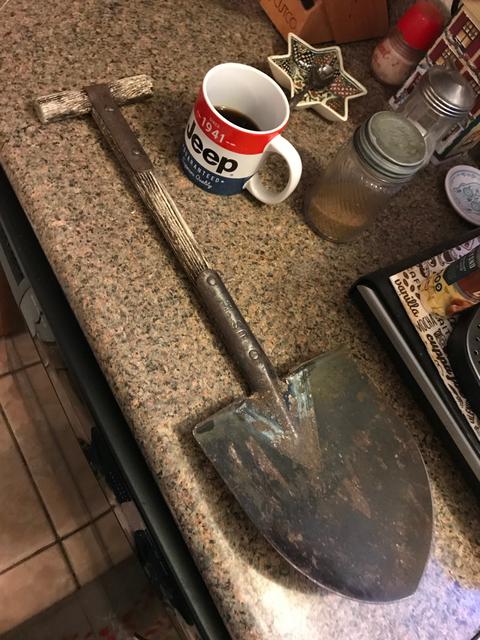
I caught a lucky break and found this tee-handled entrenching shovel (Model M1910) at a rummage sale. It was accompanied by a Model M1910 pick mattock. Both were rather sloppily coated in white paint but they were intact and showed no signs of abuse. This was a huge bonus because paint means protection. Everyone else passed them up because they were just plain ugly. Judging by the quality of the paint, even in its obviously advanced years, I'd have to say it was lead-based and not the kind of paint you'd necessarily want to remove with an abrasive or a wire wheel, right? In fact, they looked like they had been coated in yogurt, and so everyone walked right past them. I didn't. :wink:

I went with a citrus paint remover which did a very nice job removing the paint but it required several applications. A less aggressive remover is sometimes better in that it allows for more control and if you have read my other posts, you know how I prefer to sneak up on things.

Here we see the white paint still present on the lower half with citrus paint remover on the upper half. Citrus paint remover is very temperature sensitive. If it's cool, it doesn't work very aggressively and it will not put so much as a scratch on CARC or, what I presume to be epoxy based paint on those M416 fenders.

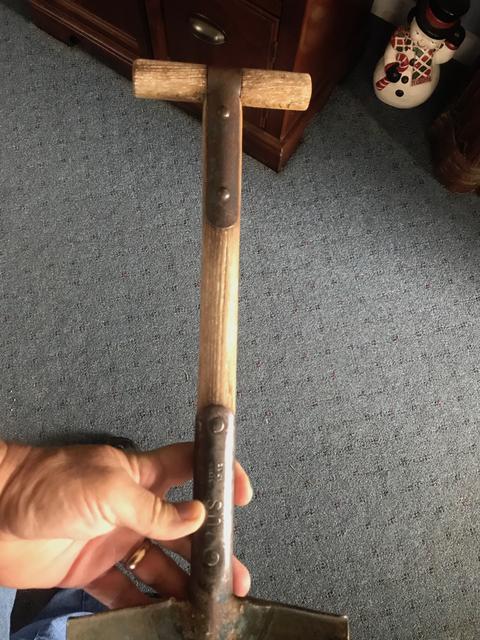
As a point of interest, the hardware on this shovel was painted with no evidence of green paint to be found anywhere on the wood bits and the issue of whether wood on e-tools and pioneer tools should be painted is a long-standing argument, no matter what era you're talking about. I've been collecting long enough I have seen every original combination; painted, unpainted, partially painted. Some times the manual will specify paint but sometimes, that depends upon when the manual was written eh?
Image

Final application on the upper half is dealt with by a quick scraping of the few big chunks of paint and then giving what remains a rub down with steel wool, paint remover and all. That is followed by a thorough rinse, being sure to get all the stuff out of the corners with a tooth brush. Yes, the wood gets a little wet. We'll deal with that in a minute.
Image

I'll deal with the rust issues later, probably with a visit to the blast cabinet. Everyone has their own favorite method of dealing with rust so I won't go into that here. Obviously, the rust has to be stopped.
Image

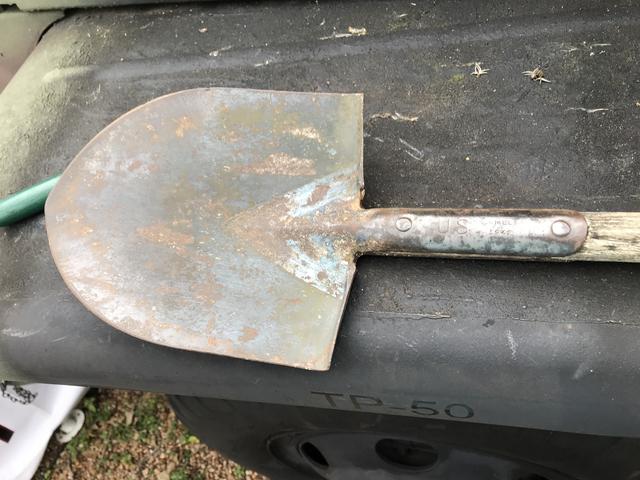
Ames has been supplying shovels to our military since the civil war (and other governments as well) to present day, so don't be surprised if you find that your modern pioneer shovel has been manufactured by Ames. Some interesting history in the link below. Open the page and then reload the page to get rid of their annoyingly persistent subscription bubble.
http://www.ames.com/about/about-ames/
Image

Here, we can see that the wood is still a bit damp around the hardware. This is dry enough to go to the next step, which is a thorough application of Easy Off oven cleaner. Apply a good coating and then let it sit in an open air environment...and NOT inside your home. The oven cleaner will break down the oxidized wood and just a bit more paint. Oven cleaner also does better when the chemical and your work's surface are not cold. Follow up with another thorough rinse while scrubbing it down with a sink sponge (the kind with a 3M scotch-brite pad on one side). The scotch-brite pad does a good job of removing the oxidized wood without being too aggressive and the sponge side ensures you'll get nice even pressure on the wood. Don't forget to get everything out of the corners with a tooth brush. Once you're satisfied, dry it off as best you can with paper towels. What is clean enough? Well, if your paper towel is becoming brown, you still have more work to do. After drying, the wood is going to be damp. No worries. The next part is easy.
Image

I just put the oven on 'Warm' (which is about 250 degrees) stick that thing in there and after a little bit, this is the result. This goes a lot easier when your wife is not around to defend her oven. For larger tools that won't fit in an oven, you can use your engine compartment as an oven (hood down and engine running of course) but make sure no one drives off with a loose tool under there! The point of this exercise is, you want to heat up that hardware and drive that moisture out from beneath it.
Image

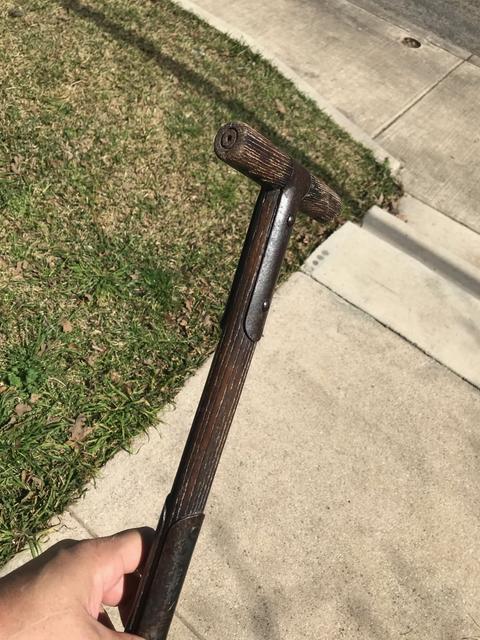
This wood will receive a very light sanding with some fine sandpaper. The goal is to reduce the high points in the grain just a little bit but not to perfectly smooth. Remember the goal? This particular wood has been around since 1942...maybe longer and we are not making fine furniture here. If you sand it perfectly smooth you'll have removed far too much wood. That wood is what gives this tool it's character and there is nothing to be gained by making it look brand new. Whatever sanding you elect to do, sand only WITH the grain, not across the grain of the wood.

Obviously, if you're working with full size tools you can afford to be a bit more aggressive with your sanding simply because there is more wood there and those tools likely don't have the same kind of collectable value as the smaller entrenching tools.
Image

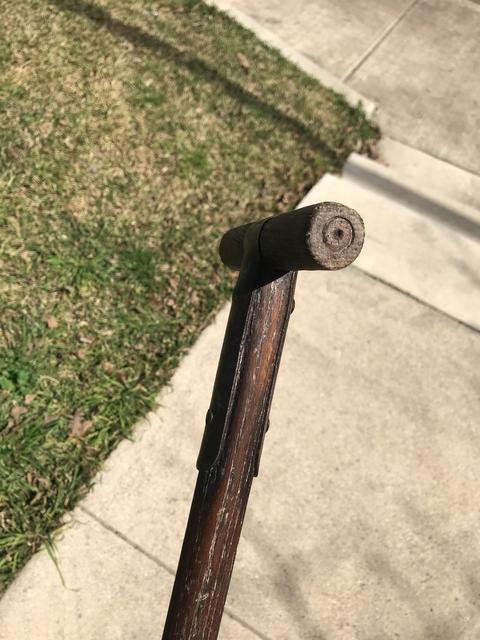
This is coming along very nicely. It looks far better than when I began.
Image

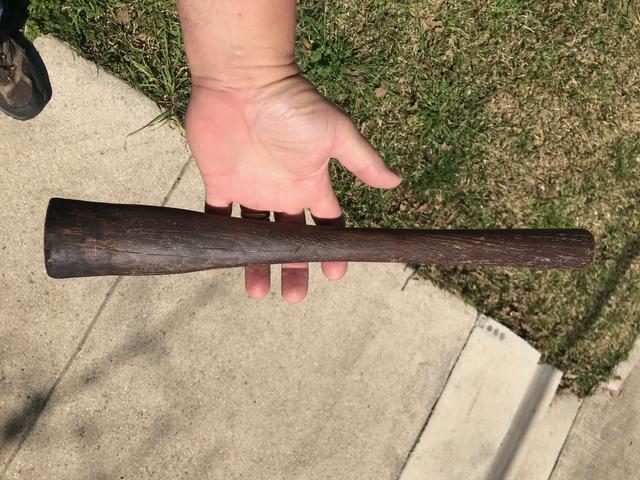
This Plumb brand pick mattock (also 1942) received the same treatment.
Image

Image

More to come.
Last edited by m3a1 on February 22nd, 2019, 9:29 pm, edited 5 times in total.

User avatar
m3a1
Lt. General
Lt. General
Posts: 4038
Joined: August 7th, 2014, 6:36 pm

Re: Pioneer tools

Unread post by m3a1 » February 22nd, 2019, 9:19 pm

Ok, so what we are dealing with now is some very dry wood and some rather obstinate paint, hunkered down deep in the grain of the wood. We're not in a position to sand it out and so, I turn to an application of a more aggressive paint remover. The white paint isn't necessarily a deal breaker because painting the whole thing is still an option and yet, I'd like to see how far we can get without painting the wood.

After letting the paint remover work, I turned to a small wire brush and gently worked it along the grain of the wood and seemed to have a bit more success. Once that got washed off and scrubbed with a scotch brite sponge, I hit it with Easy Off Oven Cleaner, washed and scrubbed it it yet again and back in the oven it went.

As an aside, there has been an argument amongst historians that suggested using painted tools caused blisters which is an argument that I consider almost laughable, having had firsthand experience digging foxholes using these exact kinds of tools, and I'm not talking about the ludicrous re-enactor kind of holes that are only a mere depression, but real, correct foxholes! and gentlemen, blisters are just part of it.

The real problem with what little paint there remains is, once the wood is treated it becomes darker and that white paint is gonna be real obvious!
Image

Image

Some of you are already saying, "Gee, this is just like refinishing a gun stock." Yup!...but a very OLD gun stock! And here is my secret weapon. I love this stuff. A chimpanzee could be trained to use it. It has a rather pleasant, manly odor, kind of like beard oil. I wouldn't use this as an aftershave but I wouldn't object to putting a dab behind my ears. :P Danish Oil is a combination of and oil and a varnish.
Image

Instructions are dirt simple. Using a brush or rag, flood the area to be treated, let it penetrate for 30 mins, re-coat areas that appear to have soaked up the oil after that time. After 15 minutes, wipe completely dry (Wipe down is a very important step, by the way because, if you don't you'll end up with a rubbery mess where the oil was standing on top. An old tee shirt is the perfect material for this step.) Ready for use in 8-10 hours. Can be top-coated with a finish after 72 hours.

As with any wood treatment, you may find the grain has been raised in some areas. Buff with steel wool or lightly sand as necessary, then repeat the coating process until you achieve the desired result.

We are not concerned with getting some on the fittings as that will soon be getting sandblasted.
Image

And in short order, here's the result after one coat and an almost immediate follow up on the dry spots. With a nice matte finish, the wood is darker, and it feels heavier and stronger and it smells wonderful (alas, that wonderful odor will not last forever). There is still a tiny bit of white paint to be found upon close inspection but frankly, I think it would be a mistake to pursue it further. I can live with it.

Why do I not go further with this wood? Simply because these are just entrenching tools, meant to be used in the worst possible conditions, then scrubbed clean by an otherwise disinterested soldier and occasionally, oiled or painted. Nothing more. I think having an understanding of how things will be used leads to far greater authenticity, whether you are dealing with a collectable piece or just the lowly pioneer kit on your vehicle.

Soon, I will turn my attention toward getting that metal back in shape.

Image

Stay tuned.
Last edited by m3a1 on February 24th, 2019, 6:02 pm, edited 4 times in total.

User avatar
fergrn37
Staff Sergeant
Staff Sergeant
Posts: 198
Joined: March 18th, 2016, 12:05 am
Location: SEOK

Re: Pioneer tools

Unread post by fergrn37 » February 23rd, 2019, 8:03 pm

I have that same Jeep cup!
Some people are too busy knowing it all to ever learn anything

Barlow L
Sergeant
Sergeant
Posts: 59
Joined: September 26th, 2016, 5:39 pm
Location: Smithfield Virginia

Re: Pioneer tools

Unread post by Barlow L » February 24th, 2019, 12:20 am

Great tutorial, looking forward to the finished product.
I use oven cleaner quite often at work, I finished a complete dash restoration on a 1968 Barracuda. stripped all the paint off the plastic dash bezel. it works great on items like heater controls. cleans them spotless with out harming the original plating.

User avatar
m3a1
Lt. General
Lt. General
Posts: 4038
Joined: August 7th, 2014, 6:36 pm

Re: Pioneer tools

Unread post by m3a1 » February 24th, 2019, 3:59 pm

Since I'm not here to sell you a bridge, or danish oil for that matter, I thought I had better get into this business of selecting a finish for bare wood a bit further because one of the issues that makes collectable entrenching tools far different than our pioneer kit is how they will be stored, handled and maintained.

Collectables are typically not going to be found hanging around outside, or hung on a military vehicle day in and day out the way pioneer tools are. Between showings, my e-tools sit inside, whereas my pioneer tools sit outside on the vehicle and so, we can conclude that the amount of use and maintenance these pioneer tools get depends wholly upon you and that, dear reader, will have a great deal to do with deciding what kind of finish is right for you.

All of this discussion is predicated upon the idea that you aren't just laying paint on your tools and calling it good. That is one way of doing it and the military certainly didn't mind doing it that way because when one has endless supplies of paint and endless numbers of soldiers to paint things, it makes perfect sense. Of course we all have seen the inevitable and unenviable result of that; a large pile of diseased pioneer tools being auctioned off as surplus by the government because nobody could stand to look at them anymore and one more coat of paint just wasn't going to turn them around enough to pass the next inspection.

I like danish oil for e-tools because it fits well with my use/maintenance schedule. But there are other, potentially better choices when it comes to pioneer tools and so, rather than go into a long dissertation about the variety of finishes available to you, I've done the homework for you. Here's a short, to-the-point, informative link that will explain the stuff that's out there and the pros and cons of each. Pay special attention to what it takes to recover or restore a particular finish on the next maintenance cycle -

https://www.woodmagazine.com/materials- ... ood-finish

And now, a few pics (because everybody loves pics) 8)

The wood on these is done to my satisfaction. They look reasonably good and are serviceable. Why am I not going 'whole hog' on them and chasing down every tiny fleck of white paint? Well, the answer to that comes with what will happen with these. They will each be displayed with their own fully packed M1928 haversack, representing the kit for each of the crew on the M2 Half Track and this condition is, in my estimation, good enough.

Image

Image

Image

Image

An important comment regarding handles for pick mattocks, large or small. Even a tiny bit of sanding will cause your handle to sit lower in the tool head. This is not really a deal breaker for me because I wanted to keep the original handle and this particular pick mattock would still work just as well with the handle that far down in the head but, to anyone who knows about tools, it will look a bit 'off' when assembled. In the case of this handle's found condition, it was a necessary evil but, no matter. When stowed on the pack, the handle and head are separated anyway so no one will be the wiser.
Image

And finally, here we have the pioneer kit on my M109A3. This is what properly applied, top-quality polyurethane looks like after one year. The bit that is up under the shelter box and kept largely in the shade is still in pretty good shape but, at this end...not so good. One of the reasons I dislike polyurethane is it can't be touched up which means I'll have to sand these down, clean up the discolored wood with bleach AGAIN and start the refinishing process all over and I'm not happy about that. Maybe this time, I'll choose a different coating or maybe, just maybe, I'll paint 'em! :wink:
Image

SturmTyger380
Sergeant First Class
Posts: 299
Joined: October 1st, 2015, 2:31 pm
Location: Upstate SC

Re: Pioneer tools

Unread post by SturmTyger380 » February 25th, 2019, 8:22 am

I use multiple coats of Spar Varnish on wood exposed to weather.
45' MB, ??' MBT, 47' CJ2A, 48' CJ2A,
51' M38 #1, 51' M38 #2, 51' M100,
52' M37, ??' M101A1 (1st Gulf War Vet),
53' M38A1, 53' M211, 65' M151A1, 67' M416,
MVPA #31724

Post Reply