A place to post pics and descriptions of ongoing restoration projects
Moderators: rickf, raymond, Mr. Recovery
-
Francis Marion
- 2nd Lieutenant

- Posts: 877
- Joined: June 22nd, 2009, 2:29 pm
- Location: Taylorsville, UT
-
Contact:
Unread post
by Francis Marion » February 18th, 2013, 10:55 pm
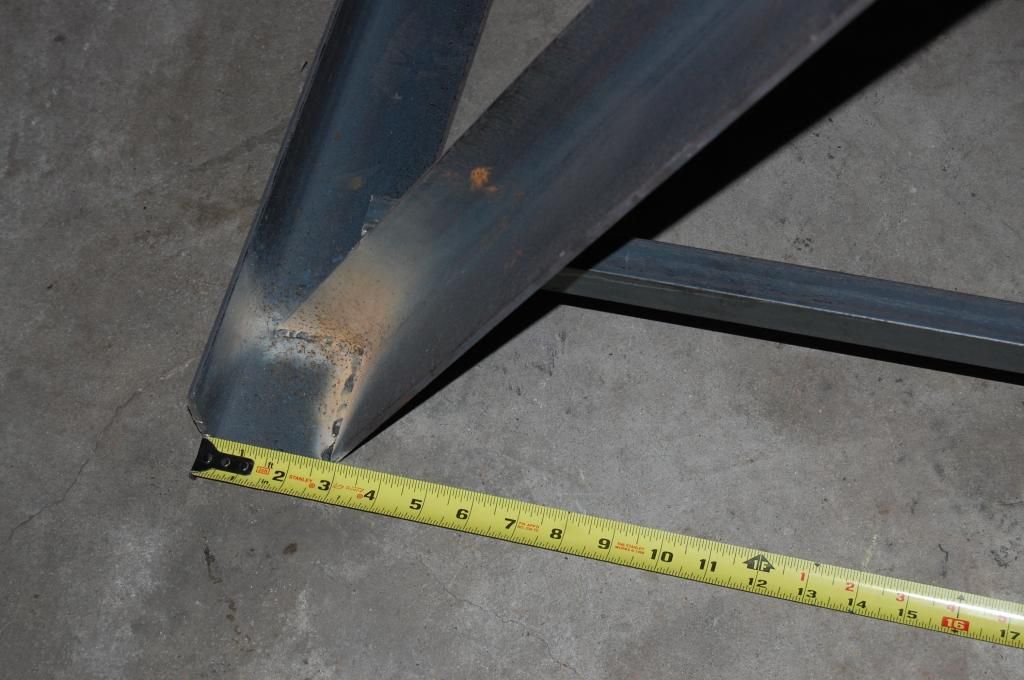
Construction material include:
3 Ea. 20' 3x2x3/16" angle iron
1 Ea. 10' 1x1x3/16" angle iron
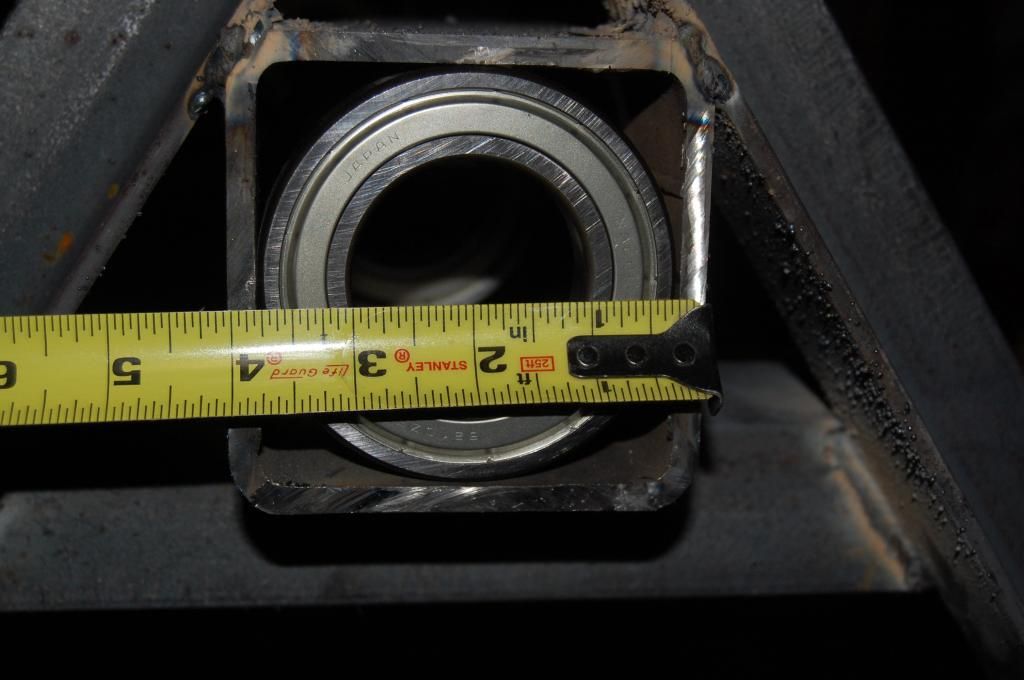
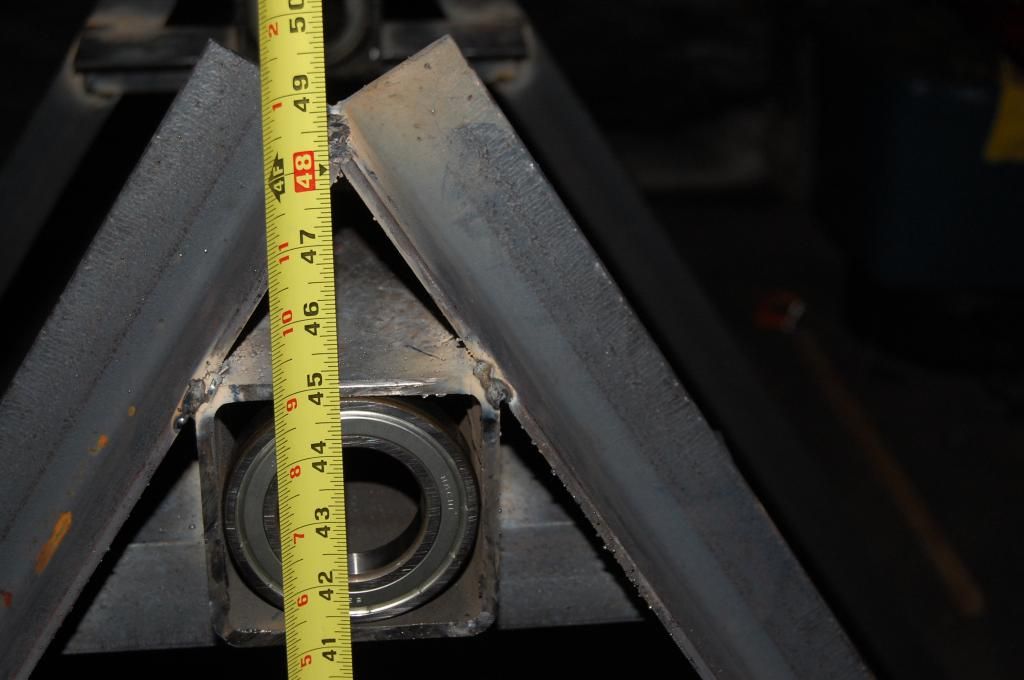
4 Ea. 50mm ID bearings
4 Ea. 4" casters
8' of 1 1/2" pipe
16" of 4" square tubing
24 Ea. 1" 3/8 bolts
24 Ea. 3/8 nuts
48 Ea. washers
Total cost is about $300
(I'm not responsible for the condition of the garage. I just got home Thursday and have had 2 family weddings and one other significant family event since then. Besides, it's been too cold at 5:00 AM - when I usually spend cleaning the garage on my first day or two back home due to jet lag - to be out in the garage.)
This is what I started with today.
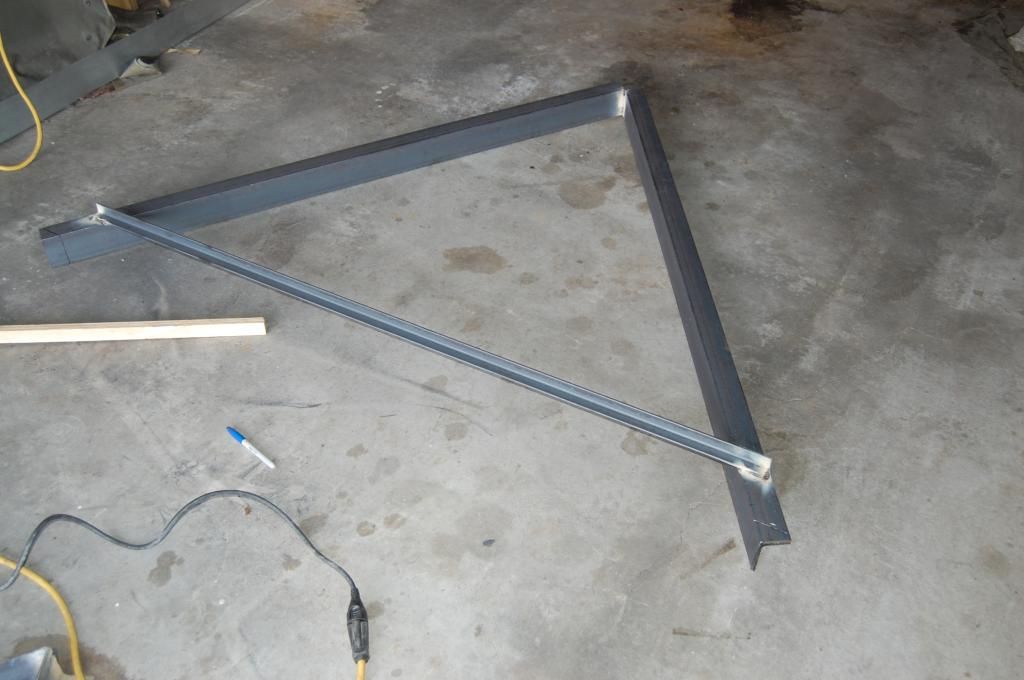
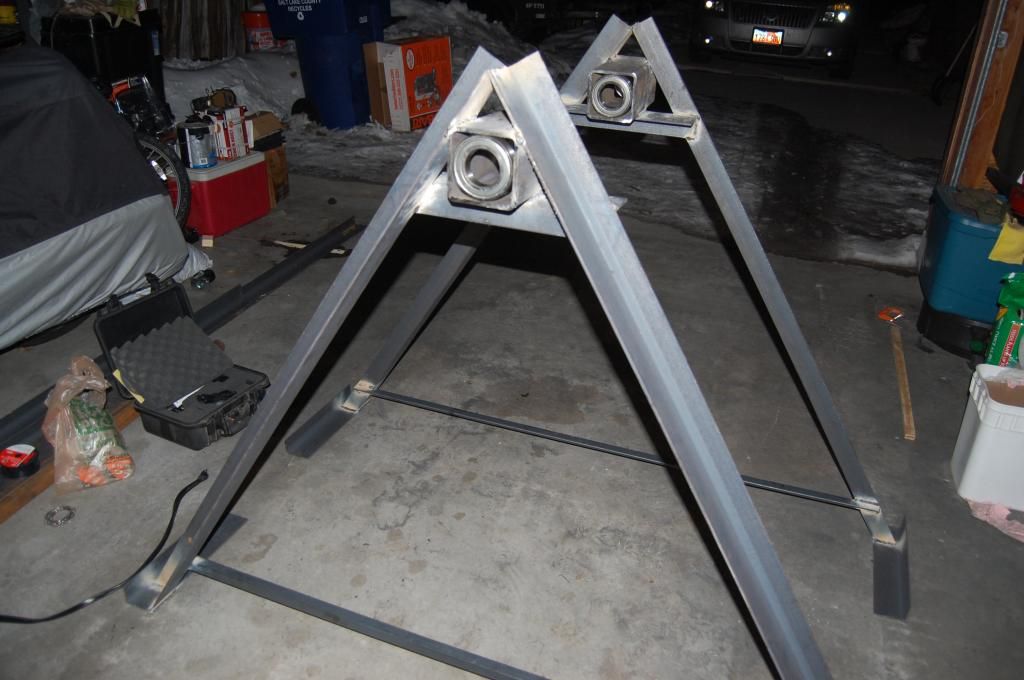
This is what I finished with.
I still have to drill holes for the casters and cross beams and figure our how I'm going to fab the mounting brackets but it's useable right now
1968 M151A1
1967 M416
-
rickf
- General

- Posts: 19765
- Joined: November 26th, 2007, 1:28 pm
- Location: Pemberton, NJ.
Unread post
by rickf » February 19th, 2013, 8:52 am
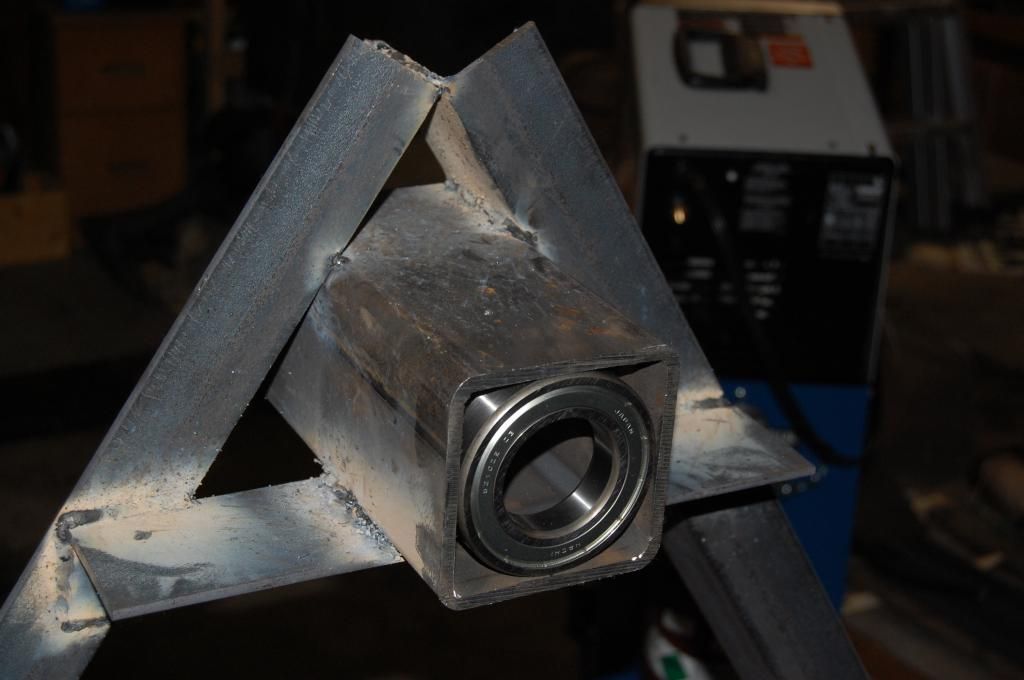
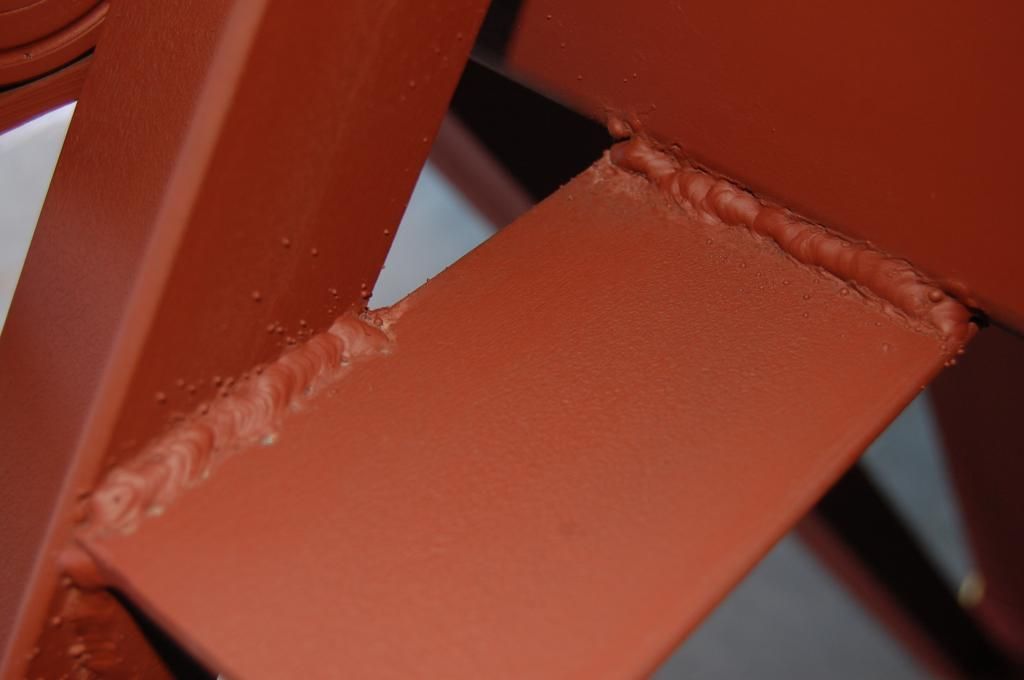
Just a suggestion, On those welds up top on the box tubing to angle.. Go over them again with more heat. They are cold welds and do not appear to have much penetration. JMHO.
Other than that it looks great, nice design. My only fear is that without anything to tie the two ends together they will have a tendency to want to rock end to end. Once the vehicle is mounted you might want to fab a couple of spreaders from one to the other along the bottom to stabilize things.
Rick
1964 M151A1
1984 M1008
1967 M416
04/1952 M100
12/1952 M100- Departed
AN/TSQ-114A Trailblazer- Gone
-
Francis Marion
- 2nd Lieutenant
- Posts: 877
- Joined: June 22nd, 2009, 2:29 pm
- Location: Taylorsville, UT
-
Contact:
Unread post
by Francis Marion » February 19th, 2013, 8:58 am
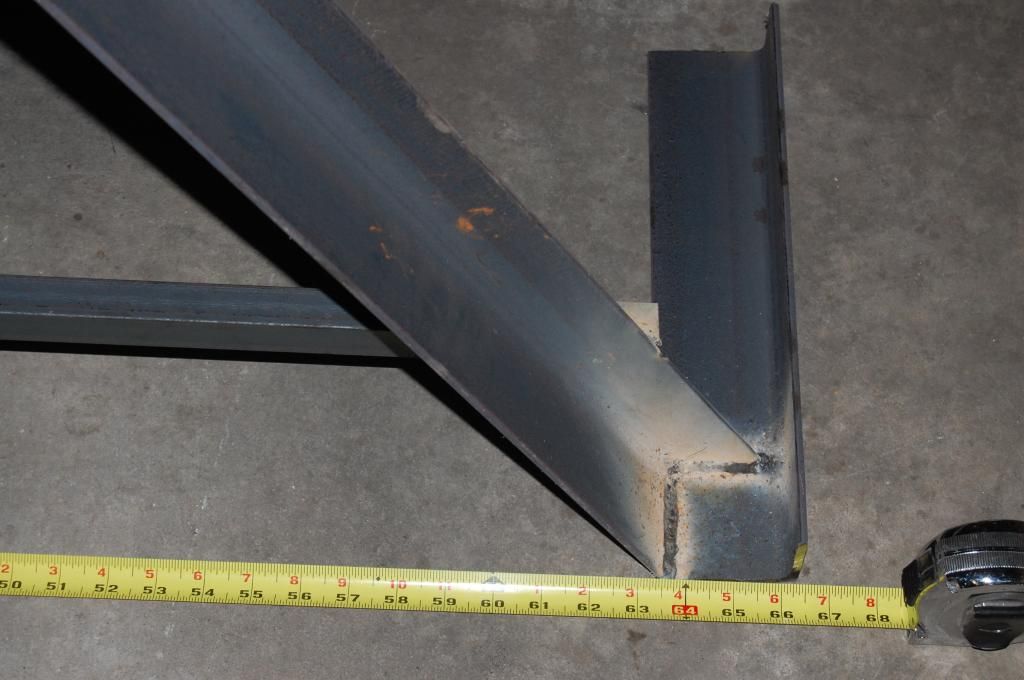
See the angle iron sitting on the ground to the side on the 2nd pic? There are 2 12' pieces that will attach to the feet.
1968 M151A1
1967 M416
-
rickf
- General
- Posts: 19765
- Joined: November 26th, 2007, 1:28 pm
- Location: Pemberton, NJ.
Unread post
by rickf » February 19th, 2013, 10:39 am
Make sure that you don't make them any longer than the end supports when the vehicle is mounted, ankle breakers! Ask me how I know this.
Rick
1964 M151A1
1984 M1008
1967 M416
04/1952 M100
12/1952 M100- Departed
AN/TSQ-114A Trailblazer- Gone
-
Mr. Recovery
- Brigadier General

- Posts: 2895
- Joined: December 5th, 2007, 9:03 pm
- Location: New Port Richey, Fl.
-
Contact:
Unread post
by Mr. Recovery » February 19th, 2013, 11:28 am
1960 M151 Run 1
1963 M151 Willys DoD 10-63 in Baltimore
1989 Alley Cat. "work in Progress"
NRA Life Member
American Legion Post 275 Fl
US Army 6 years 2nd Armored Cavalry Bindlach Germany
Colorado Army Nat. Guard 5 years
Md Air Guard 15 years active duty on C-130's
-
rickf
- General
- Posts: 19765
- Joined: November 26th, 2007, 1:28 pm
- Location: Pemberton, NJ.
Unread post
by rickf » February 19th, 2013, 1:29 pm
Did you know I would criticize his welding too?

Francis, What welder are you using? I see you are using flux core, what size?
Rick
1964 M151A1
1984 M1008
1967 M416
04/1952 M100
12/1952 M100- Departed
AN/TSQ-114A Trailblazer- Gone
-
Francis Marion
- 2nd Lieutenant
- Posts: 877
- Joined: June 22nd, 2009, 2:29 pm
- Location: Taylorsville, UT
-
Contact:
Unread post
by Francis Marion » February 19th, 2013, 4:13 pm
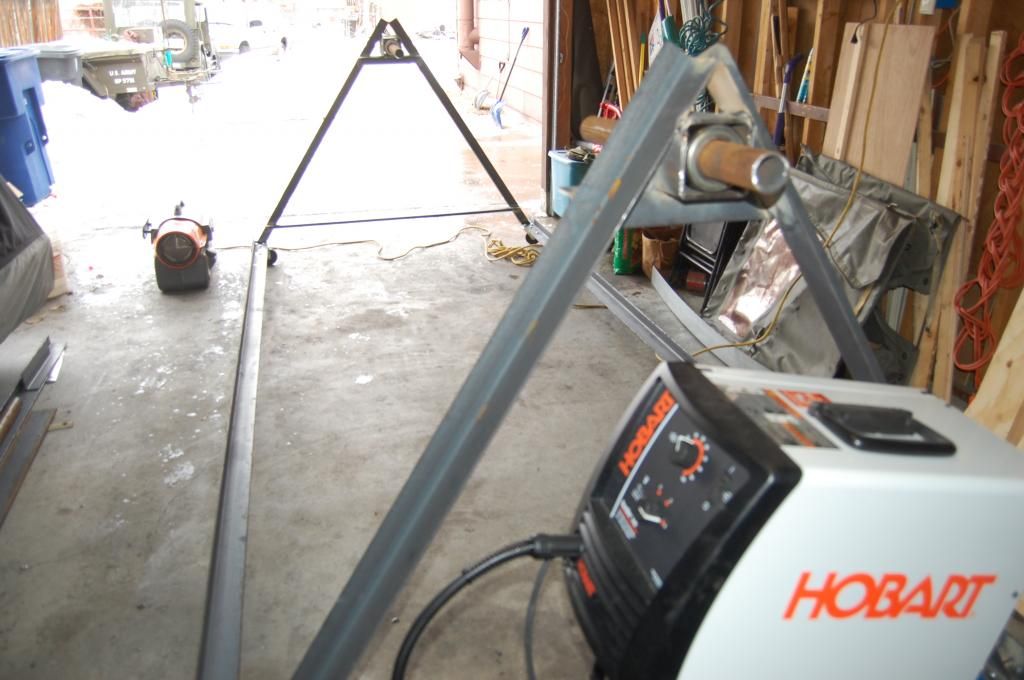
I picked up a
Hobart 140 last time I was home but just pulled it out of the box the other day. You can see the box in one of the pics above. I'm running .030 wire in it for this job.
Seeing that this is the first time I've ever done any arc welding and the 140 is only rated for up to 1/4", I'm hoping it all stays together.
1968 M151A1
1967 M416
-
Francis Marion
- 2nd Lieutenant
- Posts: 877
- Joined: June 22nd, 2009, 2:29 pm
- Location: Taylorsville, UT
-
Contact:
Unread post
by Francis Marion » February 19th, 2013, 8:45 pm
It's finished. Just need to make the mounting brackets. Does anyone have the instructions for making them?
1968 M151A1
1967 M416
-
rickf
- General
- Posts: 19765
- Joined: November 26th, 2007, 1:28 pm
- Location: Pemberton, NJ.
Unread post
by rickf » February 19th, 2013, 9:10 pm
Mr. Recovery made up some nice ones, I thought they were on this thread. If not they will be. That thing is really loooong! I see the rotator pipes are pointing down, is that just from the angle of the ends? On your welder I see you have the heat all the way up but your wire speed is only halfway. What you do is get a piece of scrap and with one hand on the wire speed dial and the other on the gun start welding and cranking the speed up as you are welding. At the point it starts pushing the wire out so fast that it is pushing the gun back then turn it down just a hair and that is the max you will get out of that machine. You will find it puts out more heat that way. A 140 is pretty light for that work but you can do it with two passes, three on the box tubing. Go over all of your welds now with a critical eye because you do not want this thing to fail on you with a vehicle on it. And right now you have no paint to hide anything in the welds or to clean off to reweld them. There is no shame in doing it twice the first time and get it right so you don't have to do it a second time.
1964 M151A1
1984 M1008
1967 M416
04/1952 M100
12/1952 M100- Departed
AN/TSQ-114A Trailblazer- Gone
-
Francis Marion
- 2nd Lieutenant
- Posts: 877
- Joined: June 22nd, 2009, 2:29 pm
- Location: Taylorsville, UT
-
Contact:
Unread post
by Francis Marion » February 19th, 2013, 10:52 pm
The M151 is just over 11' and I cut the spreaders on the bottom to 12'. I'm still considering cutting them to make them more adjustable. The rotor pipes do point down a little but not as much as that image suggests. This novice welder didn't get them quite as square as i would have liked but a couple washers as spacers down below should square it up.
It was hard enough getting the welding tip in those little corners so grinding them out is not likely to happen. I did plan on most of the weight being supported on the angle iron and made sure those welds were the best I could muster. I'll still give it another inspection with fresh eyes when I can get back to it. I also don't fully trust myself as a welder so the jeep will be pretty stripped before mounting it and even then I'll make sure it can't fall more than an inch until I give it a stress test.
1968 M151A1
1967 M416
-
Mr. Recovery
- Brigadier General
- Posts: 2895
- Joined: December 5th, 2007, 9:03 pm
- Location: New Port Richey, Fl.
-
Contact:
Unread post
by Mr. Recovery » February 20th, 2013, 2:14 am
Looks good, the fun part is getting the mutt up onto the pipe mount by yourself.


"Just need to make the mounting brackets. Does anyone have the instructions for making them?"
I posted them with the other photos, the front one mounts to the bumper holes, it is welded to the round pipe, the rear one is just a flat plate welded to the round pipe and bolts to the pintal hook holes. I bolted the mounts with the pipe onto the mutt first then, sat the tub on saw horses then, used the engine hoist to lift it up until I could slide the front and rear triangle over the pipes.

1960 M151 Run 1
1963 M151 Willys DoD 10-63 in Baltimore
1989 Alley Cat. "work in Progress"
NRA Life Member
American Legion Post 275 Fl
US Army 6 years 2nd Armored Cavalry Bindlach Germany
Colorado Army Nat. Guard 5 years
Md Air Guard 15 years active duty on C-130's
-
salt6
- 2nd Lieutenant
- Posts: 820
- Joined: April 6th, 2008, 12:18 am
- Location: NE Okla
-
Contact:
Unread post
by salt6 » February 20th, 2013, 3:11 am
"People sleep peaceably in their beds at night only because rough men stand ready to do violence on their behalf."
George Orwell
-------------------------------------
"I once was one of those men."
salt6
http://www.mg42.us
-
Horst
- Colonel

- Posts: 1962
- Joined: December 9th, 2007, 6:21 am
- Location: Munich, Germany
Unread post
by Horst » February 20th, 2013, 3:19 am
Looking at no braces at all where the triangles meet the long spreaders I would not want to be close to that thing when you hang a body in it. Most of the welds are not looking really strong too but that might be a picture thing too.
Horst
1972 USMC M151A2 w/ROPS (ex Barstow) and M416
1962 M201 and trailer
1966 GTO,1982 E350 Skoolie, 1987 SJ413, 1987 911
Gone: 2xM35A2c, Unimog 404S, Hanomag AL28, DKW Munga
-
Fil Bonica
- Brigadier General
- Posts: 2607
- Joined: December 9th, 2007, 10:49 am
- Location: ~ Heaven ~
Unread post
by Fil Bonica » February 20th, 2013, 7:23 pm
Made a set of the mounts show in the manual for the replacement body.
Used a damaged MC bumper for the front and apiece of plate for the rear with holes spaced from a pintle
Both ends had 2 in Id pipe welded on the ends.
Too bad you weren't closer or you could have borrowed it.
Fil Bonica
K1ABW
-
Francis Marion
- 2nd Lieutenant
- Posts: 877
- Joined: June 22nd, 2009, 2:29 pm
- Location: Taylorsville, UT
-
Contact:
Unread post
by Francis Marion » March 1st, 2013, 5:29 pm
OK, I reworked those welds. Thanks to Rick for showing me where to find welding tips and tutorials.
1968 M151A1
1967 M416


