My M 151 A1 Restoration Project
Moderators: rickf, raymond, Mr. Recovery
-
Hambone
- Brigadier General

- Posts: 2506
- Joined: October 1st, 2010, 12:19 am
- Location: El Dorado, Arkansas
Re: My M 151 A1 Restoration Project
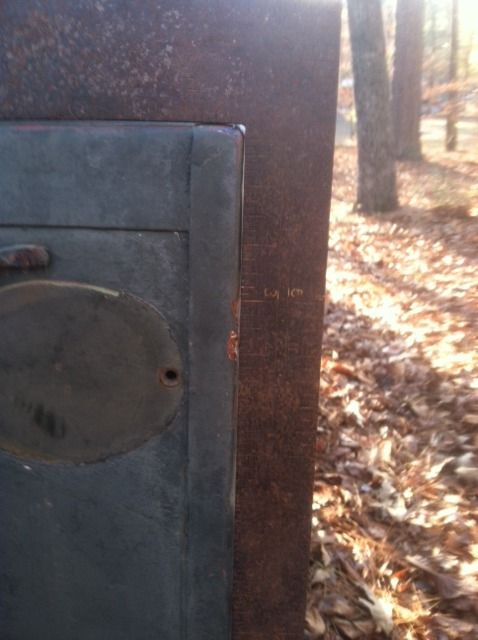
I know it's hard to tell by the photo but the straightest A1 I have is pretty square compensating for the ridge on the rear panel, measured 2 others and the are all within a 1/4", plus it's dark, holding square with one hand and taking picture with the other, also battling a hangover.  I can get better pics tomorrow if needed.


Re: My M 151 A1 Restoration Project
STILL have a hangover!? That must have really, REALLY been a party. Maybe they won't tear up your invitation for next year, you were probably the main attraction.
1964 M151A1
1984 M1008
1967 M416
04/1952 M100
12/1952 M100- Departed
AN/TSQ-114A Trailblazer- Gone
1984 M1008
1967 M416
04/1952 M100
12/1952 M100- Departed
AN/TSQ-114A Trailblazer- Gone
-
lpcoating
- Brigadier General
- Posts: 2030
- Joined: February 19th, 2013, 11:38 pm
- Location: Mansfield, PA
- Contact:
Re: My M 151 A1 Restoration Project
I hear what your saying and I looked things over pretty good trying to figure out what is going on. The relationship between the two parts is as follows:rickf wrote:I just noticed you wanted the fender to rear panel. I will have to take the top loose for that so that will have to wait another day. Are you sure that is not a result of all of the other work you did on the rear end? Just doesn't make sense to do that when everything else is square corners and bends.
The rear panel location is set from the rear cross member which is mounted to the (4) frame rails - outer rails that the spring pockets are in, inner rails that mount the rear differential. These parts fit "snug" and our panel dimensions match the original. Although I repaired one of the frame rails (back section only) I did not alter anything else. And, the "X" cut was done in front of the rear fender support. So, the vertical location of the back of the rear fender tops is locked in by the rear panel. The mid section location is set by the fender supports - I did not mess around with them and again, they are behind the "X" cut. So, with the fender tops located by the above, angle is established. Nothing I'm going to do about it but like you said Rick, doesn't make sense it would be designed that way. Maybe it was built at 4:30 on a Friday??
Guy
M151 Body Panels - http://www.m151bodypanels.com/
'68 A1 - Under full resto
'68 A1 - Under full resto
Re: My M 151 A1 Restoration Project
Or maybe Hamm's relative built it after the office party. 
1964 M151A1
1984 M1008
1967 M416
04/1952 M100
12/1952 M100- Departed
AN/TSQ-114A Trailblazer- Gone
1984 M1008
1967 M416
04/1952 M100
12/1952 M100- Departed
AN/TSQ-114A Trailblazer- Gone
-
Hambone
- Brigadier General
- Posts: 2506
- Joined: October 1st, 2010, 12:19 am
- Location: El Dorado, Arkansas
Re: My M 151 A1 Restoration Project
I would have had a hard time doing body work Tuesday night but I bet I could have told you how to do it,rickf wrote:Or maybe Hamm's relative built it after the office party.


Re: My M 151 A1 Restoration Project
HOW DARE YOU TALK OF THE HOLY GRAIL OF RULERS THAT WAY!!!!!!!!!!!!!!!!!!!!
Nothing is as old or as good as Dans ruler, Well, Dan may be as old.
Nothing is as old or as good as Dans ruler, Well, Dan may be as old.
1964 M151A1
1984 M1008
1967 M416
04/1952 M100
12/1952 M100- Departed
AN/TSQ-114A Trailblazer- Gone
1984 M1008
1967 M416
04/1952 M100
12/1952 M100- Departed
AN/TSQ-114A Trailblazer- Gone
-
lpcoating
- Brigadier General
- Posts: 2030
- Joined: February 19th, 2013, 11:38 pm
- Location: Mansfield, PA
- Contact:
Re: My M 151 A1 Restoration Project
Thanks for the pictures Buddy. Well, looks like mine is special as I can't see an obvious reason why its out that far. Guess what? Nothing I'm going to worry about and when the tire and fuel can are hanging off the back it won't be an issue.
Guy
Guy
M151 Body Panels - http://www.m151bodypanels.com/
'68 A1 - Under full resto
'68 A1 - Under full resto
Re: My M 151 A1 Restoration Project
I had mine out yesterday but I did not take the top off to check it because Buddy's are pretty pristine and mine had pretty bad rear corner damage on both sides. I did not do the body work on it so I have no way of knowing what is there until I get to replacing and repairing back there.
1964 M151A1
1984 M1008
1967 M416
04/1952 M100
12/1952 M100- Departed
AN/TSQ-114A Trailblazer- Gone
1984 M1008
1967 M416
04/1952 M100
12/1952 M100- Departed
AN/TSQ-114A Trailblazer- Gone
-
lpcoating
- Brigadier General
- Posts: 2030
- Joined: February 19th, 2013, 11:38 pm
- Location: Mansfield, PA
- Contact:
Re: My M 151 A1 Restoration Project
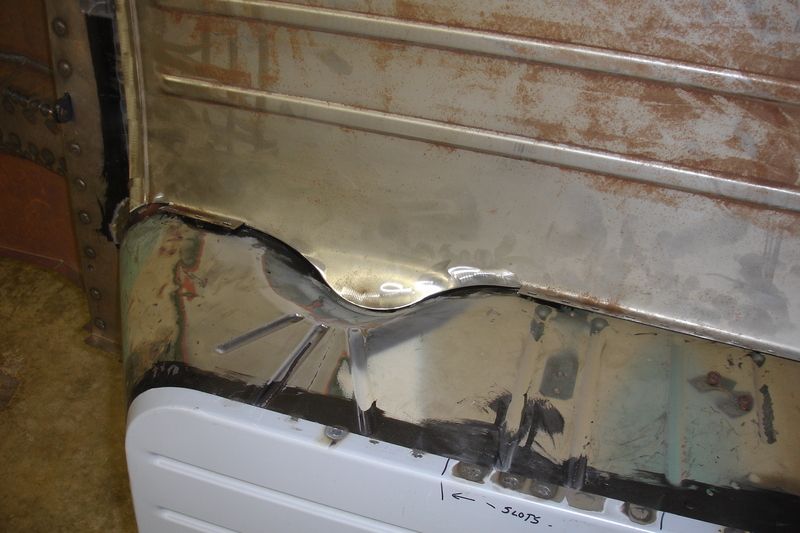
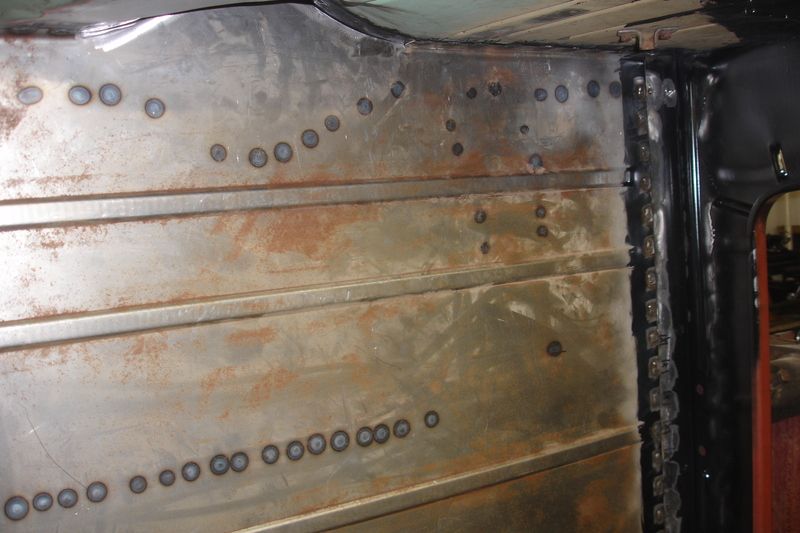
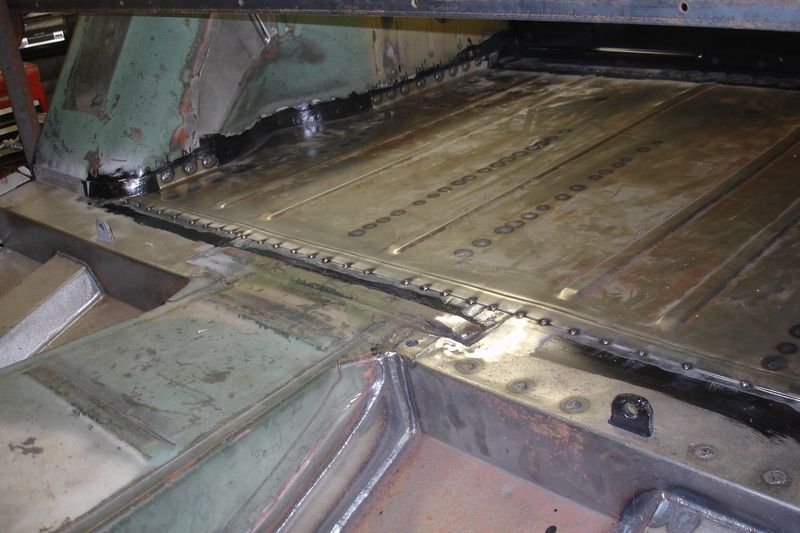
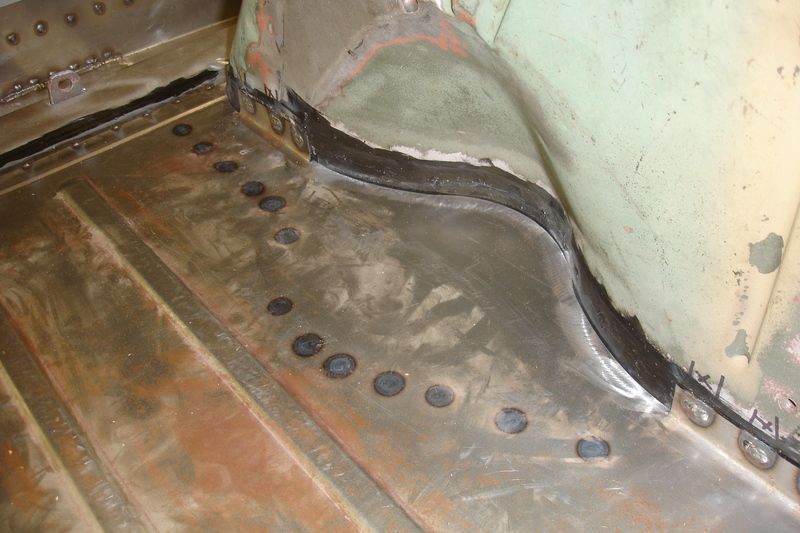
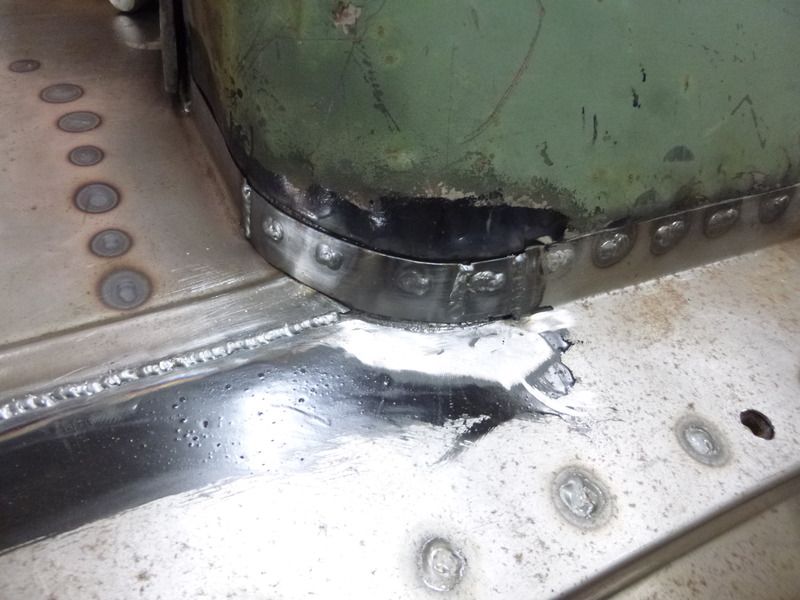
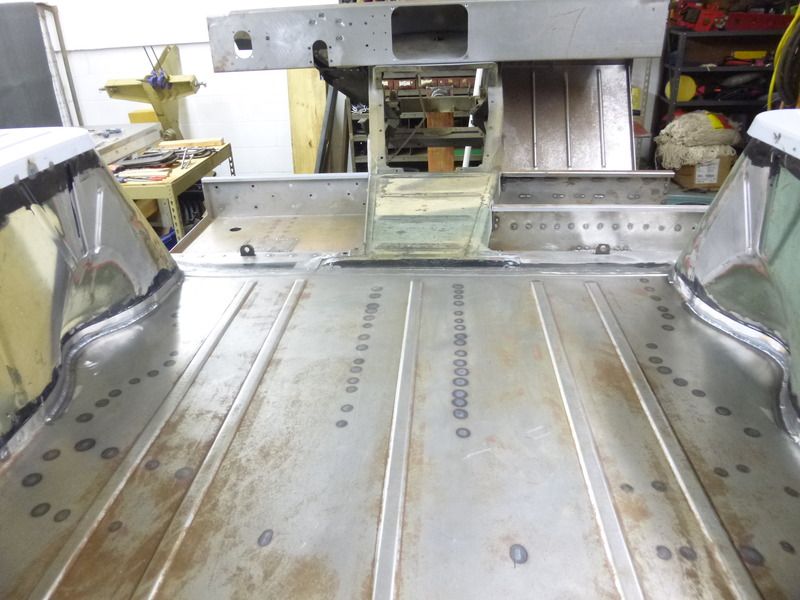
Rear Floor Install:
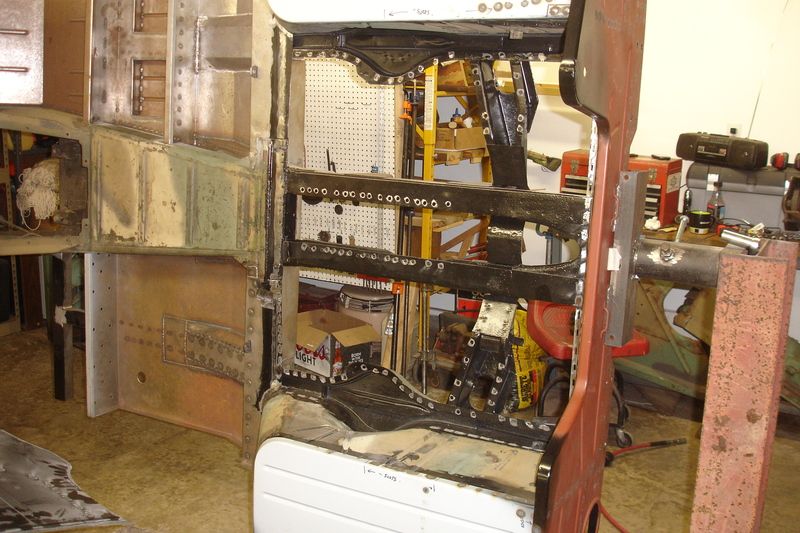
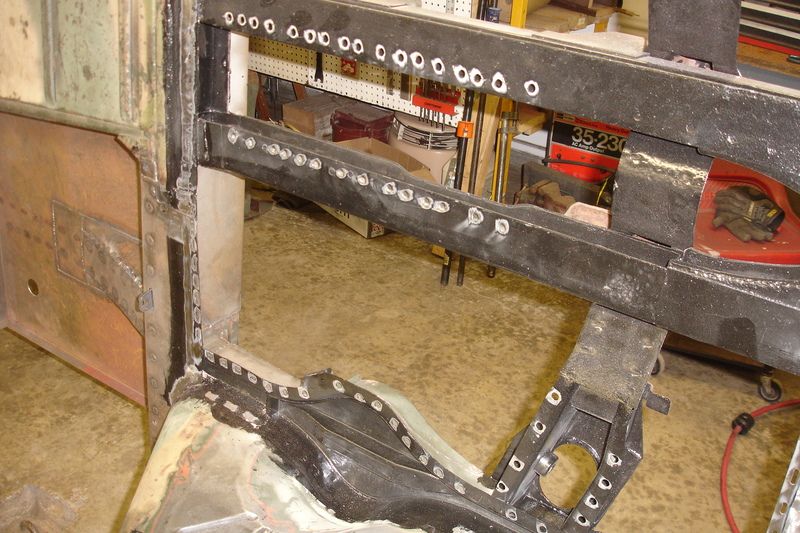
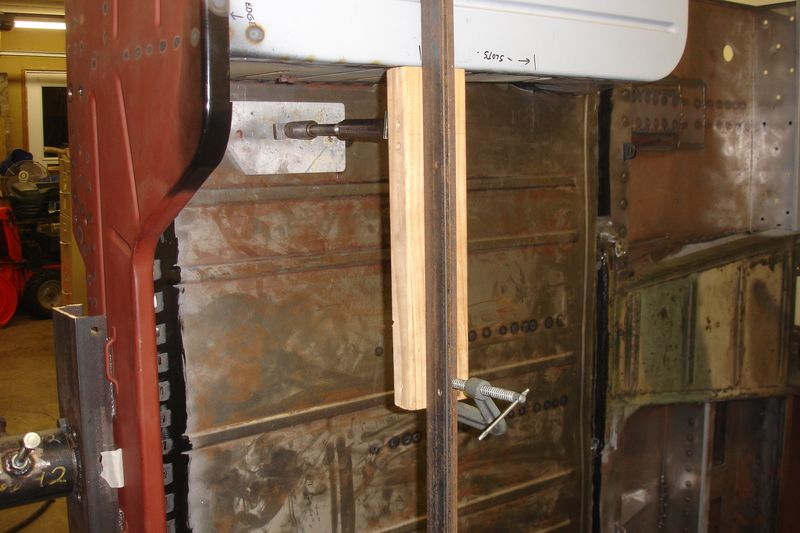
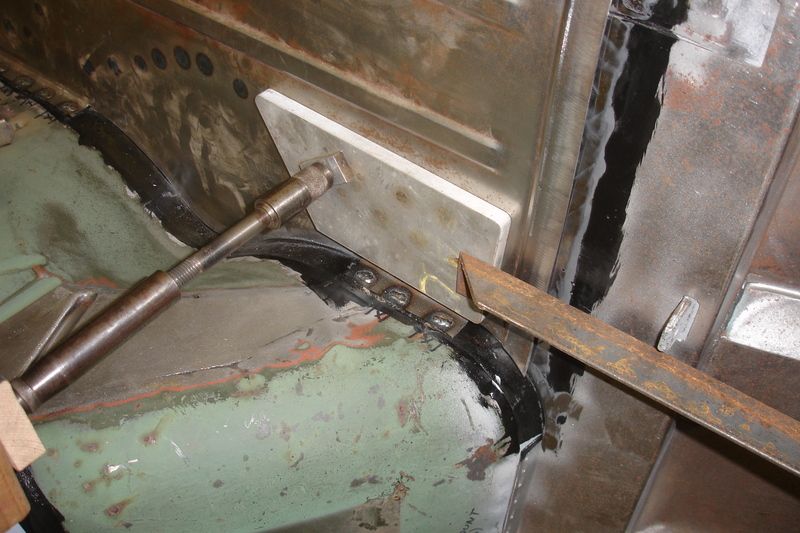
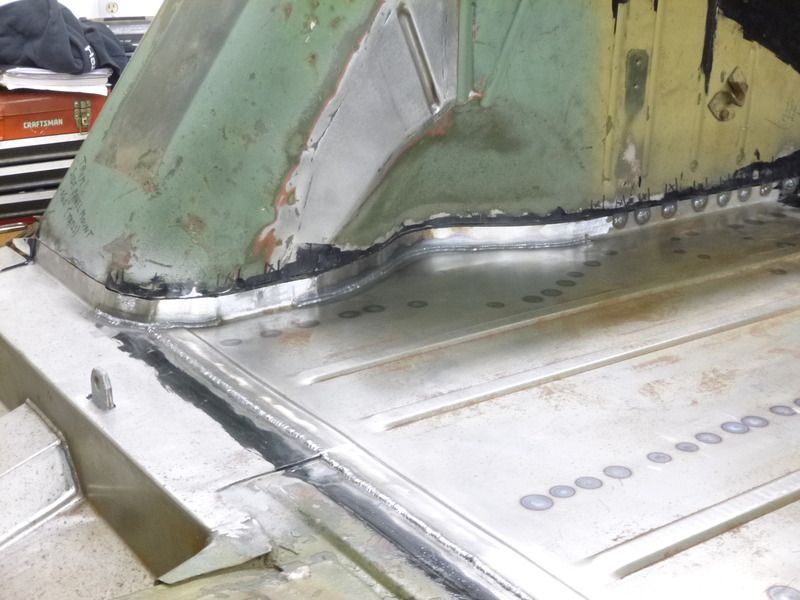
This area is bent up from the floor being installed. With the design of the spring pocket area it fits pretty tight.
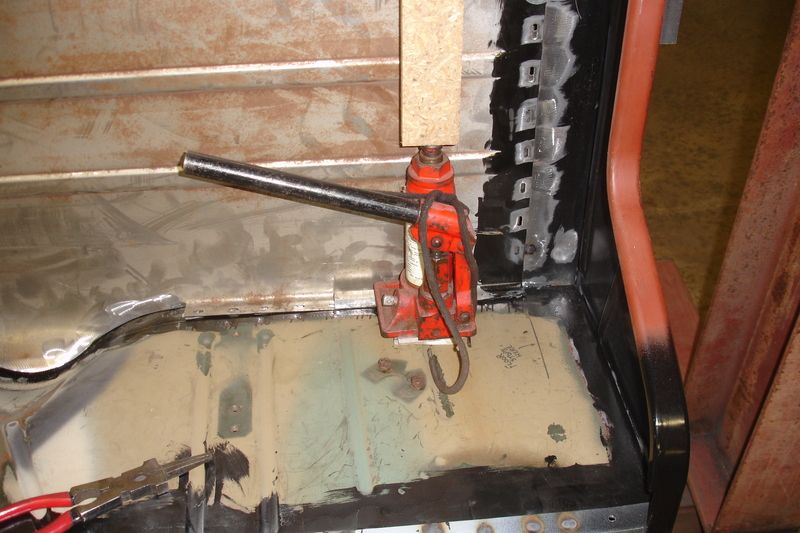
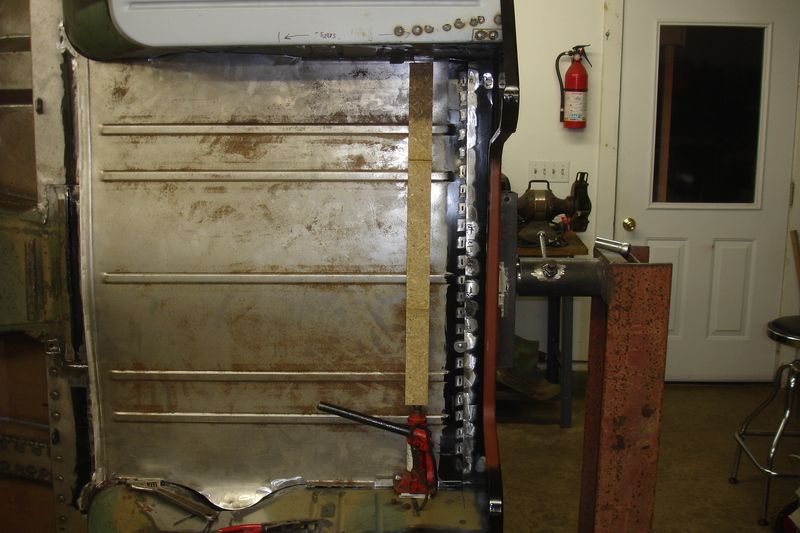
Bottle jack used to ensure tight fit up before plug welding
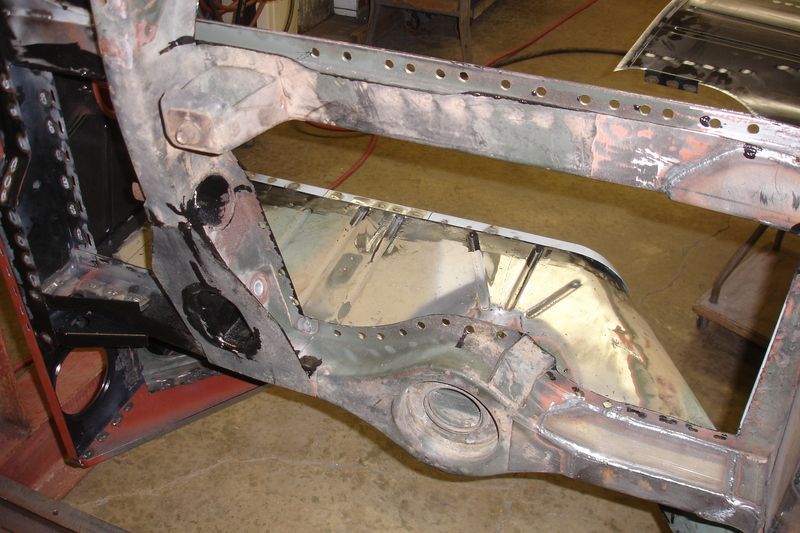
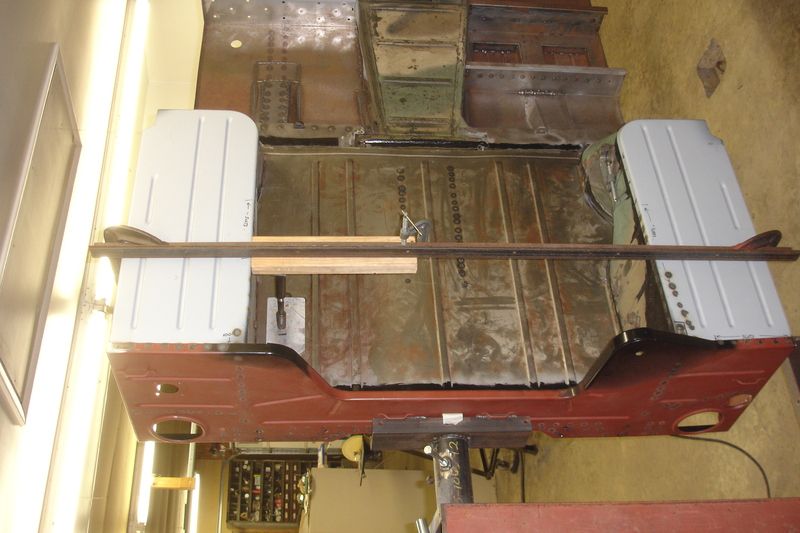
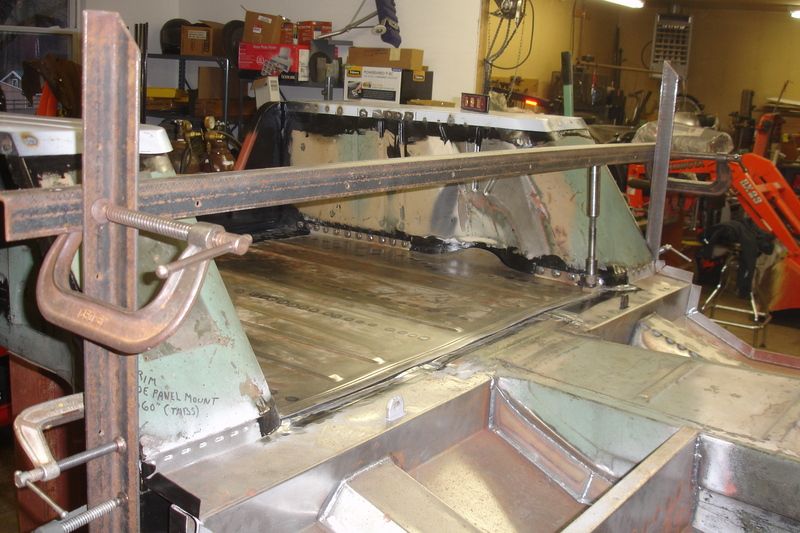
View from bottom - body upside down on rotisserie


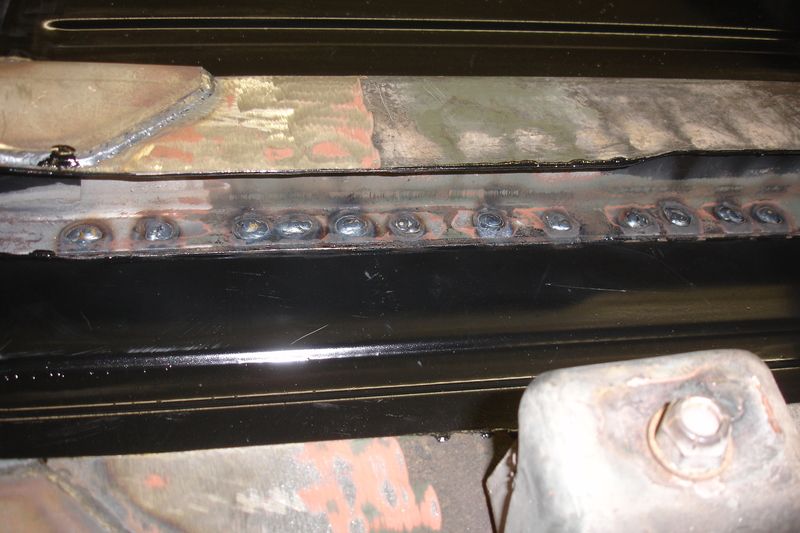
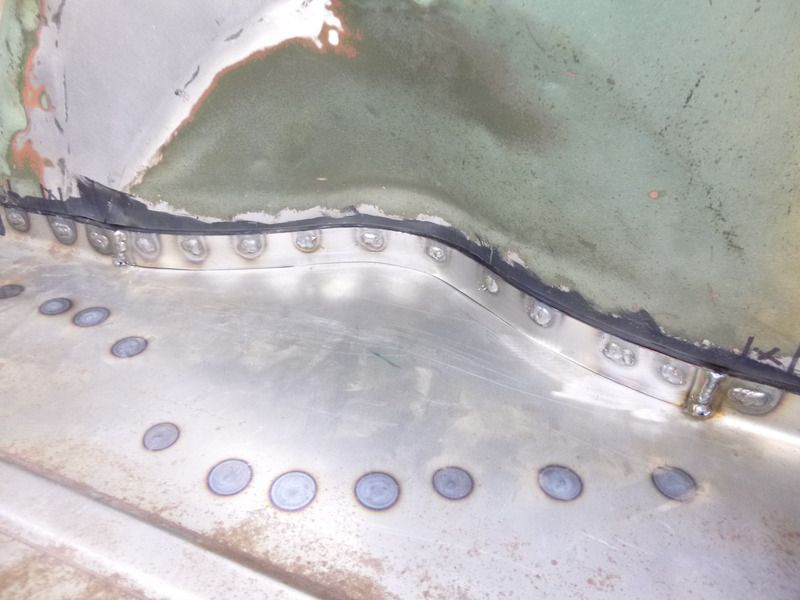
View from bottom center rails after plug welding
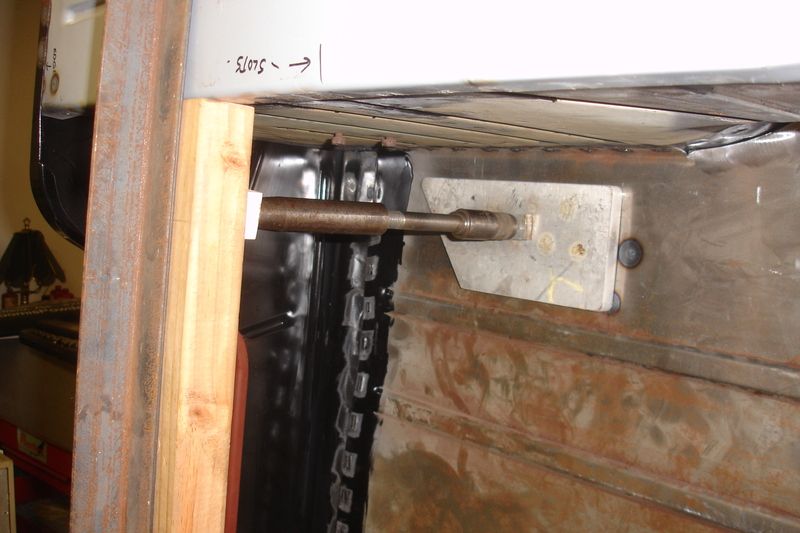
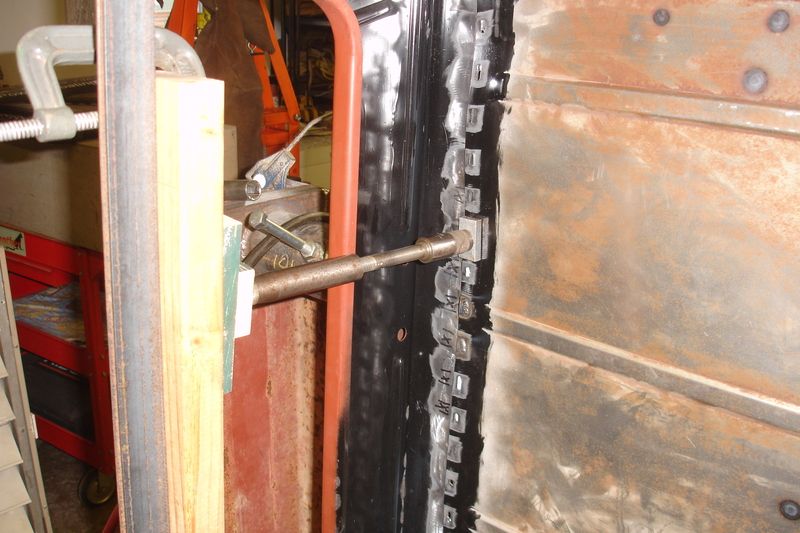
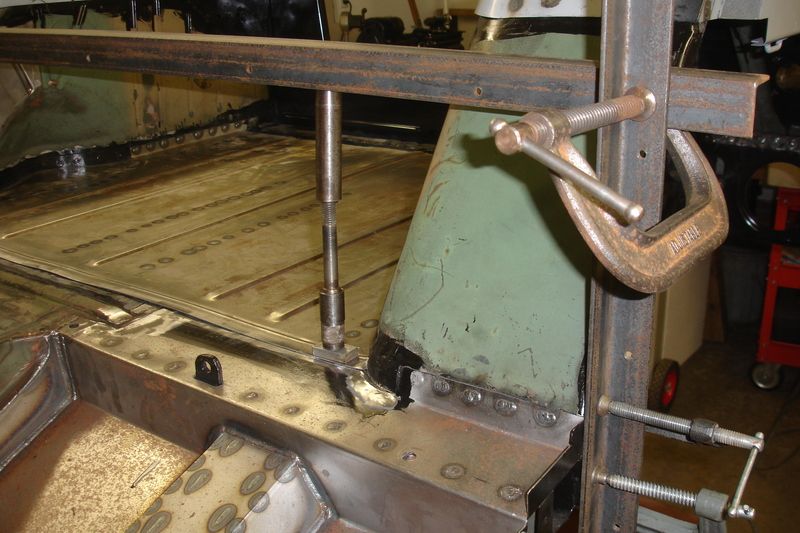
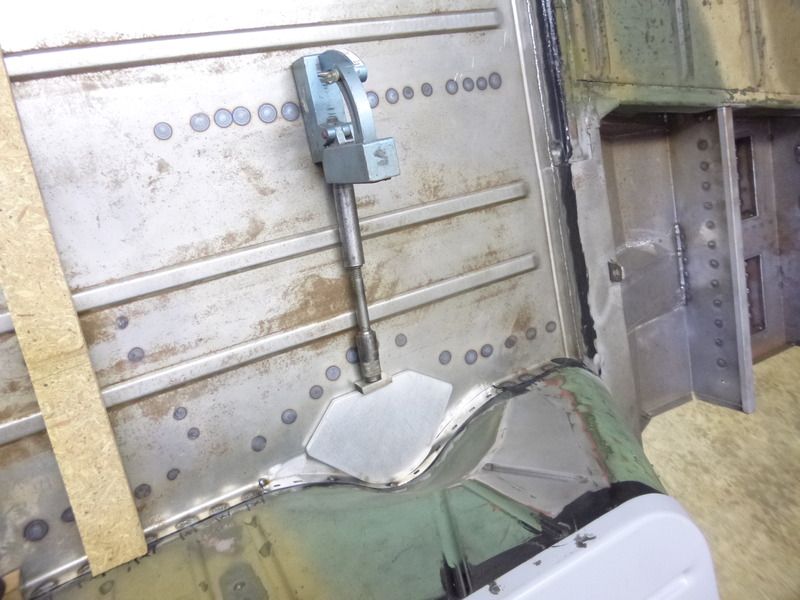
Holding floor down with jack screw
Another view from bottom
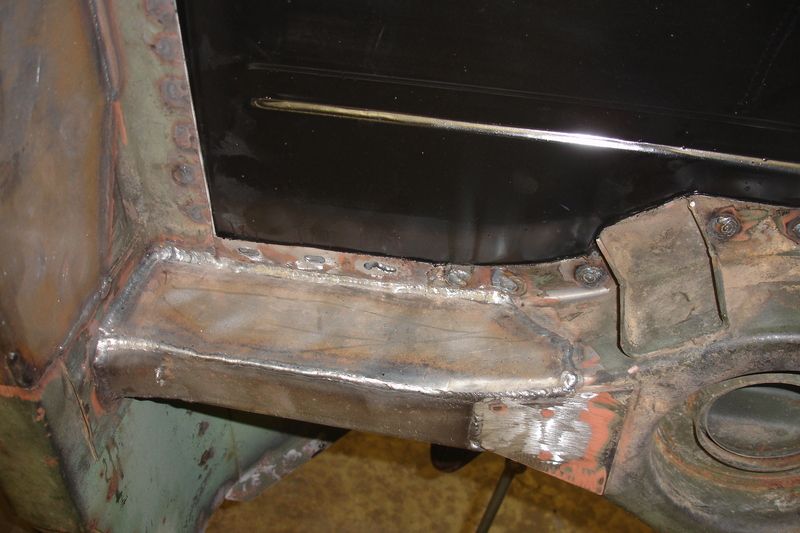
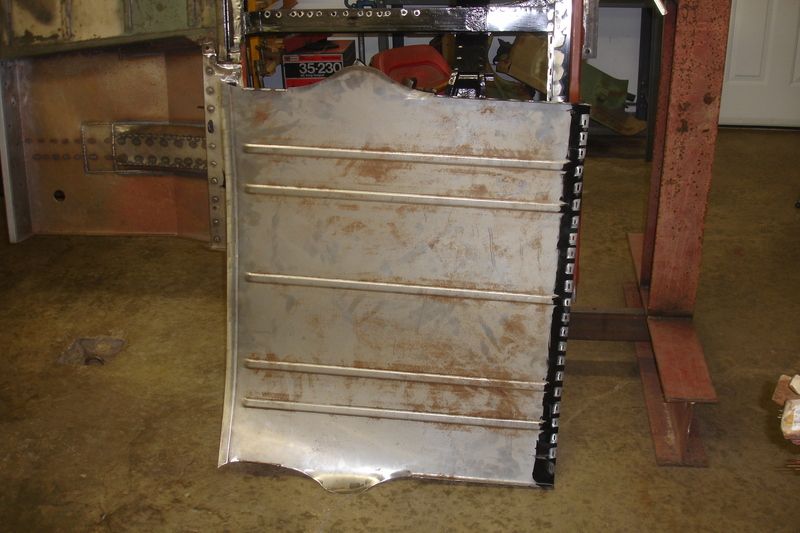
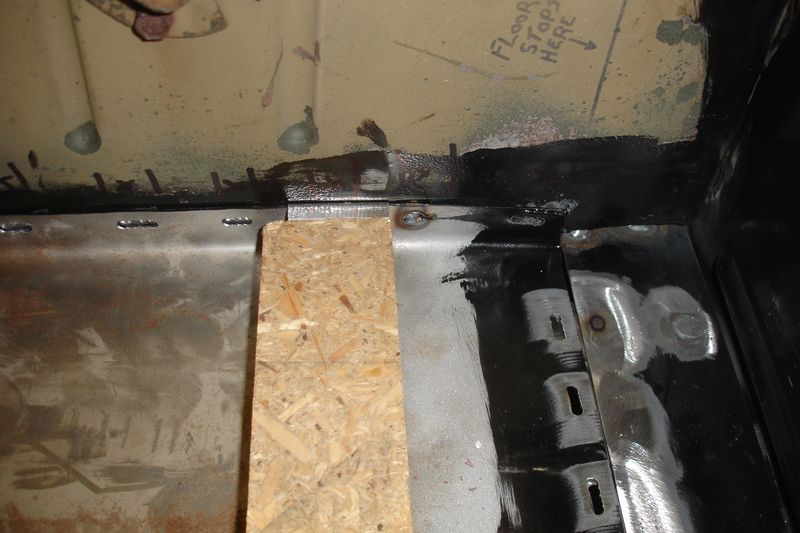
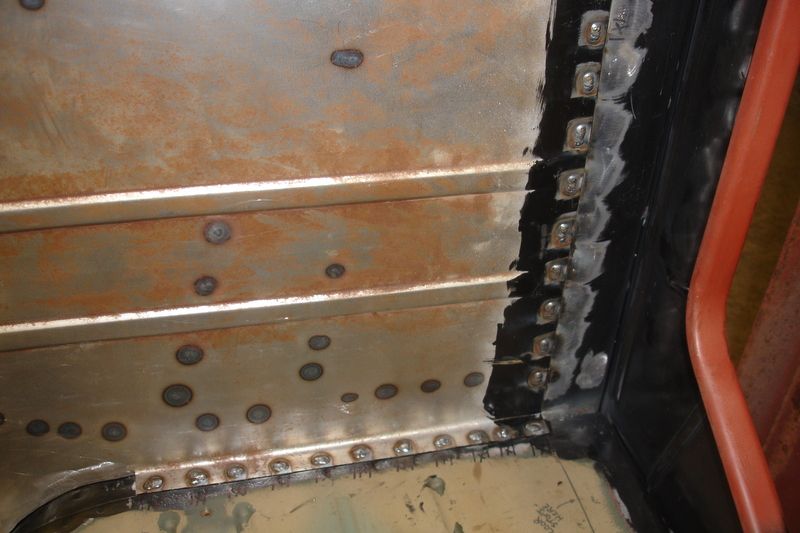
Back edge. I messed up here. I worked on the floor some time ago and should not have installed the slots for plug welding as I could have welded most of them from the bottom on this edge. Little extra grinding so not a big deal


This area is bent up from the floor being installed. With the design of the spring pocket area it fits pretty tight.

Bottle jack used to ensure tight fit up before plug welding


View from bottom - body upside down on rotisserie


View from bottom center rails after plug welding

Holding floor down with jack screw


Another view from bottom

Back edge. I messed up here. I worked on the floor some time ago and should not have installed the slots for plug welding as I could have welded most of them from the bottom on this edge. Little extra grinding so not a big deal


M151 Body Panels - http://www.m151bodypanels.com/
'68 A1 - Under full resto
'68 A1 - Under full resto
-
lpcoating
- Brigadier General
- Posts: 2030
- Joined: February 19th, 2013, 11:38 pm
- Location: Mansfield, PA
- Contact:
Re: My M 151 A1 Restoration Project
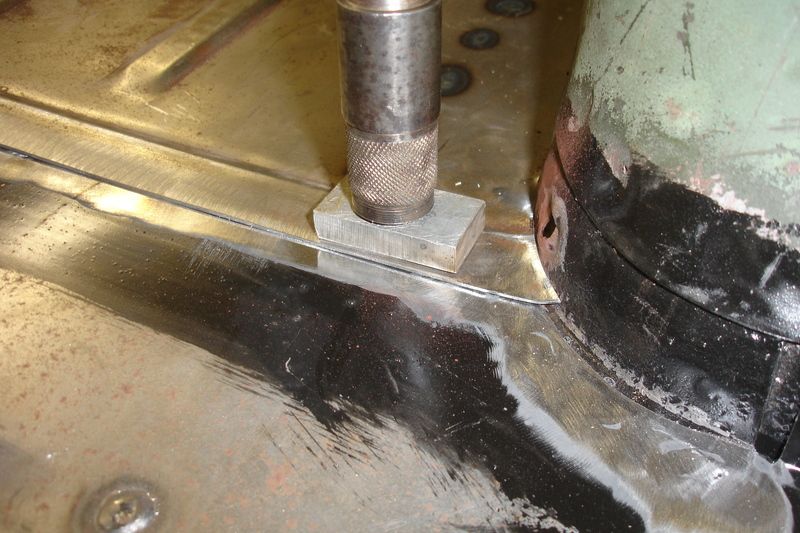
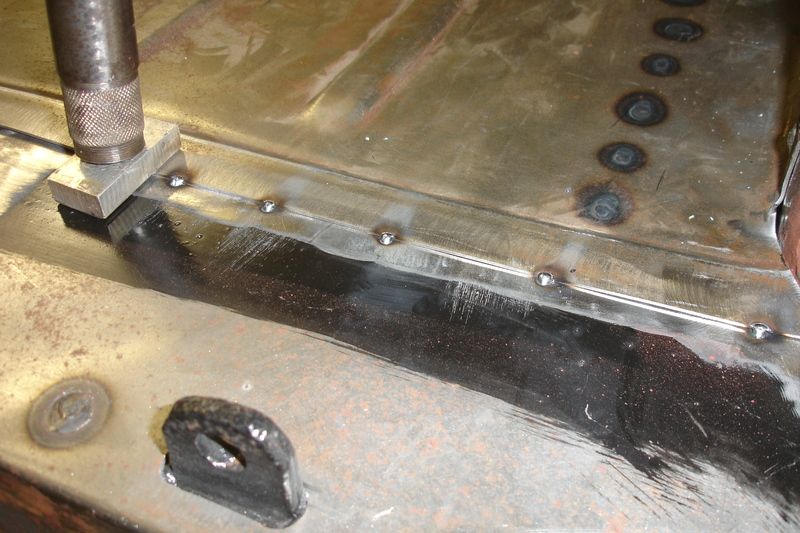
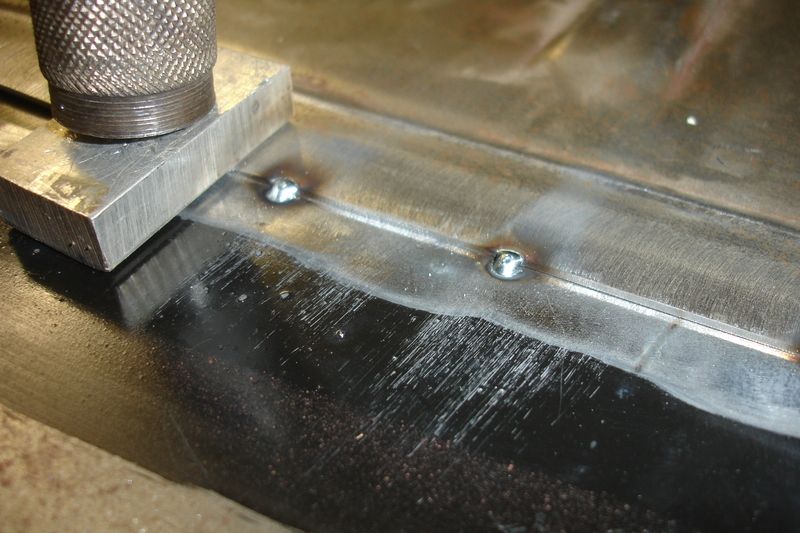
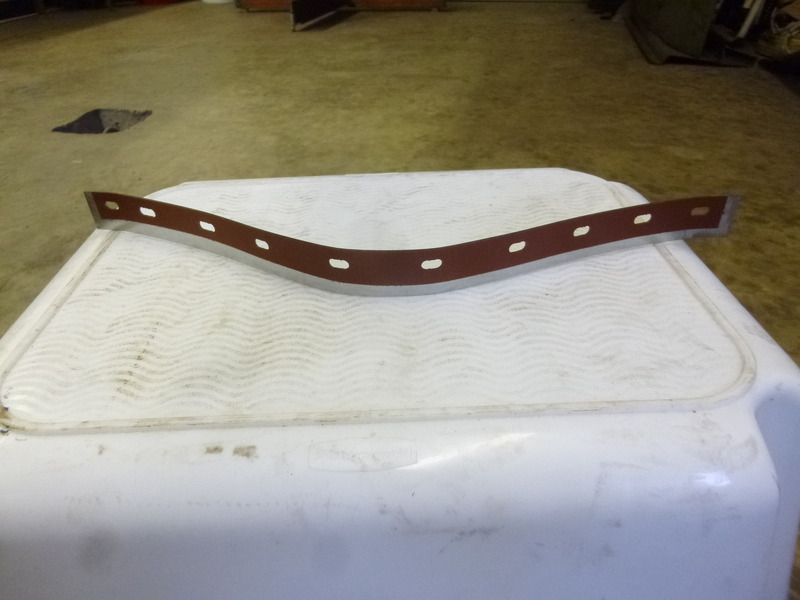
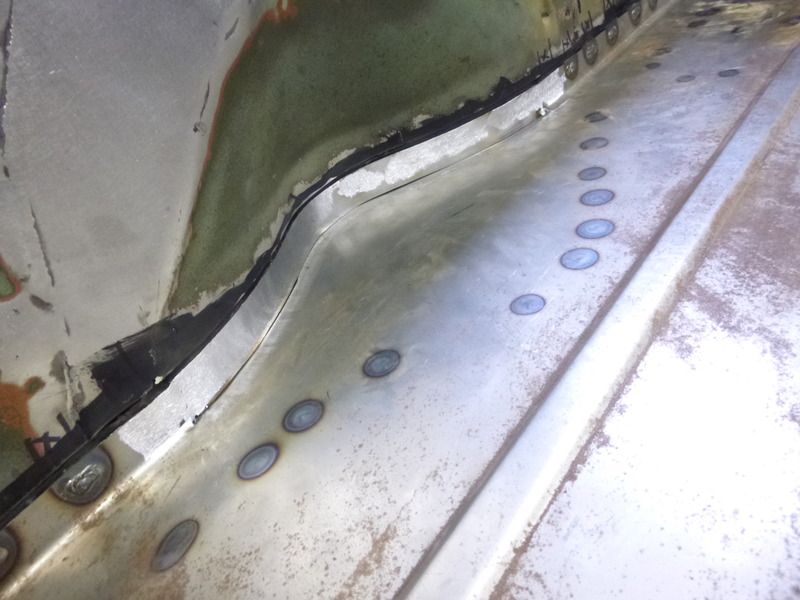
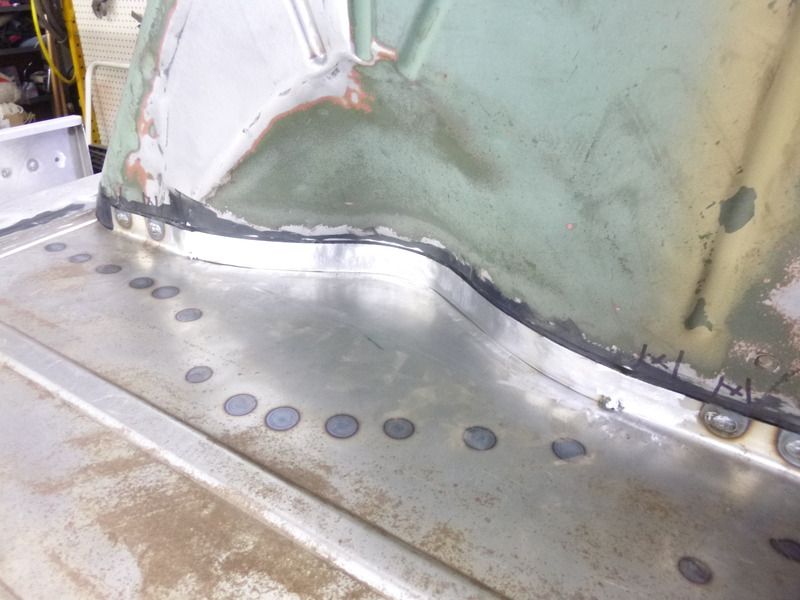
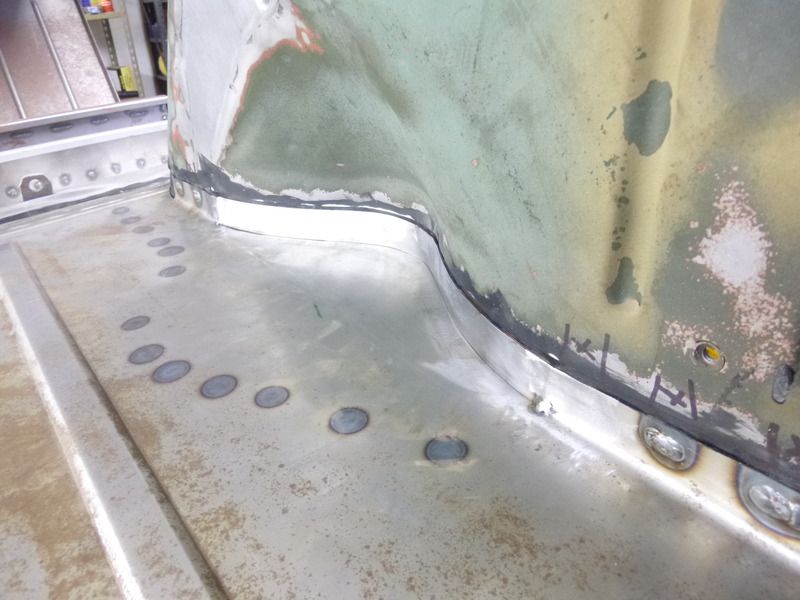
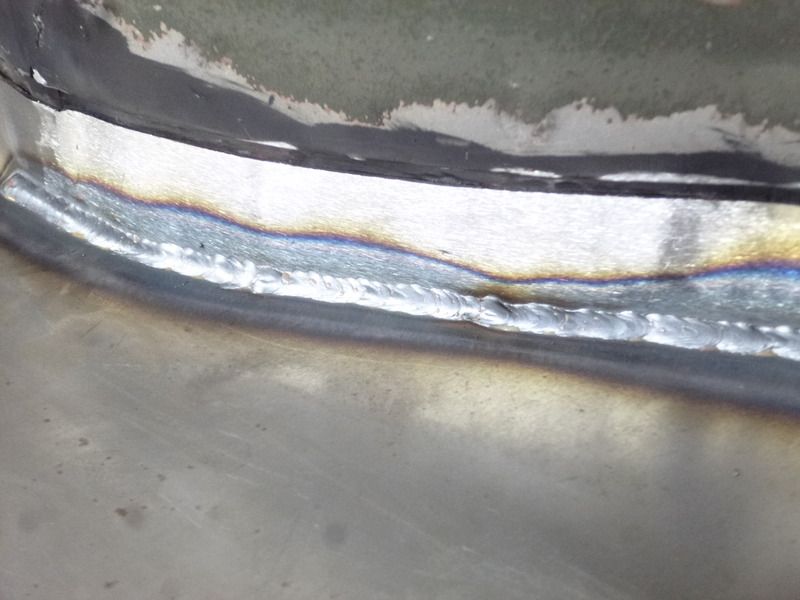
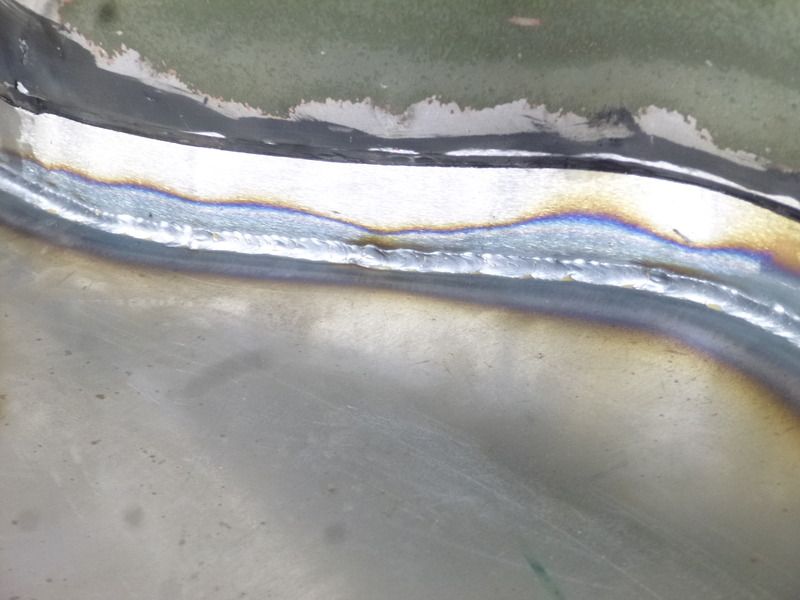
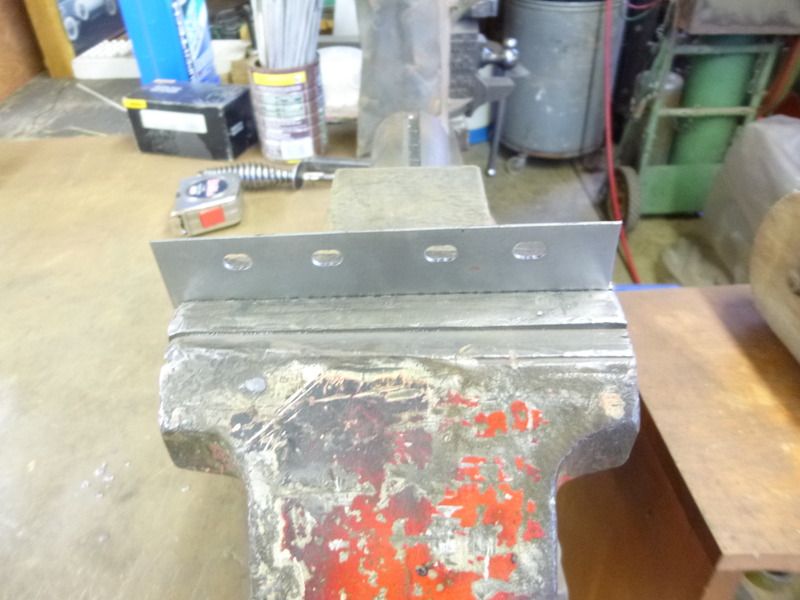
Working on the front edge:


M151 Body Panels - http://www.m151bodypanels.com/
'68 A1 - Under full resto
'68 A1 - Under full resto
-
lpcoating
- Brigadier General
- Posts: 2030
- Joined: February 19th, 2013, 11:38 pm
- Location: Mansfield, PA
- Contact:
Re: My M 151 A1 Restoration Project
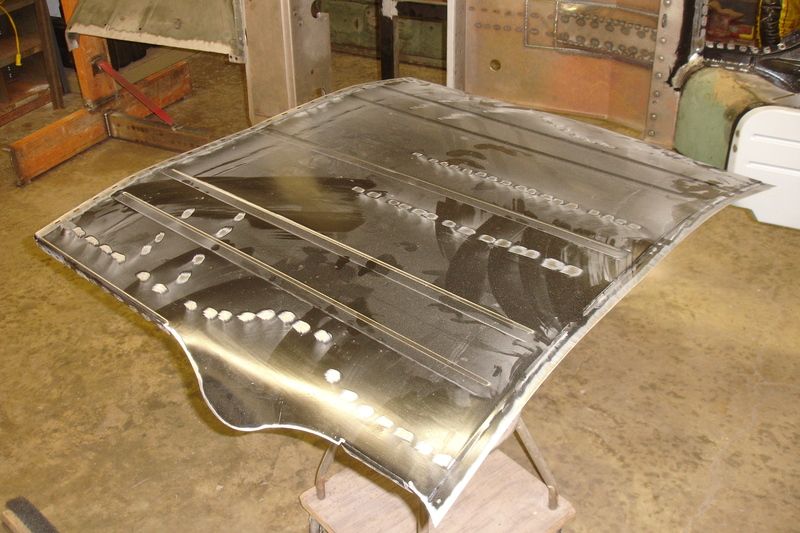
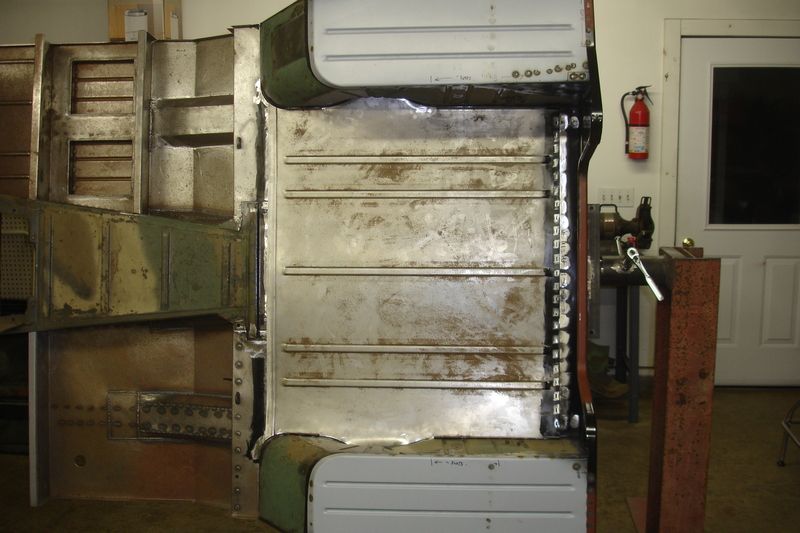
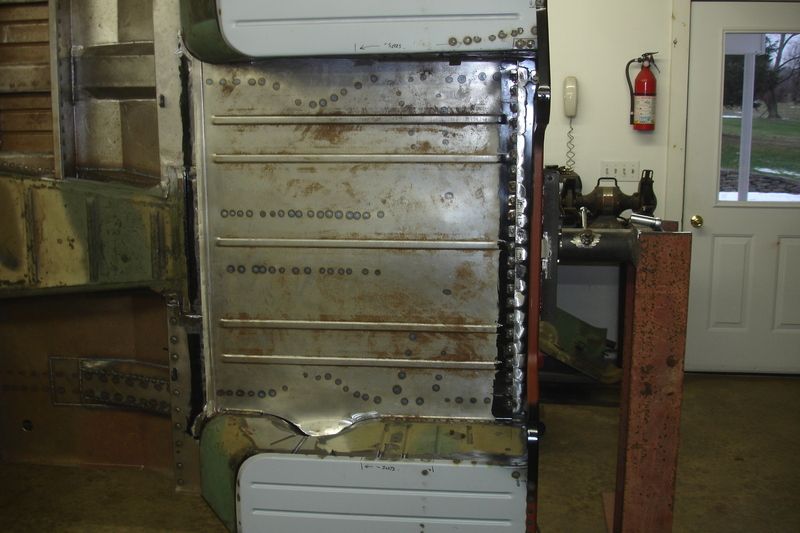
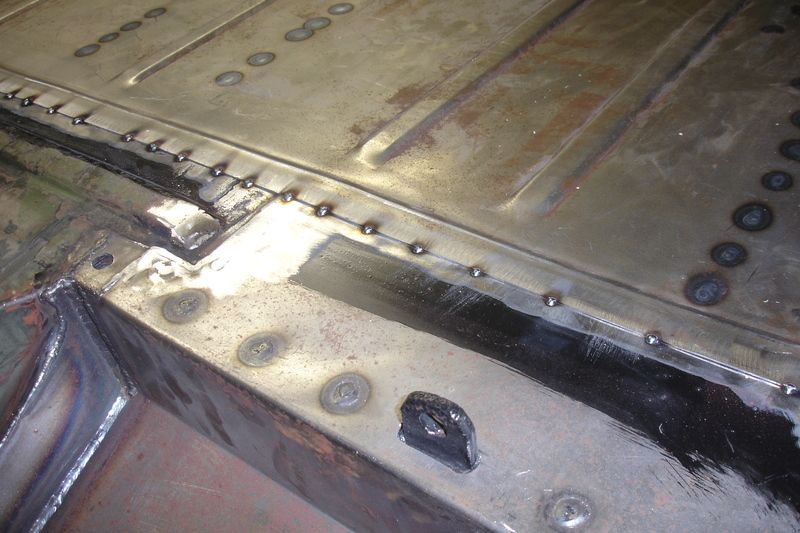
And the finish line:
Primer on the back
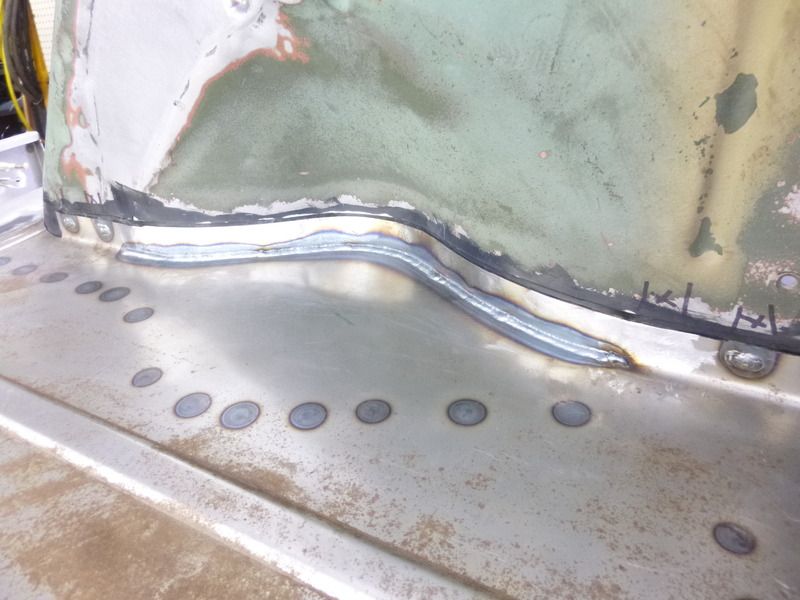
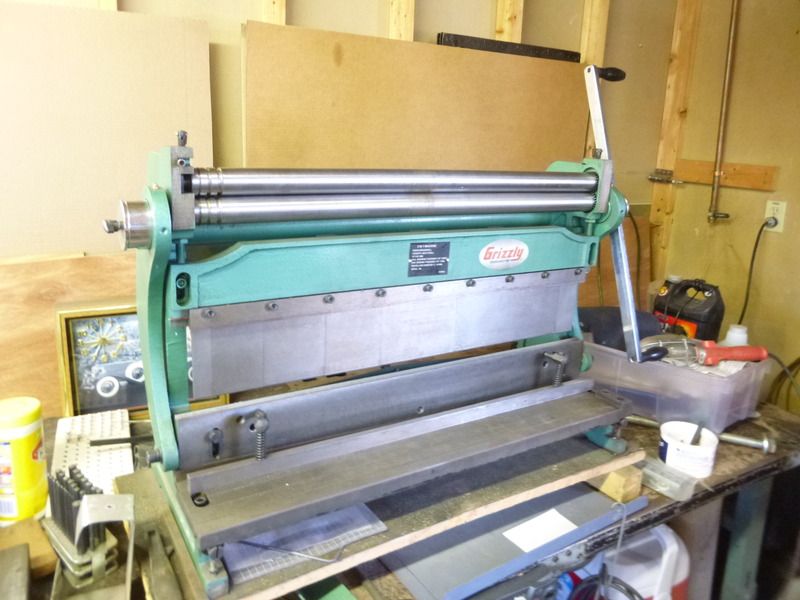
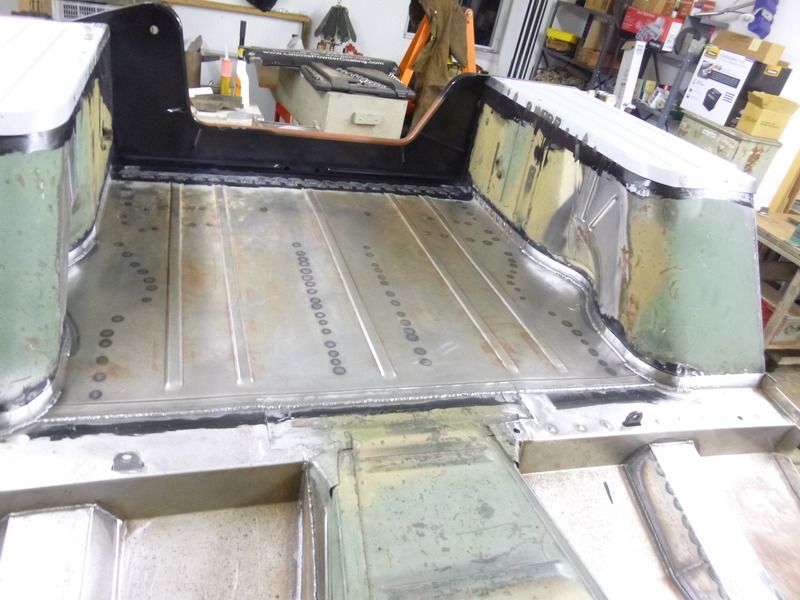
Overall the installation went pretty smooth. I still have to blend some of the plug welds but the majority of the job is behind me at this point. Job was not difficult but pretty tedious as I wanted to get it planted on the frame rails and sides as tight as possible.
Guy


Primer on the back


Overall the installation went pretty smooth. I still have to blend some of the plug welds but the majority of the job is behind me at this point. Job was not difficult but pretty tedious as I wanted to get it planted on the frame rails and sides as tight as possible.
Guy
M151 Body Panels - http://www.m151bodypanels.com/
'68 A1 - Under full resto
'68 A1 - Under full resto
-
Hambone
- Brigadier General
- Posts: 2506
- Joined: October 1st, 2010, 12:19 am
- Location: El Dorado, Arkansas
Re: My M 151 A1 Restoration Project
Great job Guy!
Re: My M 151 A1 Restoration Project
Beautiful work, and coming from me you know that is a compliment! A note to those new and learning welders looking at this, Pay close attention to Guy's attention to detail when it comes to close fitup of the panels before welding. The closer the fit the better the weld.
Guy, Some of the tools you are using you have obviously made in your business like the little jack screw and the magnetic clamp in the last couple pics. Any chance of producing some of them for sale? I can think of a hundred times I could have used that jack screw instead of a big assed hydraulic jack!
Guy, Some of the tools you are using you have obviously made in your business like the little jack screw and the magnetic clamp in the last couple pics. Any chance of producing some of them for sale? I can think of a hundred times I could have used that jack screw instead of a big assed hydraulic jack!
1964 M151A1
1984 M1008
1967 M416
04/1952 M100
12/1952 M100- Departed
AN/TSQ-114A Trailblazer- Gone
1984 M1008
1967 M416
04/1952 M100
12/1952 M100- Departed
AN/TSQ-114A Trailblazer- Gone
-
lpcoating
- Brigadier General
- Posts: 2030
- Joined: February 19th, 2013, 11:38 pm
- Location: Mansfield, PA
- Contact:
Re: My M 151 A1 Restoration Project
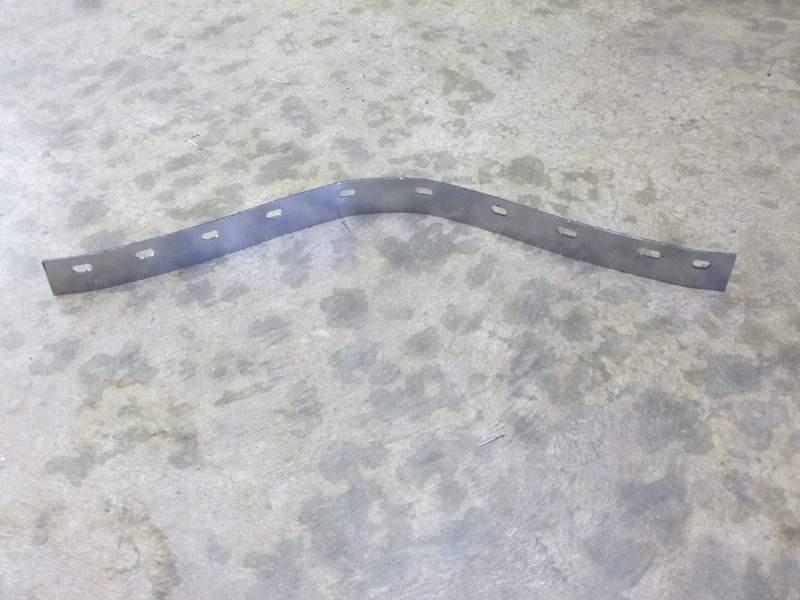
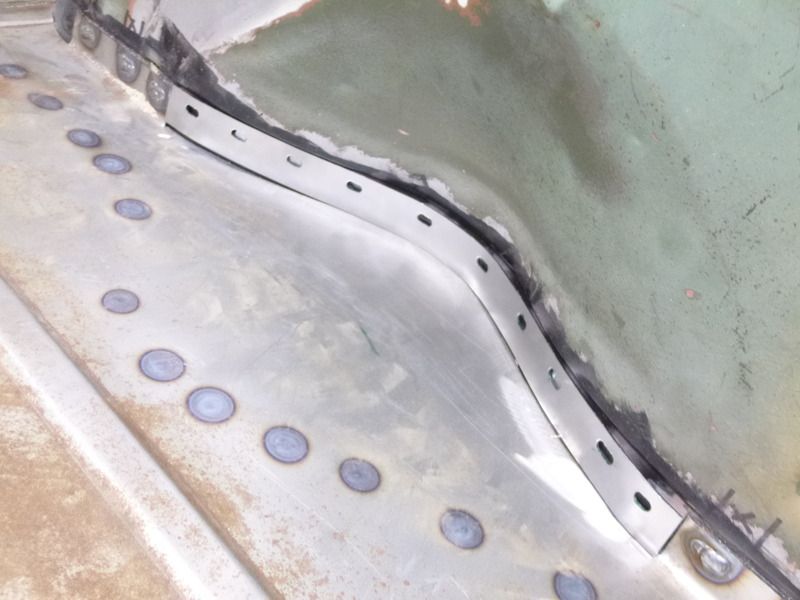
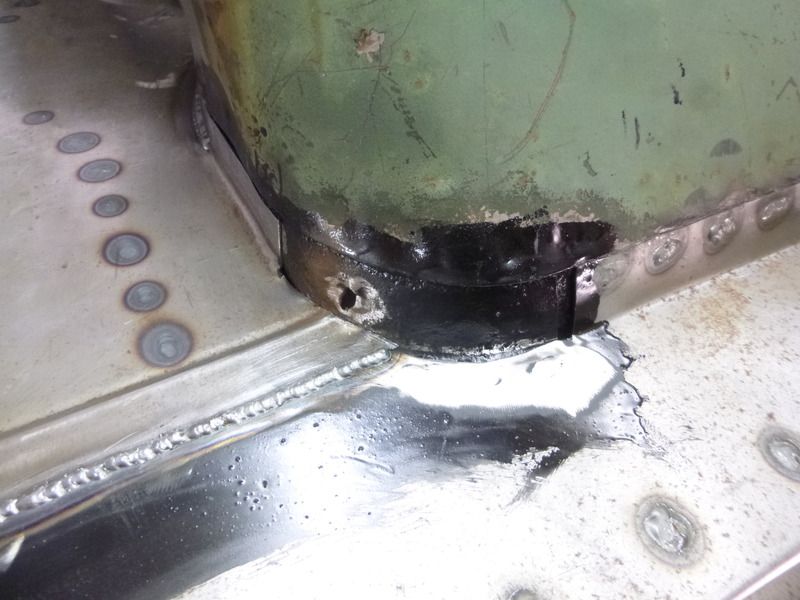
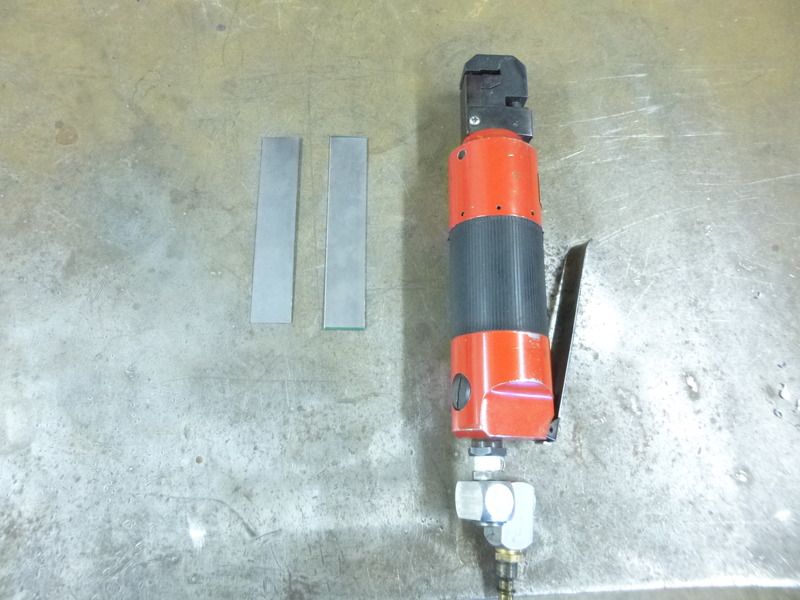
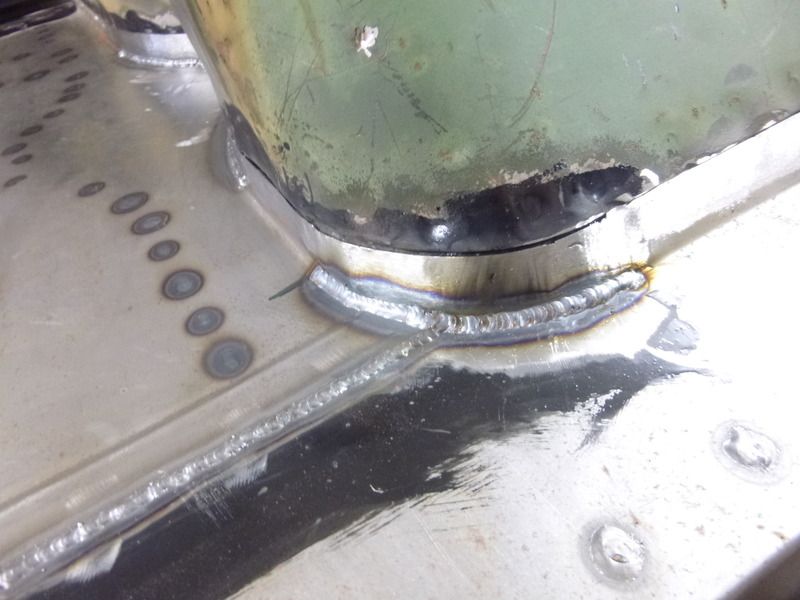
Rick,
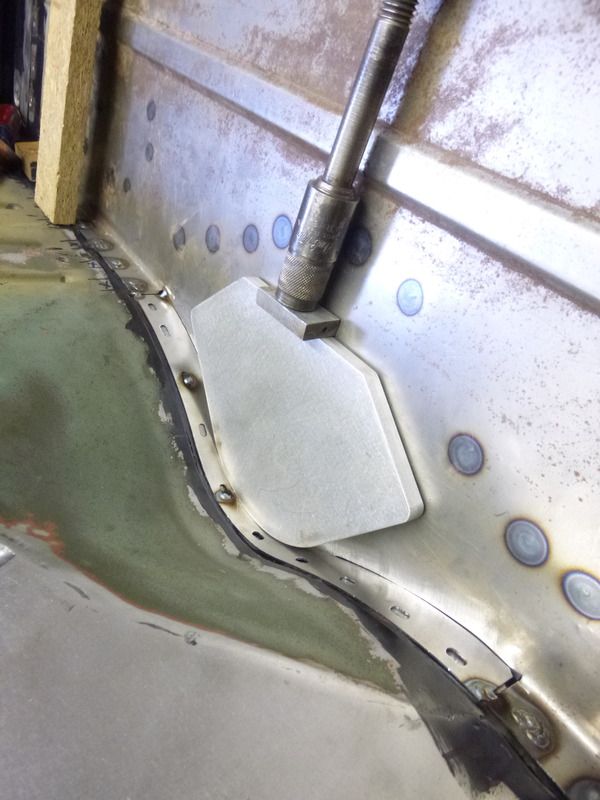
The only item from the shop is the aluminum radius piece. That is one of the heat sinks for welding the rear panel. The little Jack Screw is something my dad has had for around 30 years! When I had the body upside down and was using the bottle jacks he walked through and said "I have something that will work for that", 30 seconds later he handed it to me. I don't think he's ever used it! Later, he found a second one. 'Ol dad. The magnet was purchased at a welding store. You can adjust the angle with it. Comes in handy from time to time.
Guy
M151 Body Panels - http://www.m151bodypanels.com/
'68 A1 - Under full resto
'68 A1 - Under full resto
Re: My M 151 A1 Restoration Project
You need to make some more of those jack screws! Looks pretty simple to make. The swivel foot would be the most complicated part.
1964 M151A1
1984 M1008
1967 M416
04/1952 M100
12/1952 M100- Departed
AN/TSQ-114A Trailblazer- Gone
1984 M1008
1967 M416
04/1952 M100
12/1952 M100- Departed
AN/TSQ-114A Trailblazer- Gone