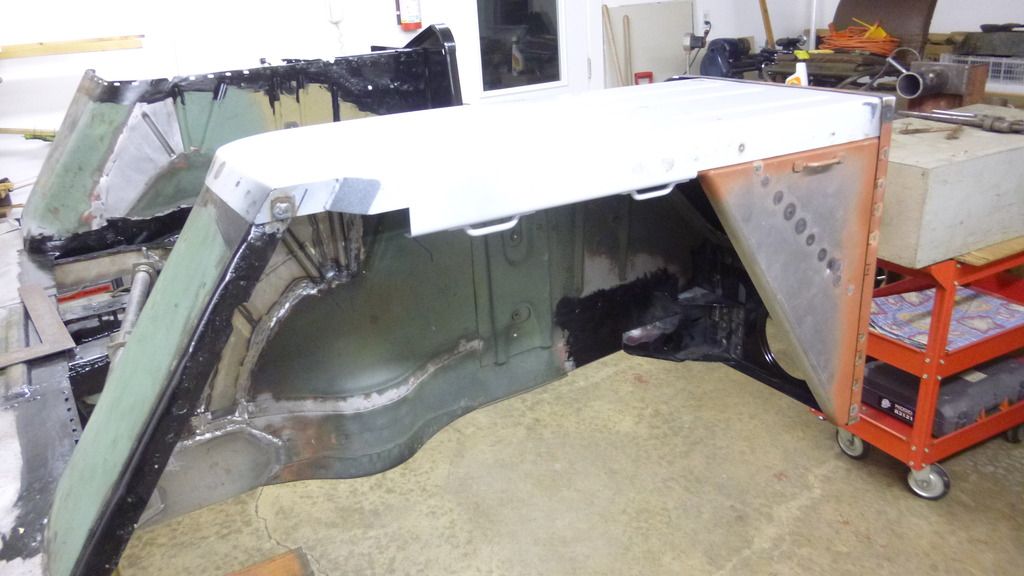
After looking the project over some more I decided to install the rear panel next. I have a few more plug welds but its pretty much done. I went this route as I had better access to the plug welds without the fender tops in the way and It'll make installing the fender tops easier. I'm doing as many plug welds from the inside of the exterior panels as possible to reduce blending visible welds and use of body filler.
Guy
My M 151 A1 Restoration Project
Moderators: rickf, raymond, Mr. Recovery
-
lpcoating
- Brigadier General

- Posts: 2030
- Joined: February 19th, 2013, 11:38 pm
- Location: Mansfield, PA
- Contact:
Re: My M 151 A1 Restoration Project
M151 Body Panels - http://www.m151bodypanels.com/
'68 A1 - Under full resto
'68 A1 - Under full resto


Re: My M 151 A1 Restoration Project
Please find the time to share some pics with us!
-
lpcoating
- Brigadier General
- Posts: 2030
- Joined: February 19th, 2013, 11:38 pm
- Location: Mansfield, PA
- Contact:
Re: My M 151 A1 Restoration Project


M151 Body Panels - http://www.m151bodypanels.com/
'68 A1 - Under full resto
'68 A1 - Under full resto
-
lpcoating
- Brigadier General
- Posts: 2030
- Joined: February 19th, 2013, 11:38 pm
- Location: Mansfield, PA
- Contact:
Re: My M 151 A1 Restoration Project
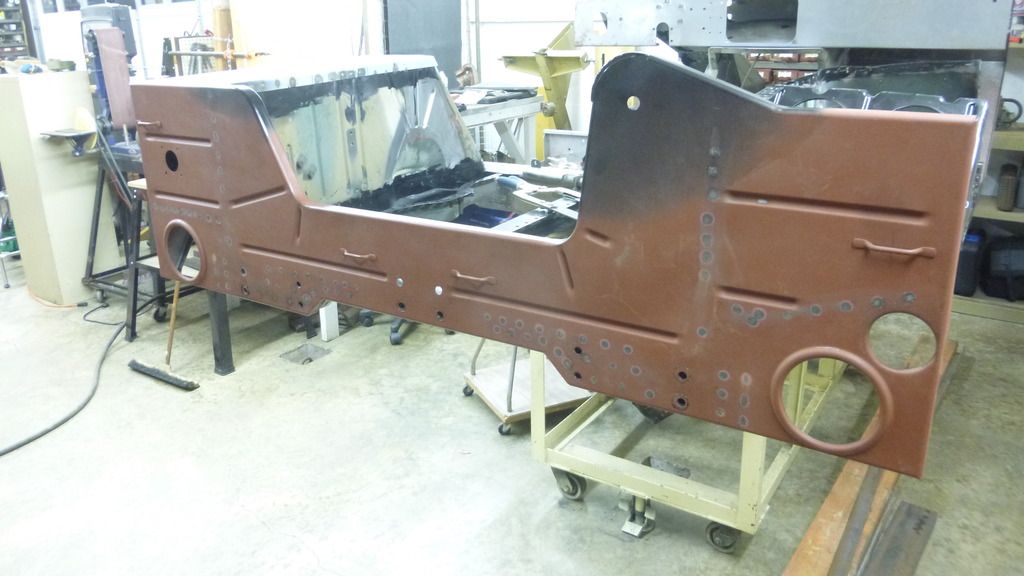
Pictures of the rear cross members and rear panel going on. I was able to do all the welding from the inside as I did not want to have to blend any welds on the outside of the panel unless necessary. This truck took a hit the the passenger side rear and it was pushed in about 1/2" or so. I pulled must of it out and overall I'm very happy with how straight it came out. I took my time and used 4" channel as a heat sink and fixture for holding panels straight.
Guy
Guy
M151 Body Panels - http://www.m151bodypanels.com/
'68 A1 - Under full resto
'68 A1 - Under full resto
-
Hambone
- Brigadier General
- Posts: 2506
- Joined: October 1st, 2010, 12:19 am
- Location: El Dorado, Arkansas
Re: My M 151 A1 Restoration Project
Looking good, Guy, is that a weld thru primer?


Re: My M 151 A1 Restoration Project
Is it my imagination or is that project living in a much larger cave than it was in originally?
1964 M151A1
1984 M1008
1967 M416
04/1952 M100
12/1952 M100- Departed
AN/TSQ-114A Trailblazer- Gone
1984 M1008
1967 M416
04/1952 M100
12/1952 M100- Departed
AN/TSQ-114A Trailblazer- Gone
-
lpcoating
- Brigadier General
- Posts: 2030
- Joined: February 19th, 2013, 11:38 pm
- Location: Mansfield, PA
- Contact:
Re: My M 151 A1 Restoration Project
Not on the back. The black is a POR type product and the primer over the plug welds inside of the rear cross member is just a red oxide. The gray primer is an Imron primer that we use at the shop.Hambone wrote:Looking good, Guy, is that a weld thru primer?
Guy
M151 Body Panels - http://www.m151bodypanels.com/
'68 A1 - Under full resto
'68 A1 - Under full resto
-
lpcoating
- Brigadier General
- Posts: 2030
- Joined: February 19th, 2013, 11:38 pm
- Location: Mansfield, PA
- Contact:
Re: My M 151 A1 Restoration Project
Rick, I knew you would notice! Let's just say that the 151 and I have a new address.rickf wrote:Is it my imagination or is that project living in a much larger cave than it was in originally?
Guy
M151 Body Panels - http://www.m151bodypanels.com/
'68 A1 - Under full resto
'68 A1 - Under full resto
-
whiterabbit

- Command Sergeant Major

- Posts: 672
- Joined: October 6th, 2013, 4:20 pm
- Location: Bristol Virginia
Re: My M 151 A1 Restoration Project
Always amazed! You're gonn'a get it too straight and it'll not look like a M151!!1 
"It’s the unconquerable soul of man, not the nature of the weapon he uses, that insures victory." Gen. George Patton
1986-2014 Ordnance Corps RETIRED!
XVIII Airborne Corps Combat Affiliation
Go Ordnance!
1972 M151A2
1978 exMOD 109 Land Rover S3 (sold)
1942 WLA
M274 (sold) Big mistake. Sigh....
1986-2014 Ordnance Corps RETIRED!
XVIII Airborne Corps Combat Affiliation
Go Ordnance!
1972 M151A2
1978 exMOD 109 Land Rover S3 (sold)
1942 WLA
M274 (sold) Big mistake. Sigh....
-
lpcoating
- Brigadier General
- Posts: 2030
- Joined: February 19th, 2013, 11:38 pm
- Location: Mansfield, PA
- Contact:
Re: My M 151 A1 Restoration Project
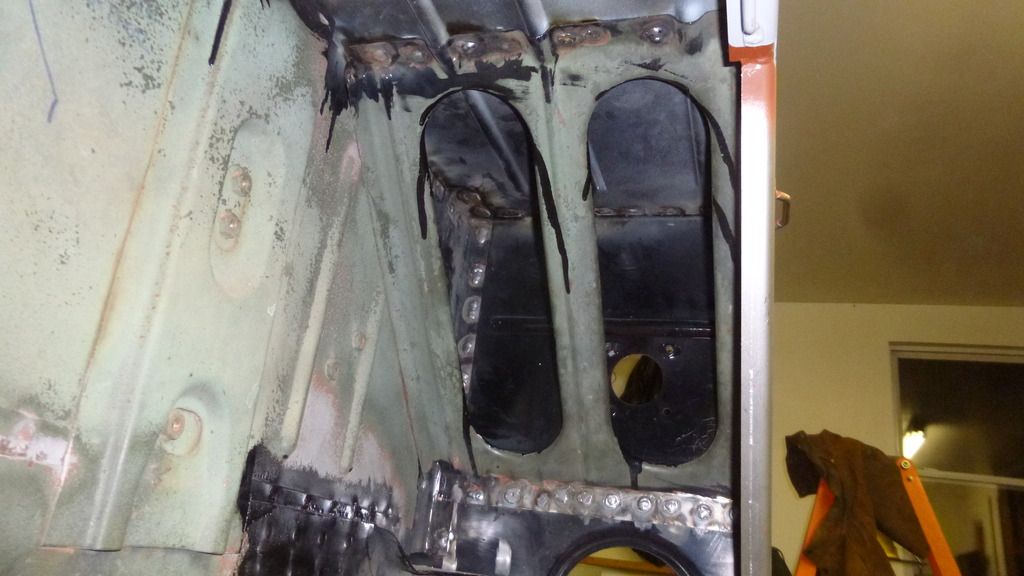
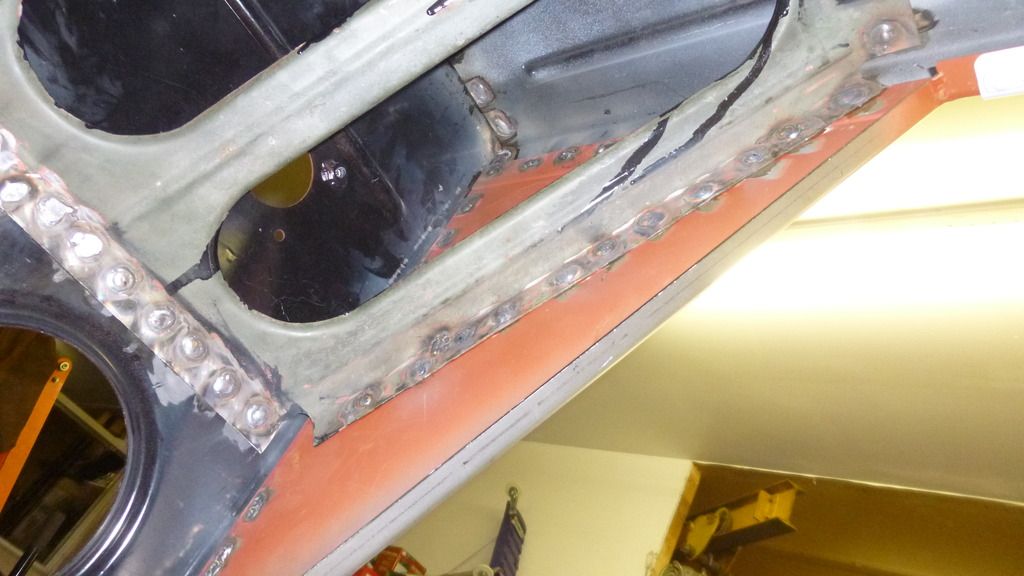
Driver side is on with the exception of the large radius area where the inner fender meets the fender top. As mine was x cut, I replaced a section behind that radius and it apparently shrunk some. I have about a 3/16" gap that I will hammer tune. Will do this when it goes back on the rotisserie. Sorry for the different shades of primer, makes it look like a hack job!
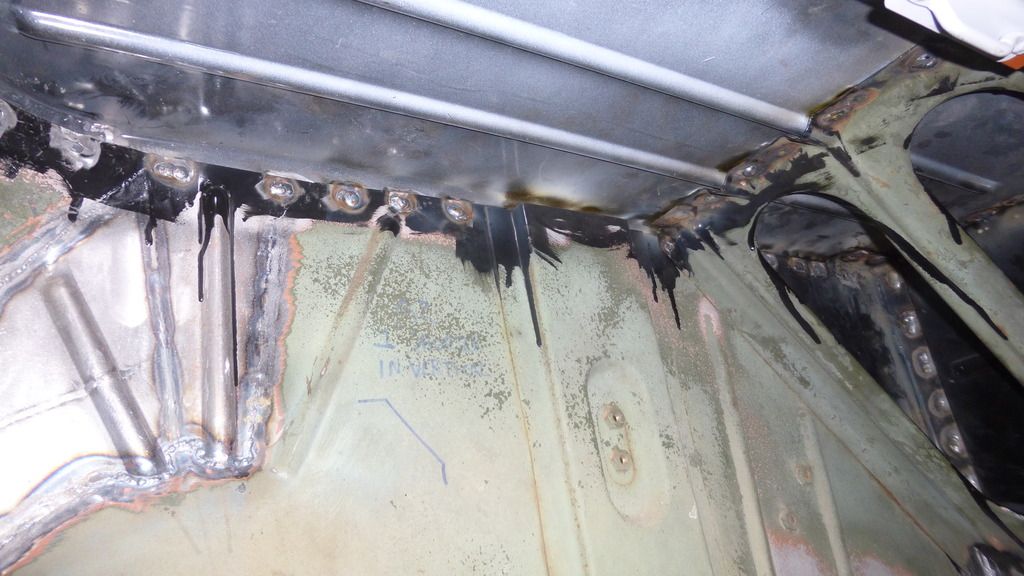
At this point I only have (5) plugs welds that are on the outside of the panels. All others done from the inside.
View from under the fender looking up:
Guy

At this point I only have (5) plugs welds that are on the outside of the panels. All others done from the inside.

View from under the fender looking up:


Guy
M151 Body Panels - http://www.m151bodypanels.com/
'68 A1 - Under full resto
'68 A1 - Under full resto
Re: My M 151 A1 Restoration Project
Spot welder sure would be nice (and accurate) for joining the new panel to new panel.
1964 M151A1
1984 M1008
1967 M416
04/1952 M100
12/1952 M100- Departed
AN/TSQ-114A Trailblazer- Gone
1984 M1008
1967 M416
04/1952 M100
12/1952 M100- Departed
AN/TSQ-114A Trailblazer- Gone
Re: My M 151 A1 Restoration Project
What a great project and, YES! Rick, I was thinking exactly the same thing and since it is clear to me that the two of you know a lot more about welding than I do, I want to ask Guy why he isn't doing spot welding rather than doing so much plug welding.
I have seen some el-cheapo spot welders out there and taking into account the limitations presented by the electrodes (is that the right term?) for getting to the work, it appears that what is being offered (that being clamp-type spot welders) would be of limited use for guys like us. Because of this, I have always passed them by. How the heck can guys like us manage spot welds in the various remote areas of our trucks without having to resort to plug welding? Is there a way to bring these electrodes to the work so that two guys might create a spot weld in an area that a regular clamp-type spot welder couldn't reach?
Guy, sorry, I didn't mean to hijack your thread and perhaps this belongs elsewhere but I would also like to hear what your thought processes are when it comes to assembling all the pieces you've worked so hard to create for your project.
Cheers,
TJ
-
lpcoating
- Brigadier General
- Posts: 2030
- Joined: February 19th, 2013, 11:38 pm
- Location: Mansfield, PA
- Contact:
Re: My M 151 A1 Restoration Project
I have an old hand held spot welder. I've only messed around with it a little bit. Most of the panels that I'm putting on are being welded to the original body therefore I already have the holes from where the spot welds were cut to fill. In the areas that I'm using new panels like the rear panel / fender top / side panel my concern would be the fact that I have paint between the pieces. I would not want to do the spot welding with paint in those areas (regardless of how well samples held up) as I'd be concerned with weld quality. And, it would take longer to layout where the spot welds were going, remove the paint, then spot weld then it's worth to me. Keep in mind this bad boy is an x cut. Ain't going to any shows!
Guy
Guy
M151 Body Panels - http://www.m151bodypanels.com/
'68 A1 - Under full resto
'68 A1 - Under full resto
Re: My M 151 A1 Restoration Project
Ok, that completely makes sense...that, and the fact that I suppose the panels you're producing are going to be for the guys who will assemble using the same method you are using.
Nothing wrong with that at all because I find myself looking at your project and saying to myself, "I could undertake such a job and with reasonable care and moderate welding skills I could get through it with satisfactory results." and I imagine that is exactly what you want people to realize. Even the panels (less expensive than repro half track panels by far!) are a very good price. Such a beautiful (and important) product you've created! When I get excited about something as simple as footman loops (and I know this sounds stupid but they were truly the quality of fine jewelry!) that's really sayin' something!
I'd love to see a tutorial on resistance spot welding or perhaps even some commentary from Rick on that topic under another thread. Please consider doing something like that, Rick, if you have the time. Everyone would benefit from it (not that you don't do enough already).
Re: My M 151 A1 Restoration Project
I have an old Lenco Spot welder that has the hand held spotters with a trigger on one hand. The problem is that you need to be able to apply a fair amount of pressure on both electrodes and in doing that both pieces of metal need to stay in contact with each other. It can be a chore. I have used it to spot sheet metal onto tubing and angle iron but everything has to be spotlessly clean, as in new metal.
1964 M151A1
1984 M1008
1967 M416
04/1952 M100
12/1952 M100- Departed
AN/TSQ-114A Trailblazer- Gone
1984 M1008
1967 M416
04/1952 M100
12/1952 M100- Departed
AN/TSQ-114A Trailblazer- Gone