My M 151 A1 Restoration Project
Moderators: rickf, raymond, Mr. Recovery

Re: My M 151 A1 Restoration Project
Rick that is true about the batteries that is why I will be lowering mine also. It will also allow more space for different size batteries. Also you can never have enough tool box space.Just my 2 cents 


Re: My M 151 A1 Restoration Project
As far as different batteries the 51R is just a bit smaller that a 2HN so fit is not really an issue. This is fine for guys building daily drivers but remember, a lot of people want to replace with original look. Especially when doing that much work.
1964 M151A1
1984 M1008
1967 M416
04/1952 M100
12/1952 M100- Departed
AN/TSQ-114A Trailblazer- Gone
1984 M1008
1967 M416
04/1952 M100
12/1952 M100- Departed
AN/TSQ-114A Trailblazer- Gone
Re: My M 151 A1 Restoration Project
True Rick I have the original bat floor replacement panel. I was thinking I may just lower it some when replacing it. Not sure just thinking about it thats all. I would like to keep it as original as I can also . Its has been a PITA for me in trying to get some of the body parts needed thats all NOS or good cutouts. I just fabed up a full rear A-2 body panel from 18 ga that came out real nice . Also saved some $$$ by making it myself  but the bead rolls are going to be harder to stamp out. May have to get the bead rolls pressed into the panel.
Last edited by RCA827 on March 17th, 2013, 10:10 pm, edited 1 time in total.
Re: My M 151 A1 Restoration Project
I know you were saying in an earlier post that you wanted to use the 16 ga. to make the welding easier. Just remember that the entire original vehicle was 18 ga. so you will be welding different sizes together. If you have a replacement panel just put it in stock, that will be much easier.
1964 M151A1
1984 M1008
1967 M416
04/1952 M100
12/1952 M100- Departed
AN/TSQ-114A Trailblazer- Gone
1984 M1008
1967 M416
04/1952 M100
12/1952 M100- Departed
AN/TSQ-114A Trailblazer- Gone
-
csmith
- Brigadier General

- Posts: 2085
- Joined: July 20th, 2009, 11:49 pm
- Location: Va. Beach & NC Outer Banks
Re: My M 151 A1 Restoration Project
That is some mighty fine work, you have some great skills. You and Fredrick should talk sometime
1976 M151A2 4 Color Cammo Mutt, aquired August 09
1976 or 7? M151A2 "Miss Sandy" Driver, aquired May 2010
Former owner M151A2 "Miss Saigon" Vietnam Rescue Sold Sept 09
Fond appreciation for the M151 Breed!!
1976 or 7? M151A2 "Miss Sandy" Driver, aquired May 2010
Former owner M151A2 "Miss Saigon" Vietnam Rescue Sold Sept 09
Fond appreciation for the M151 Breed!!
-
lpcoating
- Brigadier General
- Posts: 2030
- Joined: February 19th, 2013, 11:38 pm
- Location: Mansfield, PA
- Contact:
Re: My M 151 A1 Restoration Project
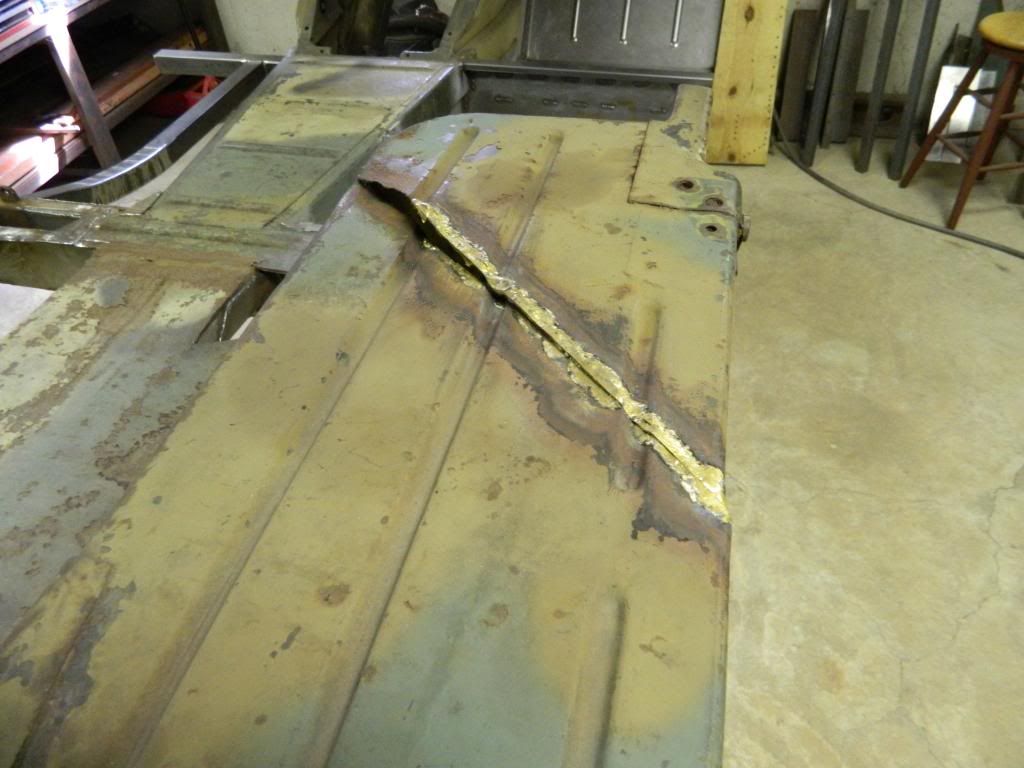
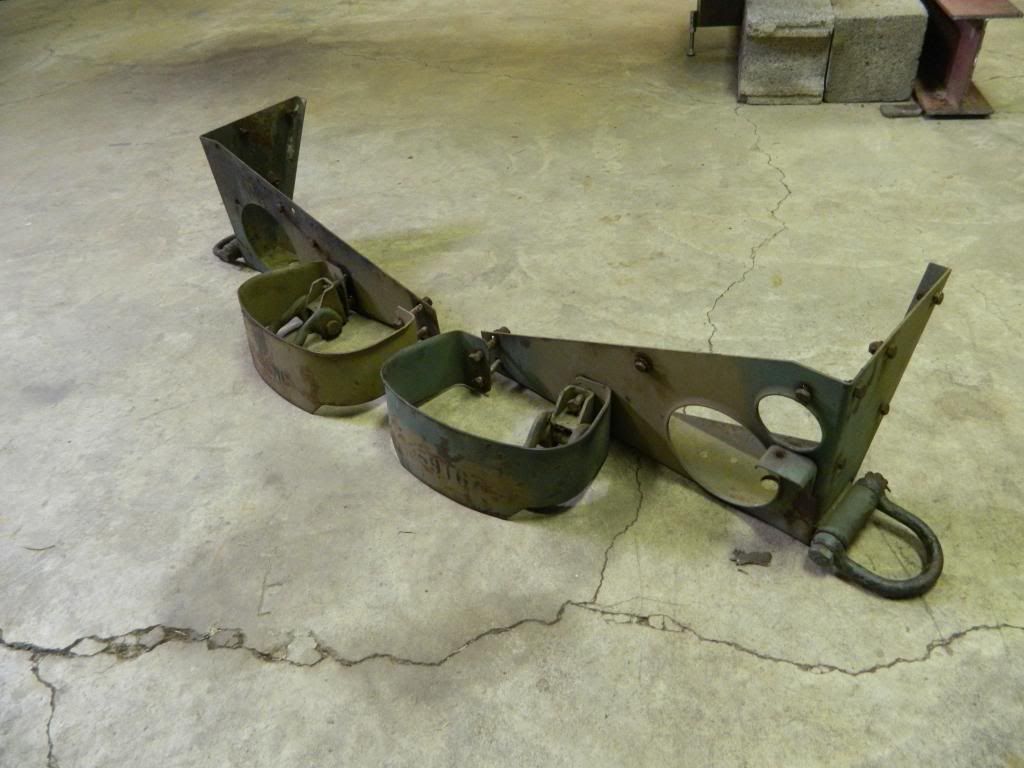
So I was going to move to the drivers side front fender next but I've changed my mind and I'm going to start working on the rear panel and rear fender tops. Today I removed the rear bumpers and corner supports for the tie down rings. Overall, the sheet metal does not have a large amount of rust. The rear panel is dented and based on all the other work that will be done I've decided to replace the panel rather then try and repair the original. The bead tool that I used for making the floor board is almost identical (on the back side) to the bead in the fender tops and rear panel. Only issue is that while this is an indexing tool on the laser, it is only 0 deg or 90 deg. On the rear panel some of the beads are on an angle. I might be able to do this angle on a manual machine. Here is what I'm up against:
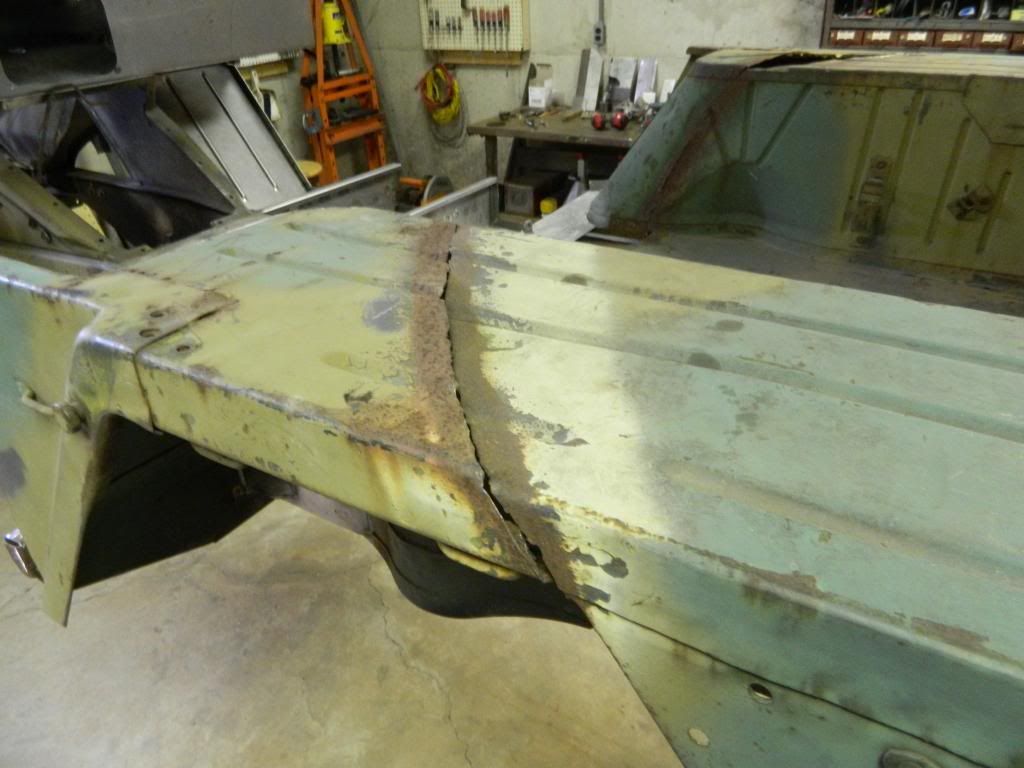
The braze job was from the orginal attempt to put the jeep back together.
The braze job was from the orginal attempt to put the jeep back together.
M151 Body Panels - http://www.m151bodypanels.com/
'68 A1 - Under full resto
'68 A1 - Under full resto
-
halftracknut
- Brigadier General
- Posts: 2068
- Joined: December 11th, 2007, 2:28 pm
Re: My M 151 A1 Restoration Project
Looks like that rear panel can be saved? htn
slowest mutt east of the missippi..
-
lpcoating
- Brigadier General
- Posts: 2030
- Joined: February 19th, 2013, 11:38 pm
- Location: Mansfield, PA
- Contact:
Re: My M 151 A1 Restoration Project
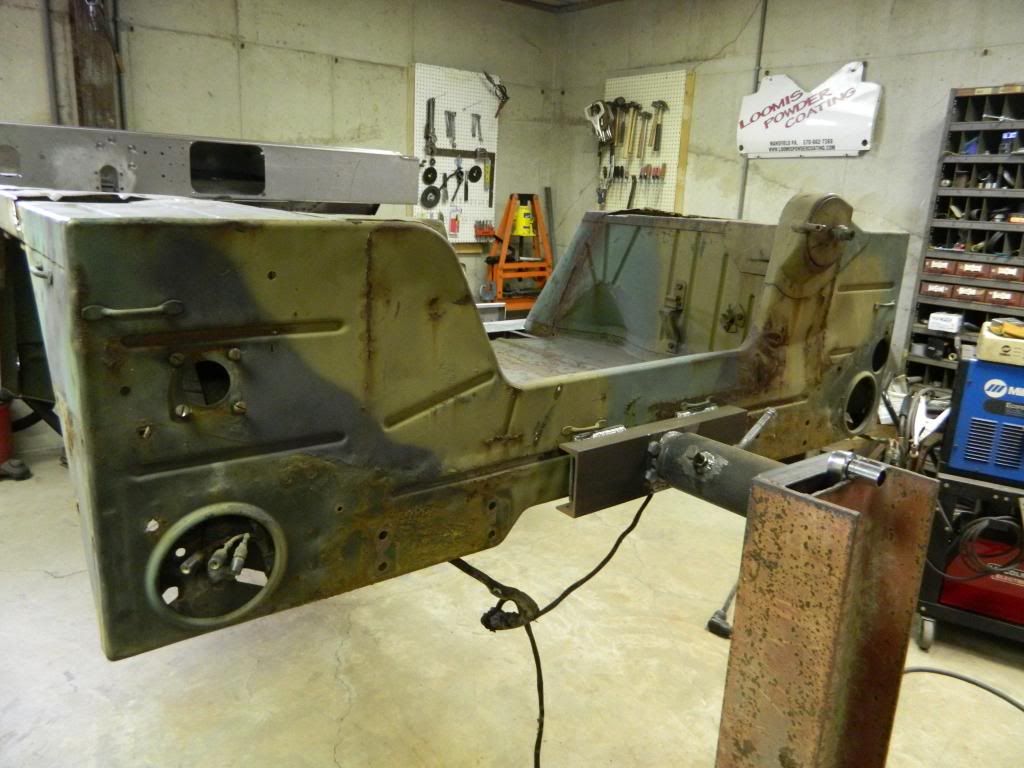
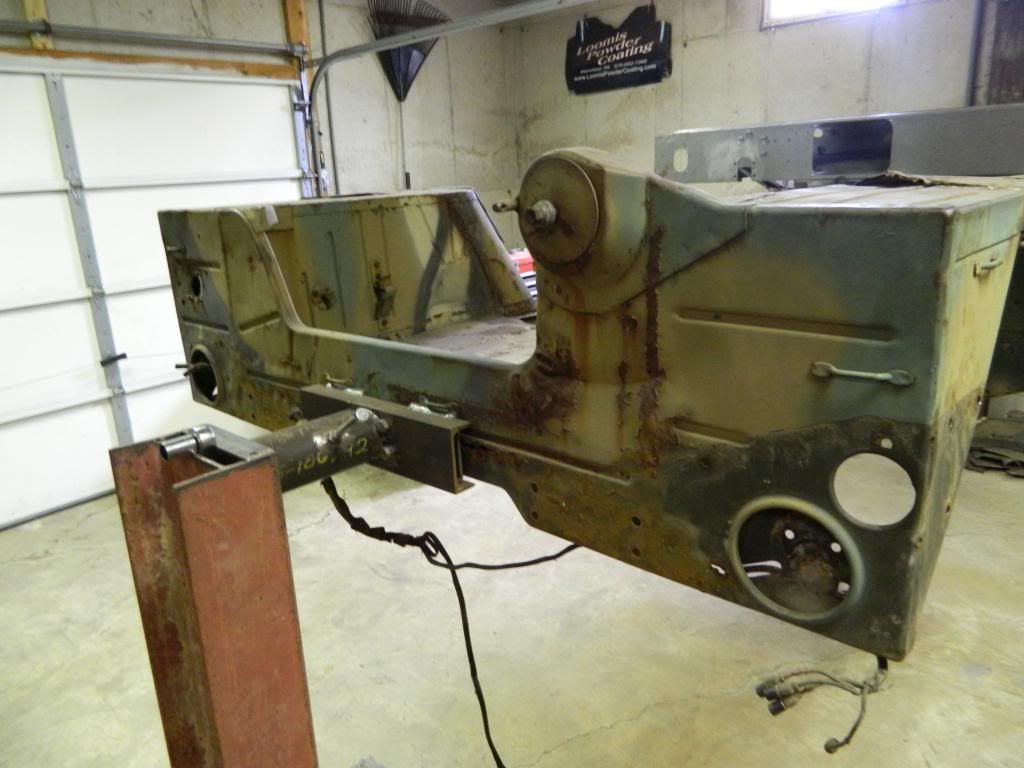
Yes htn, it is fixable. In the area behind the spare tire it was dented and then at some point it was heated with a torch and beat out. It is also dented on the drivers side. There is some rust on the bottom and on the inside where the rear panel meets the rear floor (brace) it is rusted out. Unfortunately for me, my brain is wired that with all the other work I've done I just can't "fix" this panel, it will be replaced. At this point, what does one more part matter??
M151 Body Panels - http://www.m151bodypanels.com/
'68 A1 - Under full resto
'68 A1 - Under full resto
Re: My M 151 A1 Restoration Project
That panel would make a good pattern for a replacement. (hint, hint) It is odd to see the rear corners in that good of shape after having the lifting brackets on them, they usually rot out.
1964 M151A1
1984 M1008
1967 M416
04/1952 M100
12/1952 M100- Departed
AN/TSQ-114A Trailblazer- Gone
1984 M1008
1967 M416
04/1952 M100
12/1952 M100- Departed
AN/TSQ-114A Trailblazer- Gone
-
lpcoating
- Brigadier General
- Posts: 2030
- Joined: February 19th, 2013, 11:38 pm
- Location: Mansfield, PA
- Contact:
Re: My M 151 A1 Restoration Project
I was very surprised at how good of condition the bottom corners were as well. I know of two other 151's in my area that I've looked at and mine has far less rust then the others. To bad it was cut up! I hear you on the rear panel. I've been asked about fender tops. We'll see how mine turn out and then I can let people know how much if anyone is interested.
M151 Body Panels - http://www.m151bodypanels.com/
'68 A1 - Under full resto
'68 A1 - Under full resto
Re: My M 151 A1 Restoration Project
I agree with Rick that rear A-1 panel will make a good temp plate.  Guy if I send down a full side panel would one panel work for you to draw up the plans for bouth sides ? just thinking of the shipping and all.
Re: My M 151 A1 Restoration Project
I thought you were sending all of your stuff to Rommel Juan?RCA827 wrote:I agree with Rick that rear A-1 panel will make a good temp plate.
1964 M151A1
1984 M1008
1967 M416
04/1952 M100
12/1952 M100- Departed
AN/TSQ-114A Trailblazer- Gone
1984 M1008
1967 M416
04/1952 M100
12/1952 M100- Departed
AN/TSQ-114A Trailblazer- Gone
Re: My M 151 A1 Restoration Project
OK what ever you think rick f the MODERATOR . You have not let up at me since I started posting in my M151-A2 Restoration not sure why. But I get the hint I will stop posting  . Sorry about this GUY.
Re: My M 151 A1 Restoration Project
Sir, I am going to make two suggestions here. First, look through all of my other posts to other people and tell me if you really think I treat you any differently. I do not. You were offering to send a bunch of panels to MD Juan and that is why I cracked on you about it. That is my sarcastic sense of humor. Number two, grow thicker skin. If that little bit of candor bothers you then I don't think you will be happy when some of these other guys get their digs in. If you feel the need to leave there is nothing I can do to stop you, you will not be banned and can return anytime you like as long as you keep it civil.RCA827 wrote:OK what ever you think rick f the MODERATOR . You have not let up at me since I started posting in my M151-A2 Restoration not sure why. But I get the hint I will stop posting
This is a new forum and as such I have left it alone but the gist behind it is to show off restorations and discussions of such both done and in progress, it will not be used for other discussions. That is what the General discussion forum is for. From this point forward any off subject posts will be moved.
OK what ever you think rick f the MODERATOR
Just so you know, the wording did not escape me. Remember that this is a private forum owned by Moose and you are a guest in his house. I am just the guy who guards the gate. If he does not like a decision I make he will be sure to let me know about it.
1964 M151A1
1984 M1008
1967 M416
04/1952 M100
12/1952 M100- Departed
AN/TSQ-114A Trailblazer- Gone
1984 M1008
1967 M416
04/1952 M100
12/1952 M100- Departed
AN/TSQ-114A Trailblazer- Gone
-
lpcoating
- Brigadier General
- Posts: 2030
- Joined: February 19th, 2013, 11:38 pm
- Location: Mansfield, PA
- Contact:
Re: My M 151 A1 Restoration Project
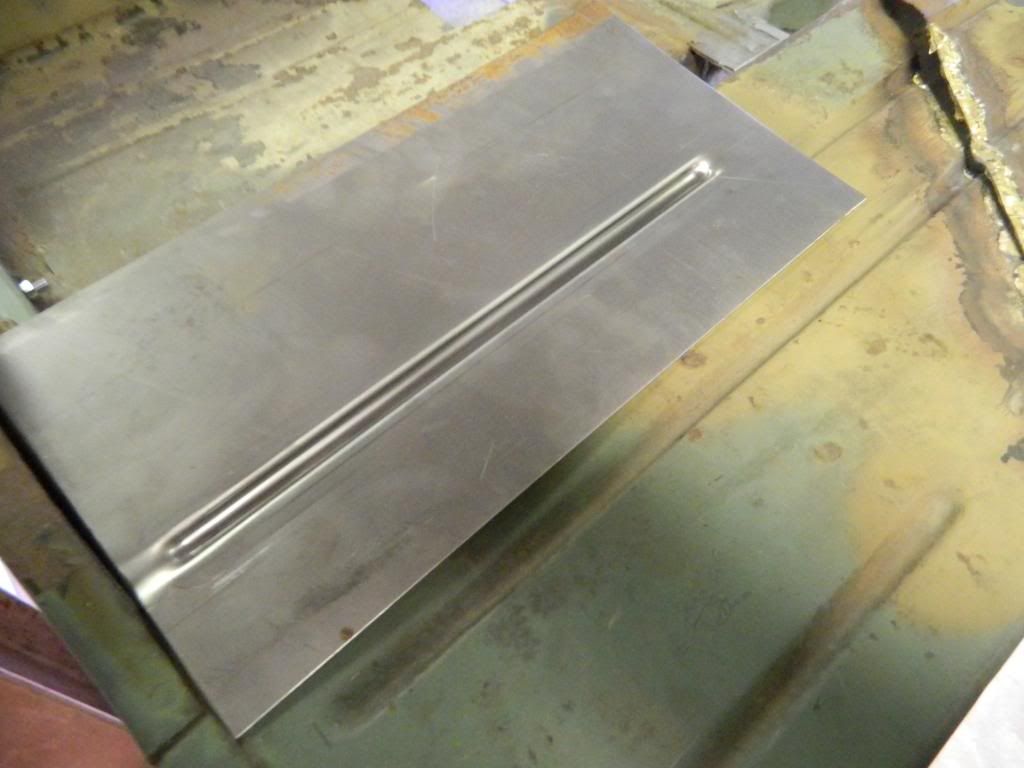
Here is a picture of a sample of the rib tool that I will use on the fender tops and rear panel. This tool is a form punch so the longer the rib, the more hits the tool does. It's hard to tell from the picture but this rib is very close to the original. Once painted only the experts of this site will know it's not original!
M151 Body Panels - http://www.m151bodypanels.com/
'68 A1 - Under full resto
'68 A1 - Under full resto