M151A2 Restoration
Moderators: rickf, raymond, Mr. Recovery


Re: M151A2 Restoration
Remember, you only have a whopping 72 horsepower pushing it. I put two people in the back of mine and it really slows it down.
1964 M151A1
1984 M1008
1967 M416
04/1952 M100
12/1952 M100- Departed
AN/TSQ-114A Trailblazer- Gone
1984 M1008
1967 M416
04/1952 M100
12/1952 M100- Departed
AN/TSQ-114A Trailblazer- Gone

Re: M151A2 Restoration
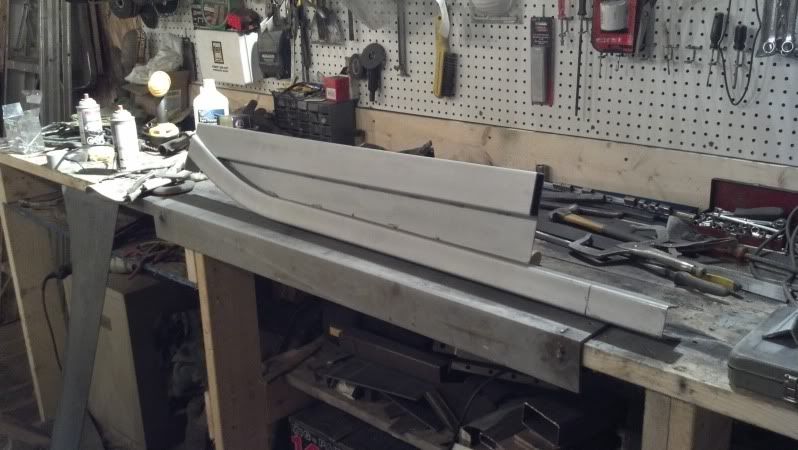
Thanks everyone for the pictures I was able to take everything that was sent and referred to Ipcoatings A1 resto and was able to come up with the tunnel 50" overall lenght 

Re: M151A2 Restoration
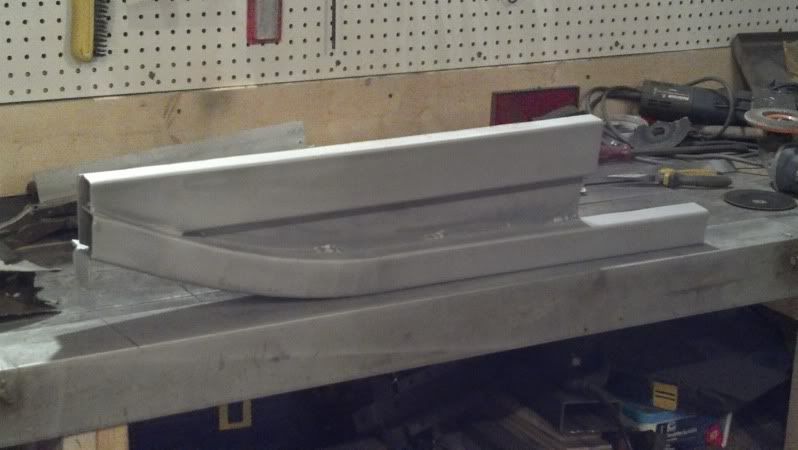
Finished up by taking the measurements needed and cut the tunnel to the length I need 27" . Rick, this weighs in at about 12lbs I'am not at 3500LBS yet 


Re: M151A2 Restoration
Next the drivers side and to order the top pannel . 
Re: M151A2 Restoration
All damn weekend but I am back online with my main computer.RCA827 wrote:Thank you Rick hope you get that all straightened out.rickf wrote:I have some pictures of the crushed one when it was hanging from my loader but I am having major issues with the computer and I am at this time getting ready to wipe it clean and reinstall windows. I HOPE I have everything backed up! I would like to just uninstall Windows but I do not remember how I did that in the past.
1964 M151A1
1984 M1008
1967 M416
04/1952 M100
12/1952 M100- Departed
AN/TSQ-114A Trailblazer- Gone
1984 M1008
1967 M416
04/1952 M100
12/1952 M100- Departed
AN/TSQ-114A Trailblazer- Gone
Re: M151A2 Restoration
lol hope you can start getting some of the pic's up you said you would ?
Re: M151A2 Restoration
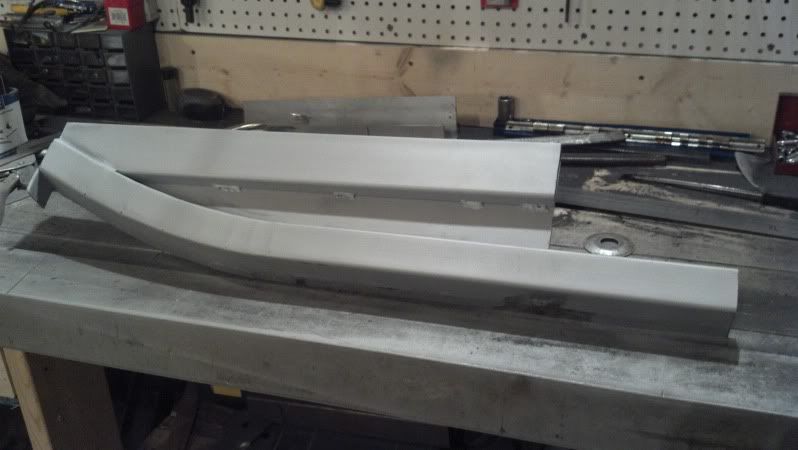
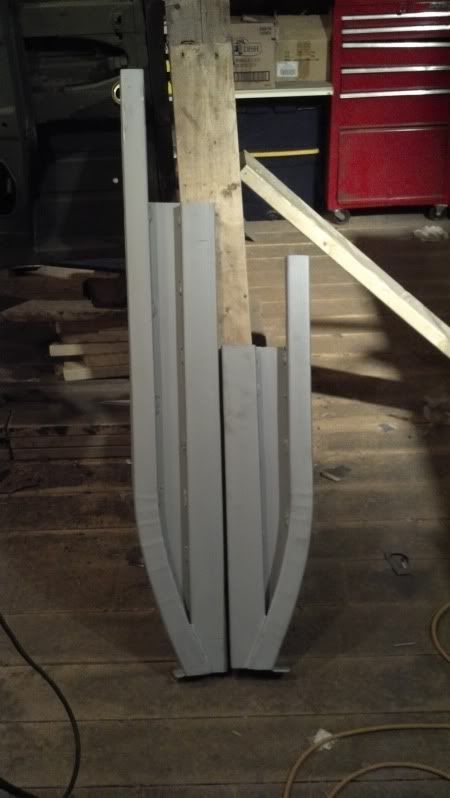
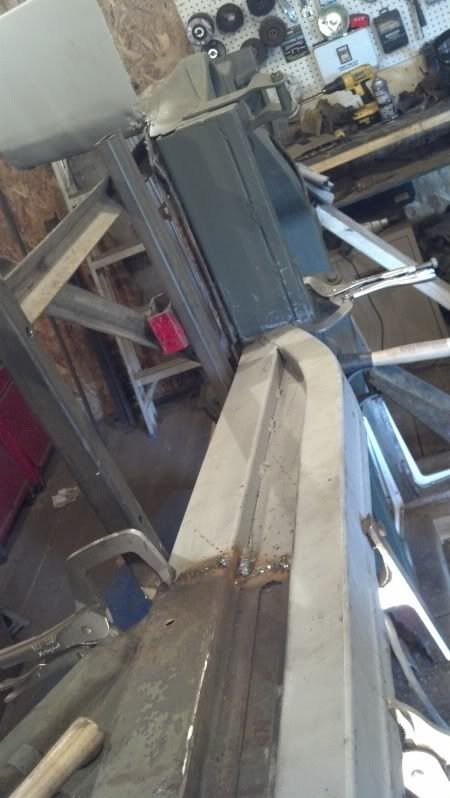
Look what I found while digging in the scrap metal today the drivers side tunnel Got other side made now, to cut it to the size needed and weld the two jeep halfs together.

Last edited by RCA827 on September 3rd, 2013, 11:25 pm, edited 1 time in total.
Re: M151A2 Restoration
Maybe I should have left the tunnel 50" long and made a stretch mutt?
Re: M151A2 Restoration
Rick for the rails that pass under the driver and co drivers seat should I be making and adding a r/l frame rail before I spot weld the under body repair rail to the floor panels ? I still have some 1/4" 2x2 left or would just the repaire rail be good to go ? Also The rear wire harness will pass through the drivers 1x3 top rail on through the cross member and down inside the rear rail to the back of the jeep would that be right  ?
?
Re: M151A2 Restoration
Sam, You are way ahead of anything I have ever done on a 151 so I would have to actually be there to answer those questions. At best I would have to have my crushed mutt upside down to use as a reference and I am sort of running up against the wire trying to get stuff done before my surgery. Mr. Recovery has the best views because his is on the rotisserie.
Rick
Rick
1964 M151A1
1984 M1008
1967 M416
04/1952 M100
12/1952 M100- Departed
AN/TSQ-114A Trailblazer- Gone
1984 M1008
1967 M416
04/1952 M100
12/1952 M100- Departed
AN/TSQ-114A Trailblazer- Gone
Re: M151A2 Restoration
OK Rick thanks and good luck with the surgery.
-
Mr. Recovery

- Brigadier General

- Posts: 2895
- Joined: December 5th, 2007, 9:03 pm
- Location: New Port Richey, Fl.
- Contact:
Re: M151A2 Restoration
PM sent! 


1960 M151 Run 1
1963 M151 Willys DoD 10-63 in Baltimore
1989 Alley Cat. "work in Progress"
NRA Life Member
American Legion Post 275 Fl
US Army 6 years 2nd Armored Cavalry Bindlach Germany
Colorado Army Nat. Guard 5 years
Md Air Guard 15 years active duty on C-130's
1963 M151 Willys DoD 10-63 in Baltimore
1989 Alley Cat. "work in Progress"
NRA Life Member
American Legion Post 275 Fl
US Army 6 years 2nd Armored Cavalry Bindlach Germany
Colorado Army Nat. Guard 5 years
Md Air Guard 15 years active duty on C-130's
Re: M151A2 Restoration
Well got started today but still need to fab a few plates up to reinforce all the welding points also a plate that will tie in the rails to cross member .

-
lpcoating
- Brigadier General
- Posts: 2030
- Joined: February 19th, 2013, 11:38 pm
- Location: Mansfield, PA
- Contact:
Re: M151A2 Restoration
If you still have access to the backside of the butt weld seam I would recommend cutting a square out of 14 or 16 ga and place it corner to corner over the backside of the seam. Weld it solid. With the welds at 45 deg to the original butt seam you reduce the risk of cracking due to stress risers. I'm going to assume that you are going to grind the outside weld flush with the base material which again is cause for cracks. The backer plate will take care of any future problems with the joint.
M151 Body Panels - http://www.m151bodypanels.com/
'68 A1 - Under full resto
'68 A1 - Under full resto
Re: M151A2 Restoration
Yes I do have access Guy I was also thinking of doing the butt weld on the back side first ? You mean that the plate would sit diamond shape over the inside butt weld ?lpcoating wrote:If you still have access to the backside of the butt weld seam I would recommend cutting a square out of 14 or 16 ga and place it corner to corner over the backside of the seam. Weld it solid. With the welds at 45 deg to the original butt seam you reduce the risk of cracking due to stress risers. I'm going to assume that you are going to grind the outside weld flush with the base material which again is cause for cracks. The backer plate will take care of any future problems with the joint.