Waking up a Texas M151A2

A place to post pics and descriptions of ongoing restoration projects

Moderators: rickf, raymond, Mr. Recovery

Post Reply
User avatar
m3a1
Lt. General
Lt. General
Posts: 4053
Joined: August 7th, 2014, 6:36 pm

Re: Waking up a Texas M151A2

Unread post by m3a1 » September 5th, 2016, 5:53 pm

And now it was time to finally address the issue of the truck only running at almost full choke, with no response to adjustments made at the idle mixture screw.

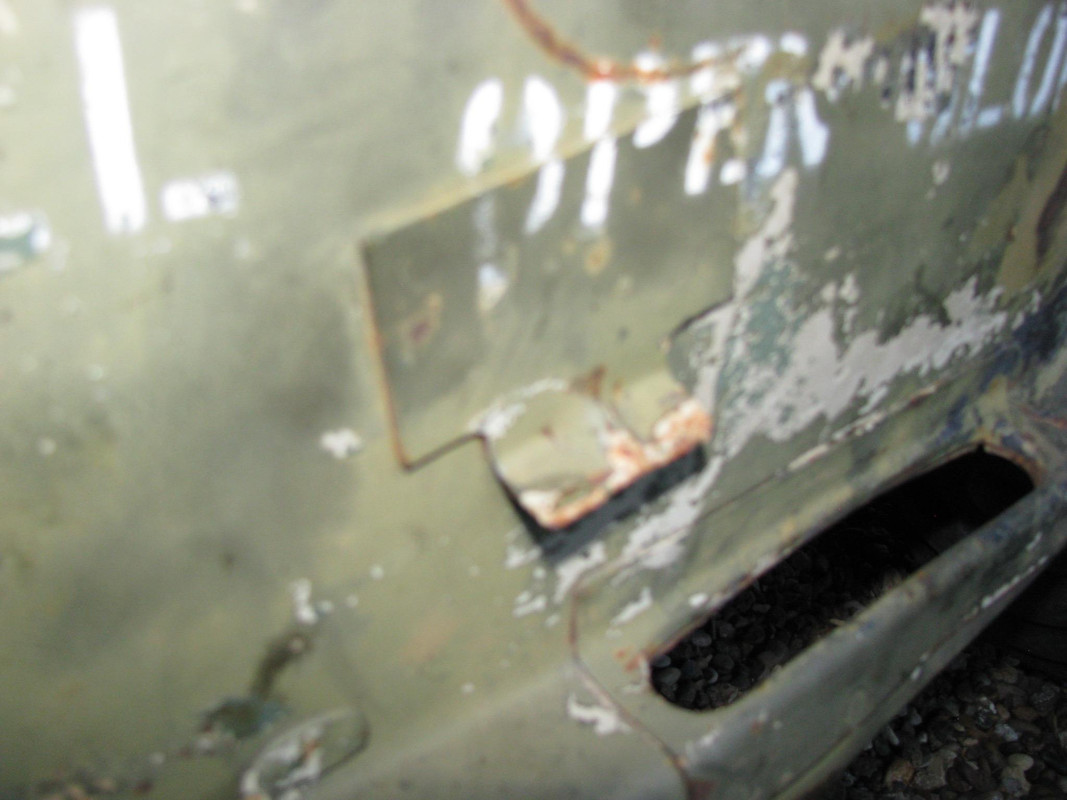
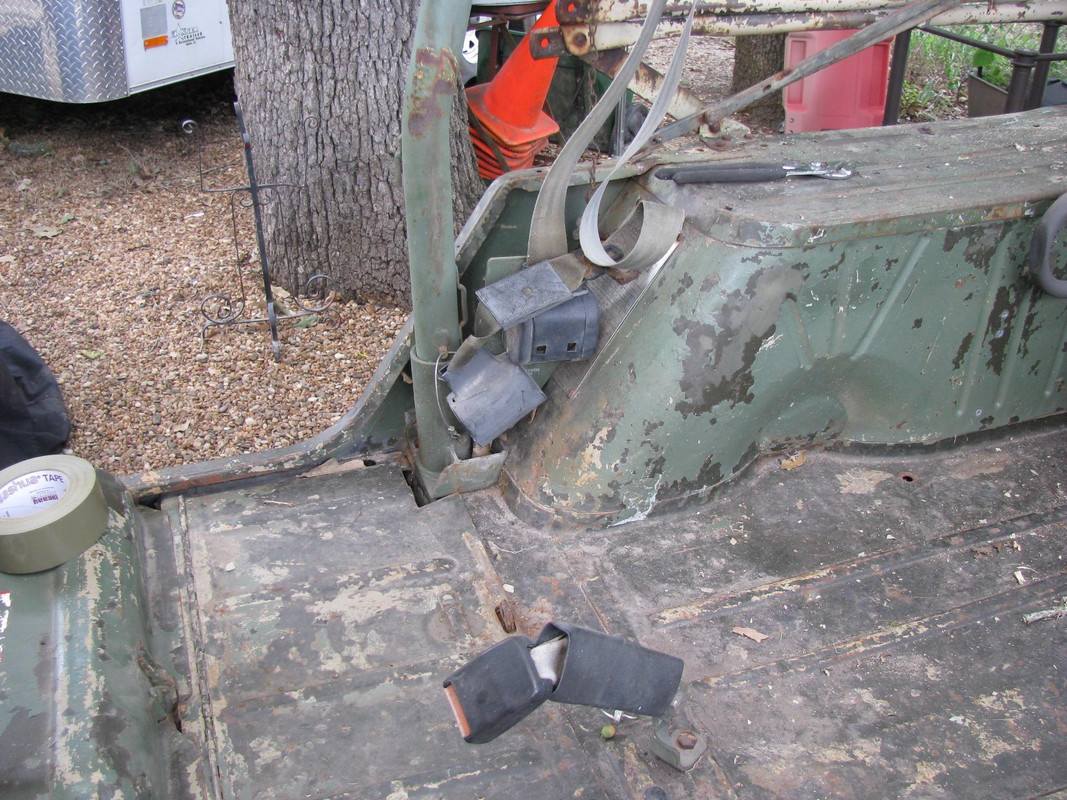
I pulled the plugs and they had all been doing their thing in a lean mixture condition. No surprise there.

So, it was time to pull the carb and replace it with one of Brooks' special rebuilds. However, my rebuilt carb was from an earlier truck so a modification had to be made and this mod was personally approved by Mr. Brooks.

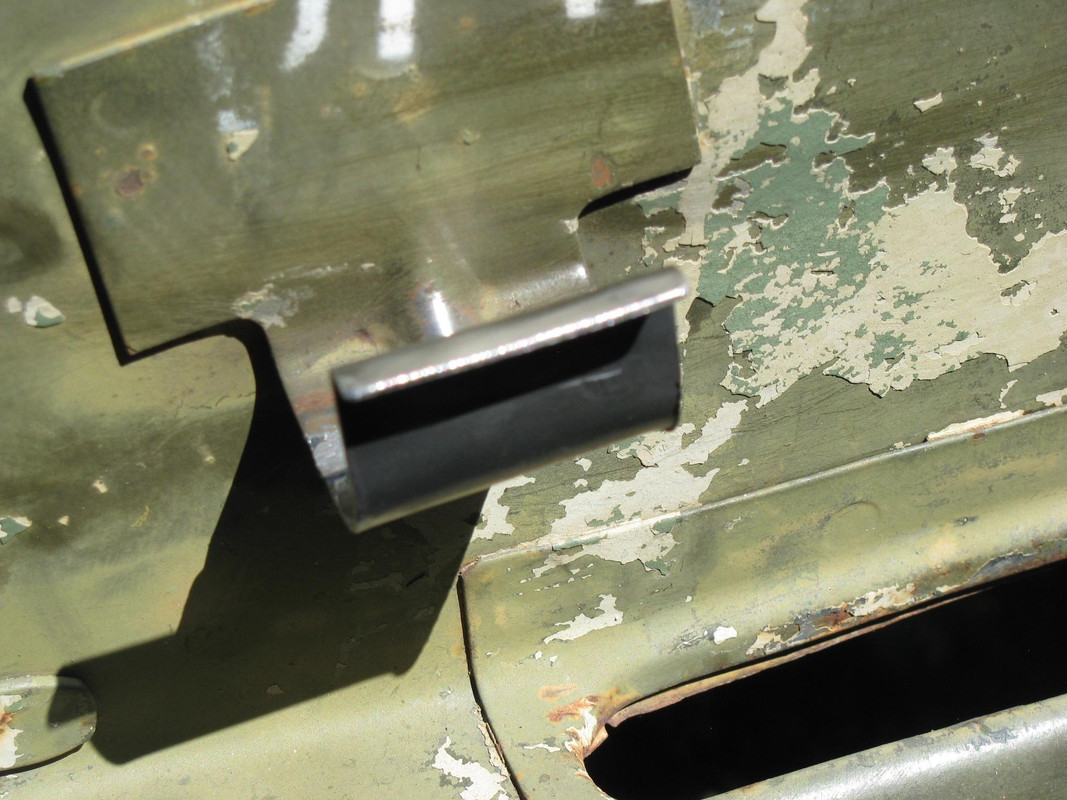
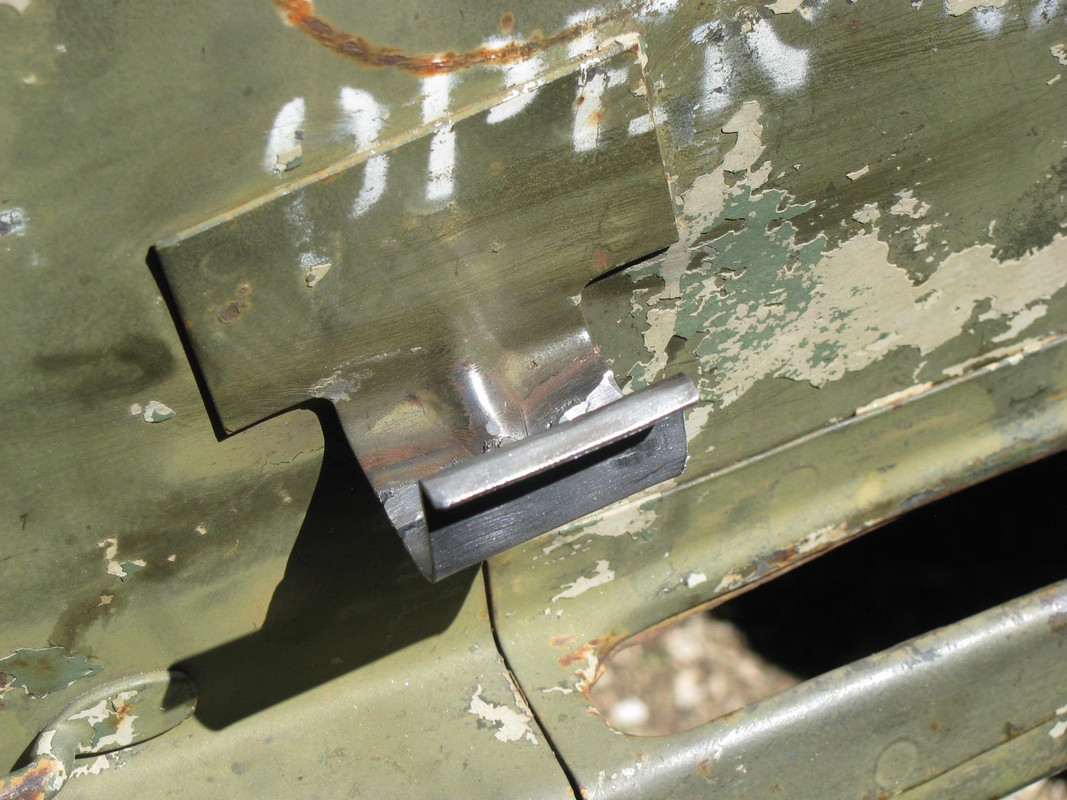
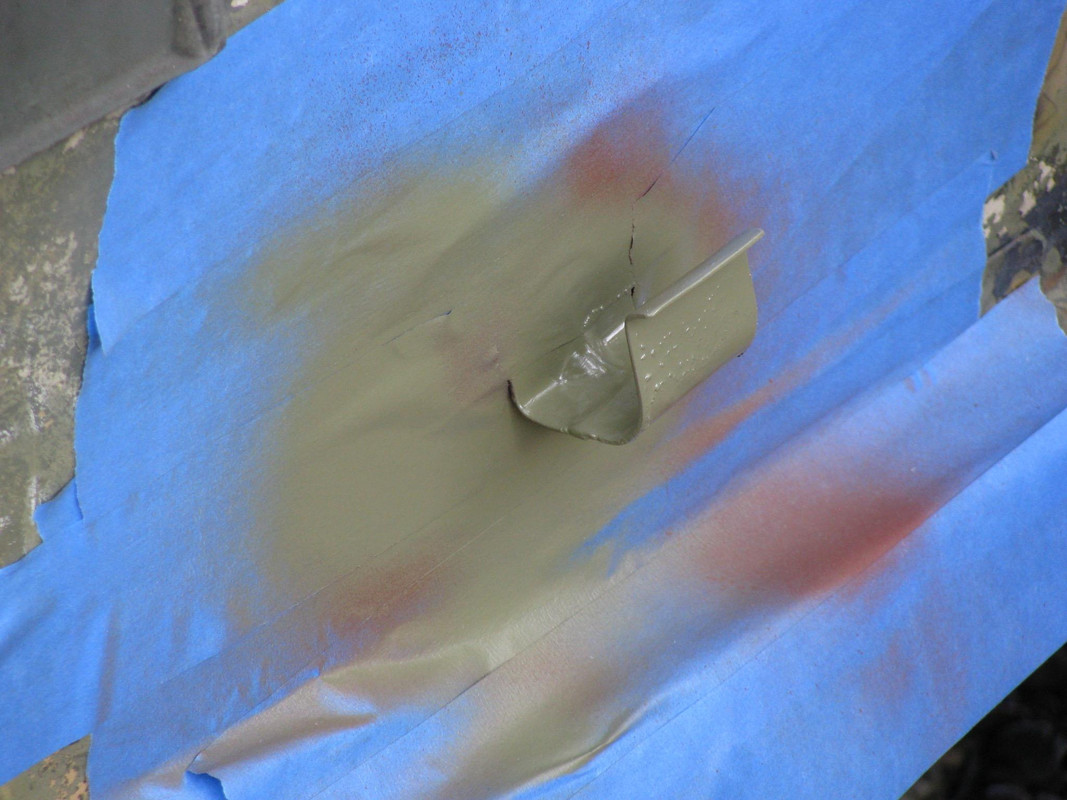
What you see here is a Zenith carburetor that predates the carb on my A2. The fixture on the right is what belongs on this carburetor (note the wire screen.) The fixture on the left, came from my original carb. The fixture on the right is blind. It has no fitting on top. Were I to put the fixture on the left on this carburetor gas would be unable to flow to the carb. This fixture can be modified to work on the rebuilt carb but, once modified, it cannot be used with the original carb. In this modification, Mr. Brooks' solution is to make three angled cuts across the threads. The total volume of these cuts approximates the normal volume of fuel that the carb needs to function properly.
Image

Image

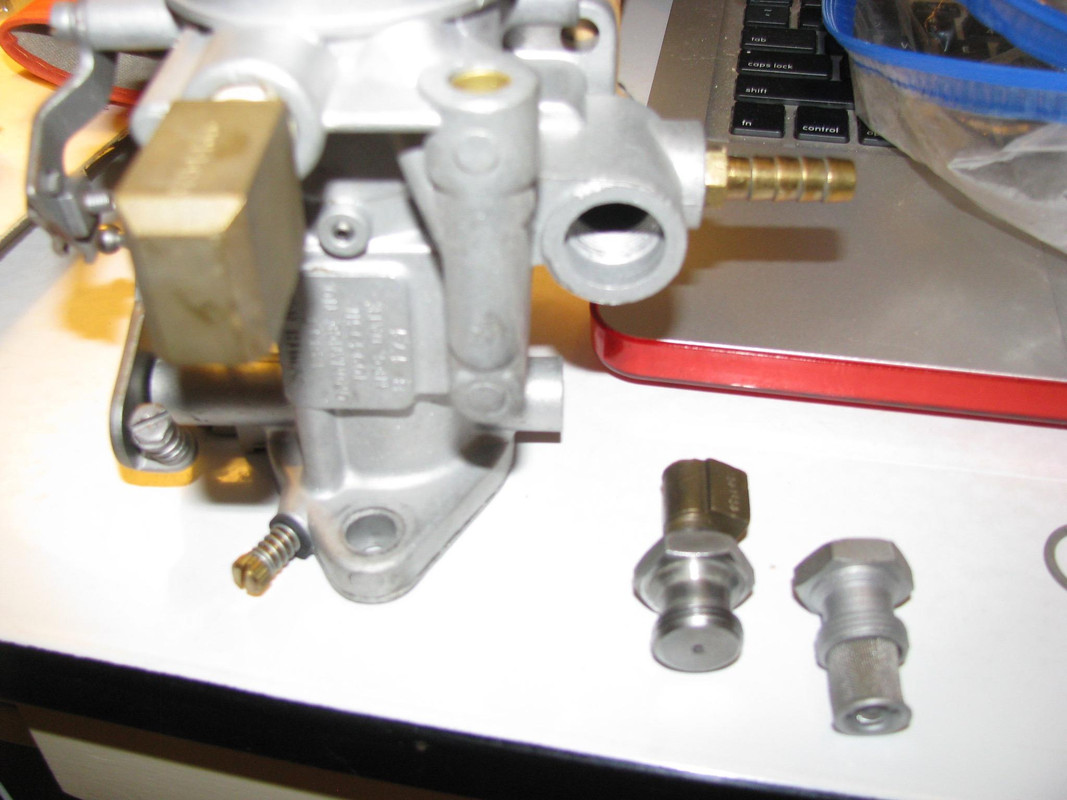
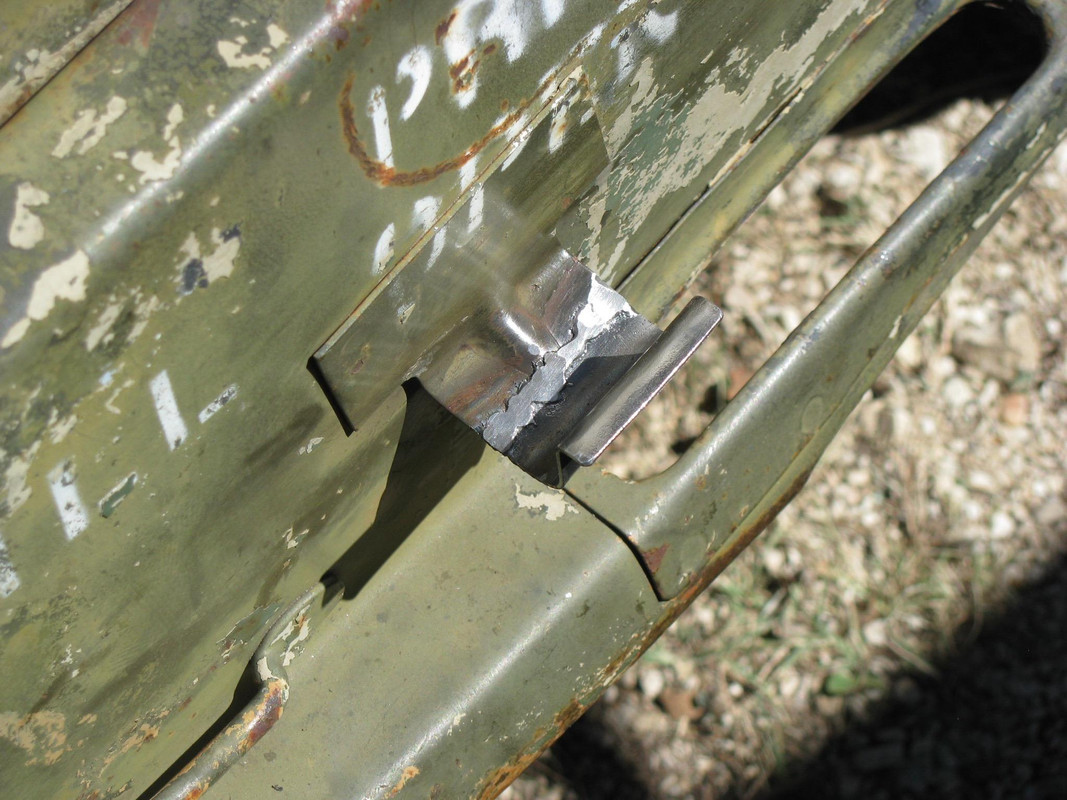
Pardon the focus...but you get the idea...
Image

Image

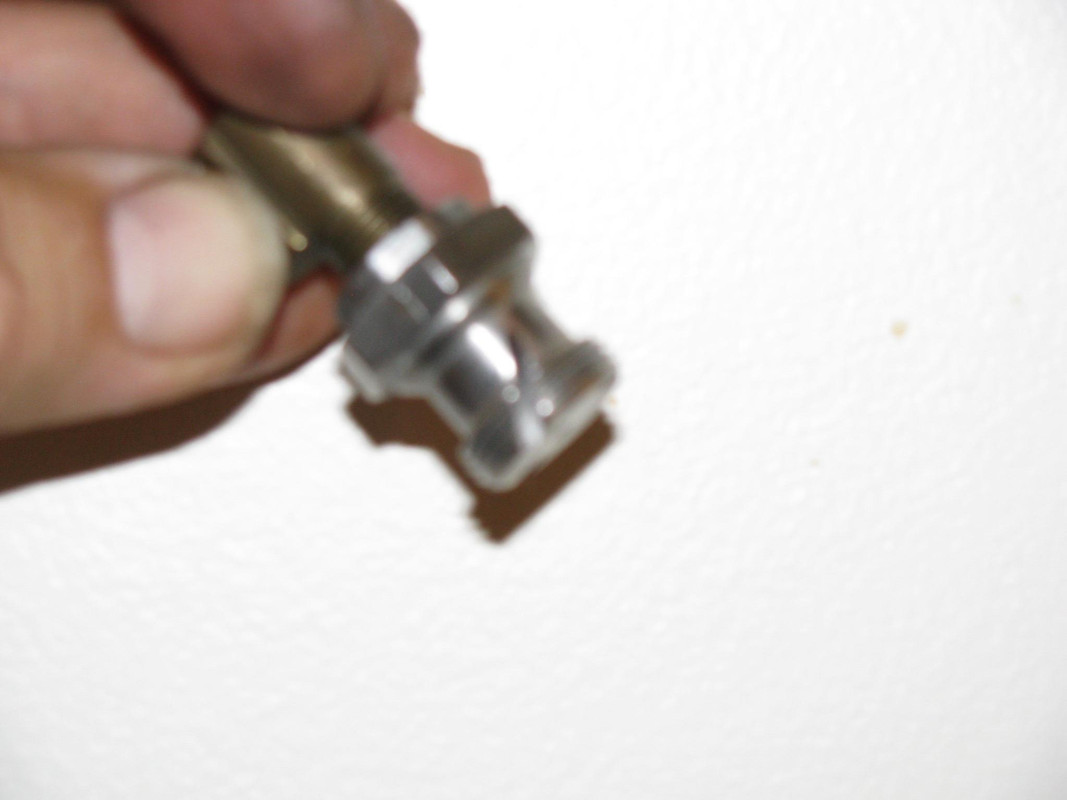
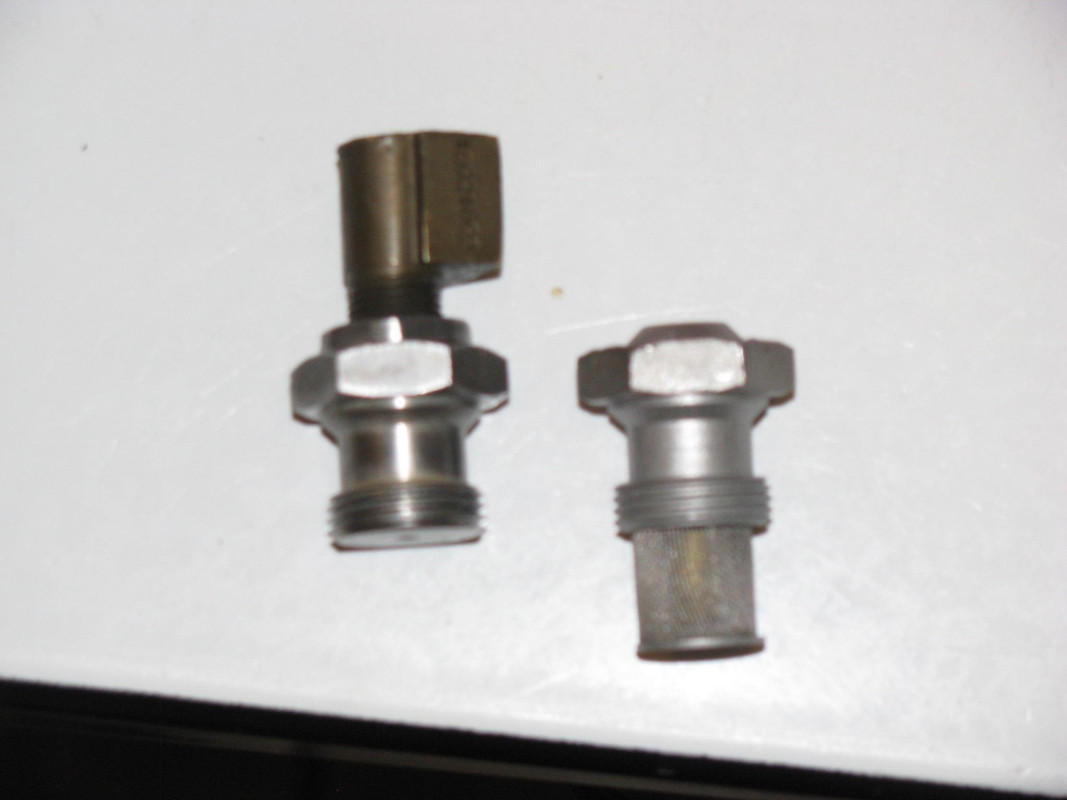
It is critical that the threads are clean and completely free of debris after the cuts are made. This can be accomplished by detailing the threads at the cuts with a fine file.

After installation, the truck fired right up and the engine ran correctly. Mr. Brooks' settings were absolutely spot on with no flat spots as promised but there must be balance in the universe so.... after a short drive around the back lot the truck wouldn't start again. :roll: The previous owner had mentioned that the truck would occasionally crap out for no discernible reason.

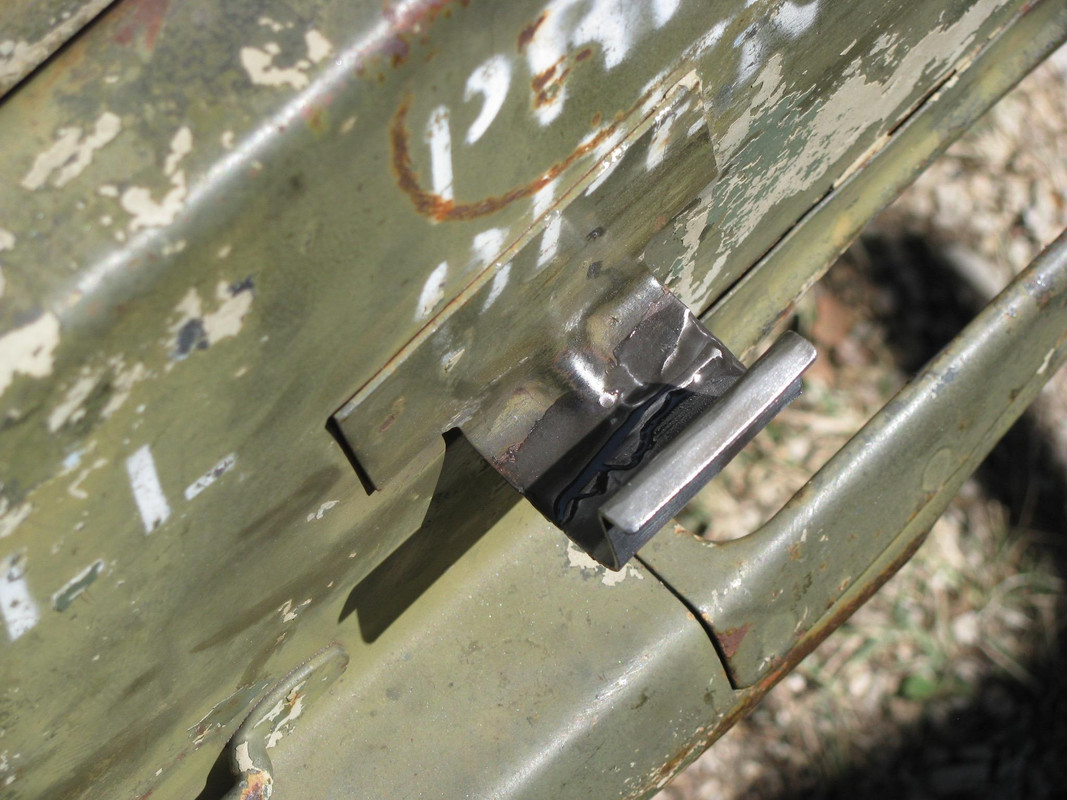
Pulled a plug wire and got no spark. So I went into the distributor and found...

THIS.
Image

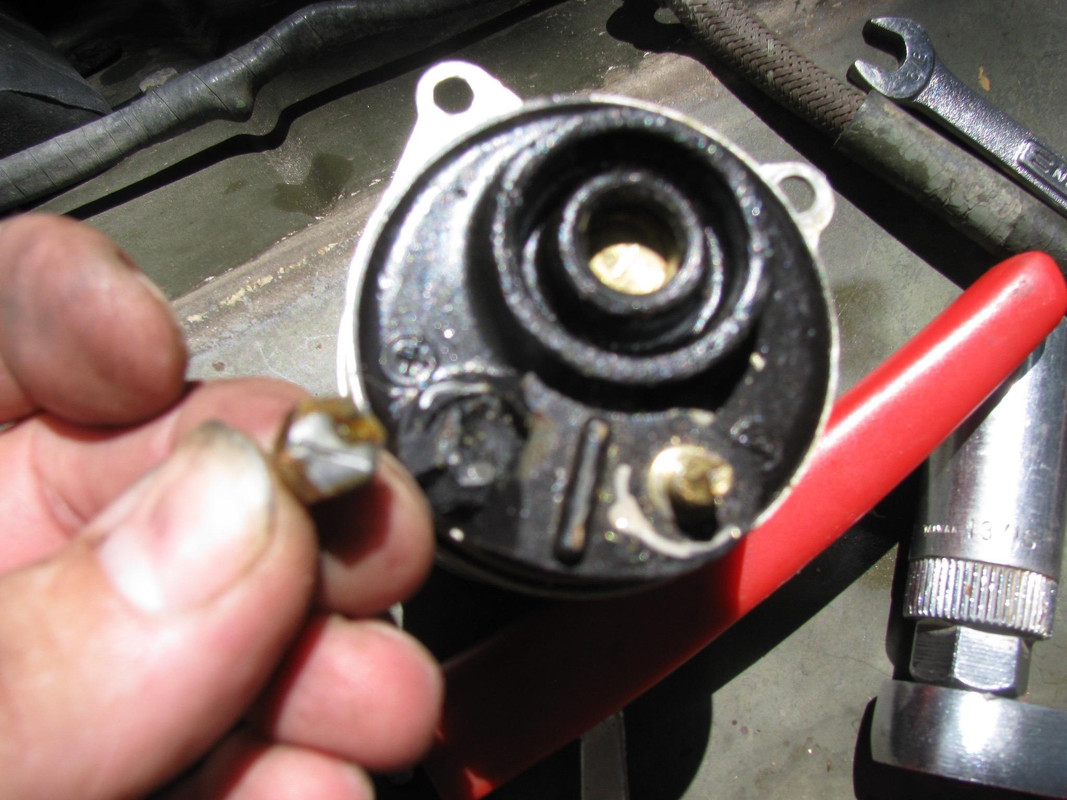
The resin around the brass lug was broken away and missing altogether (which means someone had been in there before me) and the lug is (was) soldered to a small wire. Had someone taken the time to reset that lug with some resin it probably would have been ok but the wire was no longer attached to the lug and the problem was intermittent depending wholly upon what kind of bumps the truck had endured while being driven. It's the little things that get ya. So I got into my great big box of everything and found another 24V coil (unproven) and installed it.
Image

And, we are back in business!!! Runs, drives, stops, has brakes, lights and a horn. Wow.

Next up....maintenance. Lots and lots of maintenance.
Last edited by m3a1 on May 17th, 2018, 8:32 pm, edited 2 times in total.

User avatar
rickf
General
General
Posts: 19788
Joined: November 26th, 2007, 1:28 pm
Location: Pemberton, NJ.

Re: Waking up a Texas M151A2

Unread post by rickf » September 5th, 2016, 8:17 pm

Ok, So you are using the return line fitting from an A2 13660 carb on a 12848 carb from an A1. Why not just get the right fitting from a 12848 carb? I see that there is some kind of fitting on there probably for a return line? That will now do no good at all since there is no pressure for it to work off of. Also, I see that the carb has been modifies for a hose barb connection, that is not a real good idea in an area that has very little extra metal considering it was no designed for pipe threads. Just some observations from an old carb rebuilder.

And by the way, that is a Prestolite ignition module, you might want to check the underside of it to make sure the potting material is not turning to mush.
1964 M151A1
1984 M1008
1967 M416
04/1952 M100
12/1952 M100- Departed
AN/TSQ-114A Trailblazer- Gone

User avatar
m3a1
Lt. General
Lt. General
Posts: 4053
Joined: August 7th, 2014, 6:36 pm

Re: Waking up a Texas M151A2

Unread post by m3a1 » September 5th, 2016, 9:33 pm

Yup, I checked the underside the coil and it's solid and only a temporary solution. Having several correct coils (two is one and one is none) on the shelf is going to have to be close to the top of the priority list.

Rick, what you fellas don't see in these pictures is that my place looks like an LA freeway at rush hour. Thus, nearly anything that keeps my projects mobile is a huge bonus because 99% of the time, I'm working alone around here and when a vehicle goes down, that's where it sits until it is fixed.

As for the carb, I consulted with Mr. Brooks and described the issue of having the wrong carb before doing anything that might have fouled up his good work. His opinion was that it was no big deal and he also told me that he could furnish whatever I needed when the time came to put the refurbished carb back in its original form and which would allow me to put the original carb back on the A2 once it was refurbished. The carburetor I am using at the moment belonged to the Alley Cat project but having the remaining space in the driveway tied up while waiting for misc. parts, or for another carb to be refurbished (which I might also add isn't cheap) is a no-go. Gotta keep Momma happy and if Momma ain't happy then nobody is happy and Momma likes to park in the driveway. So, the piece got modified under the tutelage of Mr. Brooks; a guy who not only is an expert in these carbs but stands behind his work and takes the time to help the customer even after the sale is complete.

I think the mod is a brilliant one and I wanted to share it with the readers. Come the day one of our members finds himself in a similar situation and out of options this might be just the fix that is needed to keep on motoring.

As for the barb, well, you might also notice that the soft line isn't right...but it's tight (no leaks) and since the truck isn't ready for the road yet (still so much to do) what you see is conducted primarily for the business of moving this truck around the place under it's own power while keeping the expenditures to a minimum and by my way of thinking, that's a very good, very sensible policy.

Cheers,
TJ

User avatar
m3a1
Lt. General
Lt. General
Posts: 4053
Joined: August 7th, 2014, 6:36 pm

Re: Waking up a Texas M151A2

Unread post by m3a1 » September 8th, 2016, 8:57 pm

I've been off on other projects around here but today I abandoned everything else and slid over to the A2 and installed the new wiper blades (no more worrying about the windshield being scratched inadvertently...yay!) and put the interior rear-view mirror on. Oh, and I pawed through the great big box of everything...assorted parts that I have been acquiring since I purchased the Alley Cat....in order to get some idea of what I have and don't have, parts-wise.

Blades and a mirror are not much but I am moving in the correct direction. Oh, and baby has new shoes. I pulled the new tires/wheels off the Alley Cat and put them on the A2. New rubber instead of those old, dry-rotted ranch tires really changes the look of the thing. It almost looks like somebody cares about it. Not bad.....for a war machine.

I also went to the local tax office and the nice ladies ran the VIN, the body serial number, the ORD number, the hood number and the VIN sequential number separately (just in case someone got creative when titling it way back when, and nothing came up.) That doesn't necessarily mean there isn't a title out there because inactive numbers actually get purged from the computer system after a certain amount of time. It used to be that the DMV would do a manual search (for a pretty penny) but I think that's pretty much over with. So, at the urging of the staff, I left there with the initial paperwork to get a bonded title. This is a new process for me so I'll share the particulars of that process with everyone when I get into it.

Cheers,
TJ

Fil Bonica
Brigadier General
Brigadier General
Posts: 2607
Joined: December 9th, 2007, 10:49 am
Location: ~ Heaven ~

Re: Waking up a Texas M151A2

Unread post by Fil Bonica » September 9th, 2016, 10:22 am

A great article about your trials and tribulations getting this beast to come alive.
Especially liked info on the carb.
These vehicles have been around for years and who knows what has been done to them.
The distributor problem was something different!

Good Luck

Fil Bonica
K1ABW

User avatar
m3a1
Lt. General
Lt. General
Posts: 4053
Joined: August 7th, 2014, 6:36 pm

Re: Waking up a Texas M151A2

Unread post by m3a1 » September 9th, 2016, 10:29 pm

After pawing through The Great Big Box Of Everything I found I had a rectangular rear view mirror. I also saw some pics in the TM that showed a round rear view mirror, though I thought that was more appropriate for earlier trucks to use the round. Which would be the correct mirror for a late 1970 model A2?

I removed the round mirror and put the rectangular one on and it's much, much better than the round which is to say I can see quite a bit more with it.

Took a few minor dents out of the hood today and found a place where the choke cable sleeve had been rubbing on the inside of the hood. I took the low road and cut a piece of leftover rubber fuel line (I never throw anything away which is a behavior that has been reinforced during jobs just like this) and slit it on the long axis and slipped it over the cable sleeve for a nice snug fit. No more rubbing on the hood!

Speaking of the hood, a closer look revealed someone had taken the time to draw out the lines that demarcated the old brush-painted camo (most of which has since detached itself from the truck.) This seems more like something that the military would do, rather than Joe-Hunter. I think I read in someone's post that the military was not above brush painting their stuff. Still, I fail to see that there were the usual markings on top of the camo. Just another mystery that will never be solved, I suppose.

On the topic of Safety Belts! My shoulder strap retractors aren't doing their job, though they are trying. Having the belts hanging there slack looks pretty darned sloppy. I'd imagine there's quite a bit of South Texas in there gumming up the works and the solution may be as simple as a detailed cleaning and lube. Has anyone been inside a safety belt retractor and found anything that can be serviced? If so, I'd love to hear more about that before I go digging around in there.

User avatar
m3a1
Lt. General
Lt. General
Posts: 4053
Joined: August 7th, 2014, 6:36 pm

Re: Waking up a Texas M151A2

Unread post by m3a1 » September 10th, 2016, 5:12 pm

See "What kind of oil?" under Technical Discussions for details on the progress I made today -

Oil and filter change.
Ran off a pesky gremlin.
Removed a suspicious rubber boat drain plug from the oil pan drain hole and installed the correct plug.
Identified a leaking lower radiator hose.

In all, a very good day indeed.

User avatar
m3a1
Lt. General
Lt. General
Posts: 4053
Joined: August 7th, 2014, 6:36 pm

Re: Waking up a Texas M151A2

Unread post by m3a1 » September 10th, 2016, 8:42 pm

Target for tomorrow -

This has been bugging me since day one.
Image

I think it's time to make a new tab for it and weld it to the piece that remains. I don't want to put a whole new hanger on. It might make a clean spot! :lol: :lol:

This has also been bugging me since day one.
Image
Image

I think I can get that piece hammered back into shape and re-tacked. I may even have a correct shovel laying around here somewhere.
Last edited by m3a1 on May 17th, 2018, 8:39 pm, edited 2 times in total.

User avatar
m3a1
Lt. General
Lt. General
Posts: 4053
Joined: August 7th, 2014, 6:36 pm

Re: Waking up a Texas M151A2

Unread post by m3a1 » September 11th, 2016, 4:49 pm

Ok, I met my goals today. I started out by forming a small piece of metal to recreate the missing piece on the forward axe mount. As usual I used my favorite metal shaping tool - the tongue of my ammo trailer. That thing has just about every angle and bend and arch you could possibly want. So, with that done I moved the whole shebang back to my welding area and tacked it on using my shiny new copper spoon as a backer. Wow, that thing makes butt-welds soooo much easier!
Image
Image
Image
Image
I couldn't get in there to take the crown of the weld all the way down so I used my biggest cheat... J.B.Weld, to dress the weld up just a little.
Image
Image
And now it's off to the other side to deal with the badly mangled shovel head mount. The forward bolt on the ROPS mount made it impossible for the shovel head mount to remain where it belonged. I'd love to see what the normal installation process should be but I'm pretty sure it didn't include tearing up the shovel mount. Anyway, in order to install the ROPS, the piece had been wrenched off the single spot weld and badly mangled in the process. First, I removed the offending bolt. Note the badly degraded nut trying hard to shrink to a metric dimension. Not good.
Image
Things are looking a bit better after some heat and a body hammer.
Image
Using an old piece of scrap left over from the Alley Cat project as a heat shield. Note how much heavier that material is than original M151 steel!
Image
Here's the piece generally back in the right place without being stressed. Once this is tacked back down that's one less rattle! I'm not going to put the offending bolt for the ROPS back in. Why? Because it's in the way, and there are a ridiculous number of bolts holding that particular ROPS mount in place and because I say so!
Image
Remember one of my top goals is not to make a clean spot. Today I made two....but they're of a manageable size and I'm going to disguise them further. (Shh! Don't tell anyone!)
Image
Image
Image
Image
Image
No, I am not going to fill that stupid hole! Notice the little rust pin holes that showed up while I was banging away on this part of the truck? This truck has lots of holes, so filling one...or not, isn't going to make any great difference.
Image
Repairs disguised. Not so glaringly obvious now! :wink:
Image

So, today was a success x2. I'm callin' it gooooooood.
Last edited by m3a1 on May 17th, 2018, 8:40 pm, edited 2 times in total.

User avatar
m3a1
Lt. General
Lt. General
Posts: 4053
Joined: August 7th, 2014, 6:36 pm

Re: Waking up a Texas M151A2

Unread post by m3a1 » September 12th, 2016, 5:09 pm

I decided to do a few little things today so off came the ROPS netting and out came the seats. I folded the top forward and wiped out an ant colony that was nesting between the canvas and the top of the windshield. Then I took a small propane torch and burned away all the little bits hanging off what was once some kind of hunter's camo tape on the ROPS in preparation for laying on new tape. I like my truck a bit ragged but I do have some standards! After laying on the new tape I can say with good authority that 2" tape is far better and infinitely more manageable than 3" tape when it comes to doing the joints in the ROPS.
Image
Image

When it came to the seats, well, they're a mess but not so bad that a few strips of zip ties won't provide a temporary solution to the occasional spring anchor having rusted away.
Image
Image

And then there was the business of the safety belts. There's nearly a mile of shoulder harness in the retractors! No wonder they won't retract all the way! There isn't enough room for all the strap. No user serviceable parts in there and they weren't all that dirty. Fact is, I should probably look for some replacements or eliminate the shoulder harness altogether. By the way, check out the way the left side was mounted differently than the right side. On the left, the retractor is mounted outboard of the mounting plate. Weird.
Image
Image

I'm claiming a double win today and at least I know where I am going with the safety belt system
Last edited by m3a1 on May 17th, 2018, 8:42 pm, edited 2 times in total.

User avatar
rickf
General
General
Posts: 19788
Joined: November 26th, 2007, 1:28 pm
Location: Pemberton, NJ.

Re: Waking up a Texas M151A2

Unread post by rickf » September 12th, 2016, 6:46 pm

They are inertia activated and are the same unit so they are mounted in the same direction so that the inertia lever will go forward on both units, right and left.
1964 M151A1
1984 M1008
1967 M416
04/1952 M100
12/1952 M100- Departed
AN/TSQ-114A Trailblazer- Gone

User avatar
m3a1
Lt. General
Lt. General
Posts: 4053
Joined: August 7th, 2014, 6:36 pm

Re: Waking up a Texas M151A2

Unread post by m3a1 » September 12th, 2016, 10:37 pm

Are you telling me that placement was correct?!! I was in one of the mechanisms today and I saw the inertia lock bar located at the base of the retractor. Its placement didn't strike me as being at all dependent upon whether it was mounted one way or the other. In fact, the lock bar's long axis was on the long axis of the vehicle. There is some interesting stuff on the internet about safety belts. See - http://auto.howstuffworks.com/car-drivi ... tbelt3.htm for some more.

To tell you the truth, I'm probably going to eliminate the shoulder harness altogether unless I can find suitable replacements on the cheap. I would certainly like to have them, but not if I'm going to be hung by 'em in an accident.

I have new, proper lap belts (equipped with retractors and the whole shebang) which will get me through an inspection in fine style. In Texas, if it was originally manufactured with belts, it has to have 'em...but only in the configuration it was delivered with. So, in the case of my truck, the ROPS (and the shoulder harness kit) is an addition made after manufacture and thus, not inspectable.
Last edited by m3a1 on September 13th, 2016, 1:19 pm, edited 1 time in total.

User avatar
Horst
Colonel
Colonel
Posts: 1964
Joined: December 9th, 2007, 6:21 am
Location: Munich, Germany

Re: Waking up a Texas M151A2

Unread post by Horst » September 12th, 2016, 11:56 pm

both lap and shoulder belts are part of ROPS, without ROPS there are no seat belts at all. I would certainly try to repair the should belt retractor or get replacement ones. Having ROPS and only lap belts would be a waste on safety in my opinion. I tried to repair a retractor but in my case the spring was rusted and broken.
Horst

1972 USMC M151A2 w/ROPS (ex Barstow) and M416
1962 M201 and trailer
1966 GTO,1982 E350 Skoolie, 1987 SJ413, 1987 911
Gone: 2xM35A2c, Unimog 404S, Hanomag AL28, DKW Munga

User avatar
m3a1
Lt. General
Lt. General
Posts: 4053
Joined: August 7th, 2014, 6:36 pm

Re: Waking up a Texas M151A2

Unread post by m3a1 » September 13th, 2016, 7:28 am

I agree with you, Horst, but only in a very general way. But your point also suggests that one must also always employ netting because that too is part of the restraint system so, how much is enough? I have netting but it is so old I sure wouldn't bet my life on it but not having wouldn't keep me from driving it and I sure wouldn't bet my life on those shoulder harnesses because, quite frankly, they're a real menace in their present state and that is my issue with them. I'm more likely to be hanged by them than to be restrained by them. So, we come down to the For my very limited use of this truck, lap belts will be quite sufficient for the time being. I might just bring this up as a topic in General Discussion. It would be interesting to see what the masses have to say about it but I will be off on other more important things for a few days. Good luck to all with your projects!

User avatar
Horst
Colonel
Colonel
Posts: 1964
Joined: December 9th, 2007, 6:21 am
Location: Munich, Germany

Re: Waking up a Texas M151A2

Unread post by Horst » September 13th, 2016, 3:46 pm

You need the netting in a roll over case so that your arms are not outside of the vehicle and get severely hurt. I personally believe that a roll over is more than unlikely and first of all in most all cases it will be you getting into it (if you ask George on this board, he might have a different opinion, he rolled his A2 at highway speeds and it was not his mistake)

Much more likely is that you get rear ended by a texting driver and you rear end one doing the same. I am pretty sure it will hurt pretty much hitting that A2 steering wheel. Rear ended will be of course worse as we don't have a headrest.

Now you can argue this is all theoretical. In my case, somebody hit me when driving my M201. The fact that I did not get hurt was just pure luck. Right after that I retired the M201 and got myself the M151 and before getting it on the road, installed ROPS.

BTW, I think if you have ROPS, you need to have the netting. But just for the looks of it. That's how they were modified and that's how they should look like. My netting was toast too but I found NOS ones. In my opinion it totally transforms the look of the 151, it moves it quite away from the flat fender look. In my case, if I want that look, I could pull out the M201 (yes I still have it and it is fully repaired/restored). In your case, get a M151A1 too :)

I totally like the used look of your A2 I might want to add.

Image
Image
Horst

1972 USMC M151A2 w/ROPS (ex Barstow) and M416
1962 M201 and trailer
1966 GTO,1982 E350 Skoolie, 1987 SJ413, 1987 911
Gone: 2xM35A2c, Unimog 404S, Hanomag AL28, DKW Munga

Post Reply