
Absolutely unbelievable resurrection!
Well done, sir. And fun to watch.
Tangible progress on the M718!
Moderators: rickf, raymond, Mr. Recovery
Re: Tangible progress on the M718!
LTDan
Commanding Officer
Company A
95th Supply & Service Battalion (Direct Support)
VII Corps Support Commmand
1970-73
Fürth, Germany

Commanding Officer
Company A
95th Supply & Service Battalion (Direct Support)
VII Corps Support Commmand
1970-73
Fürth, Germany
-
Aswayze
- Sergeant First Class

- Posts: 288
- Joined: July 10th, 2013, 7:50 am
- Location: Kansas City, Kansas
- Contact:
Re: Tangible progress on the M718!
We were talking a bit this weekend about the types of “restorations” we end up doing around here.
Are they perfect? No.
Are they good ? No.
Are they ideal? No.
Are they an efficient use of time? No.
Would we rather be doing it another way? Yes.
Everyone would like to ride into battle atop a white horse, sabers gleaming, uniforms perfect, fight that straight up, honorable, pitched battle, then ride home to parades and glory.
Sometimes you get to do that. Other times, your problem is big, your goals are in all reality beyond your reach, your resources are slight and you must resort to an insurgency. Not because you want to be that guy who fires one shot from his Pennsylvania rifle from behind a log and runs for it but because you only had one round ball and your powder horn is getting low. You could give up, you could decide that your goals are beyond your reach or you could double down and do the best you can with what you’ve got.
An insurgency is hard. Conditions are bad, resources are slim, but you can eventually succeed.
Anyhow, enough of my ranting. The M718 insurgency continued over the weekend.
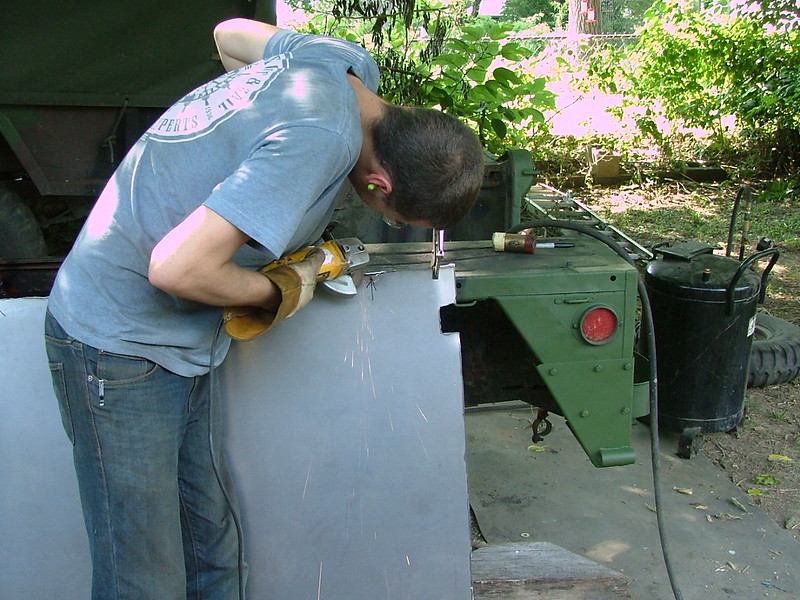
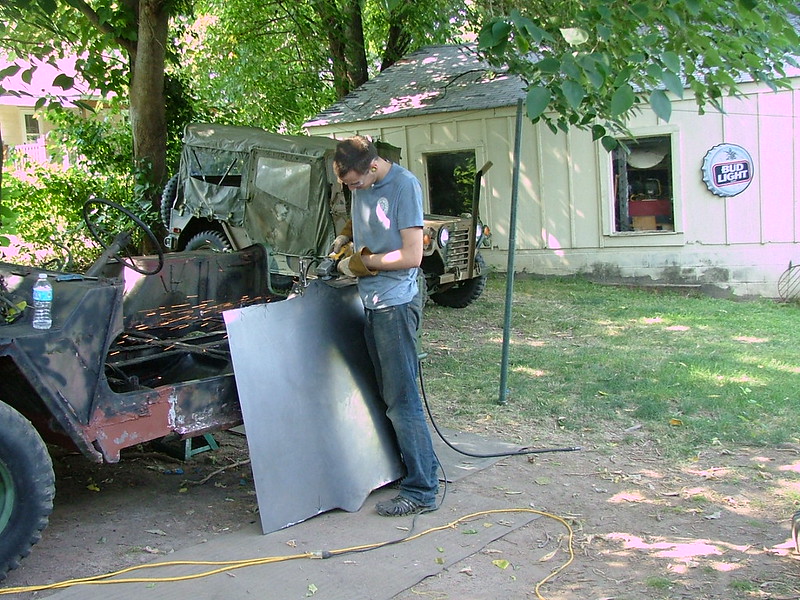
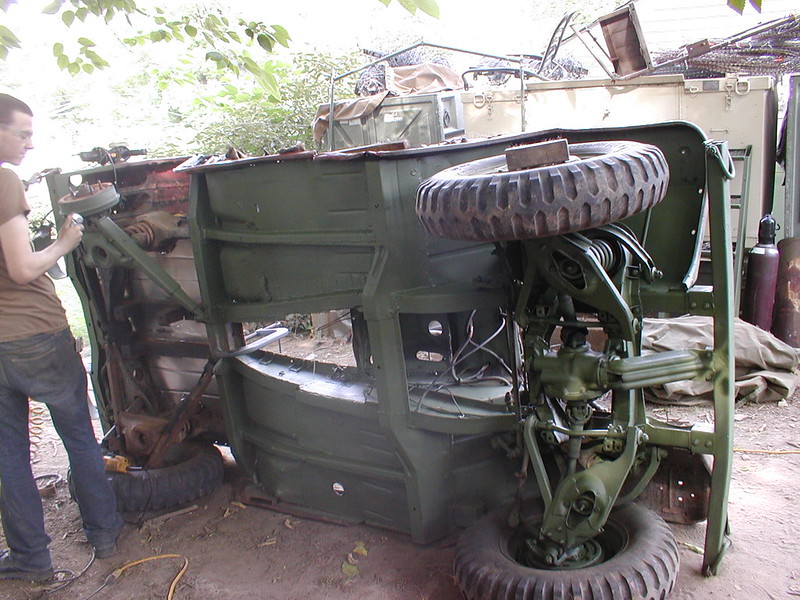
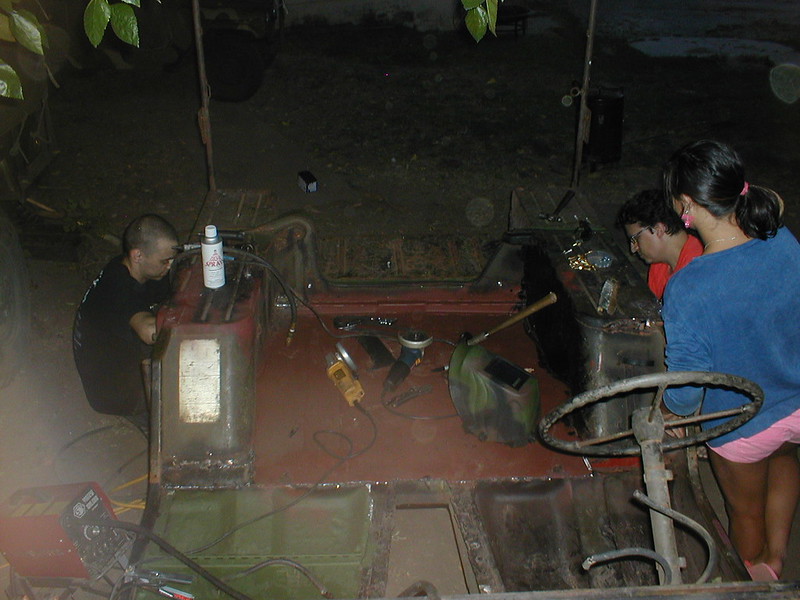
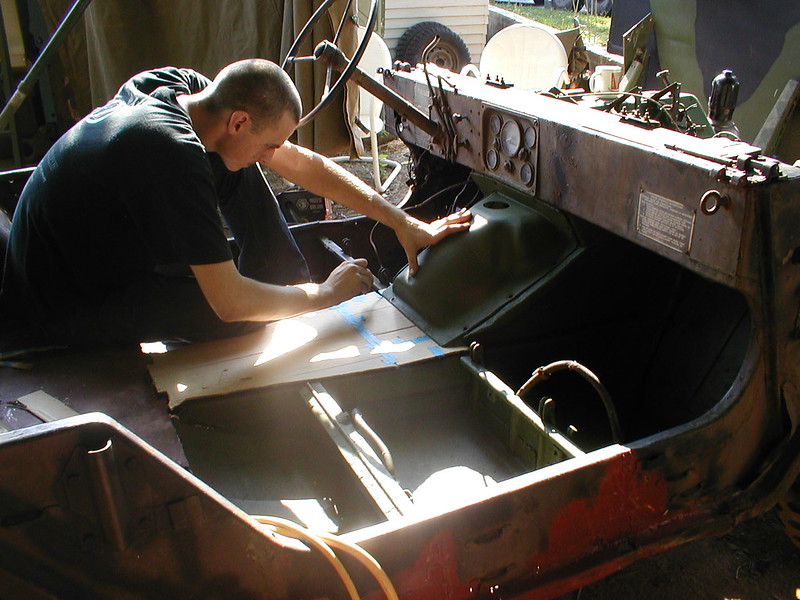
Curfman got the sides all patched up and I got the new framing installed in the back to replace all the rotted away metal. We then fitted the patch panel then tied everything back in structurally to it to make certain that it’s as strong as it can be since it’ll have the ambulance extension back there.
Curfman then capped the back edges all up and has got most of the prep work done for the rear floor. Once he gets the sheet metal cut and the beads rolled, the next step will be installing the rear floor.
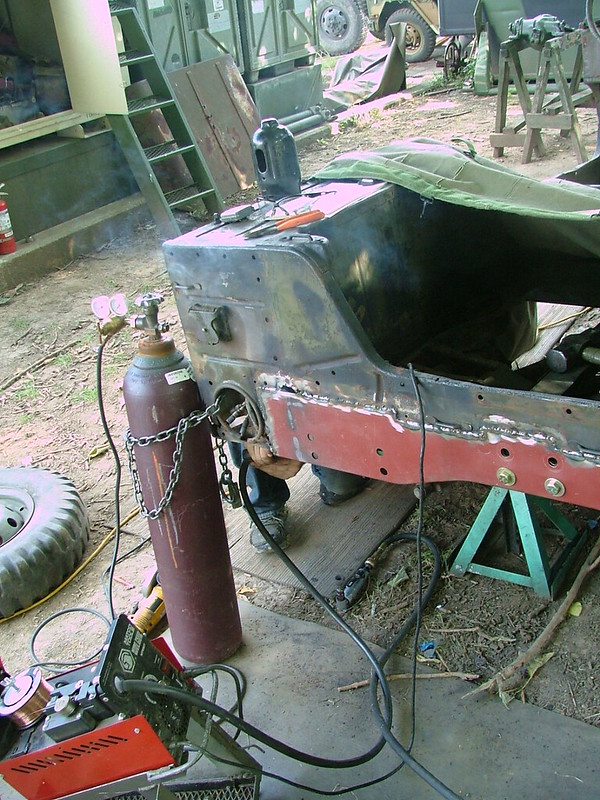
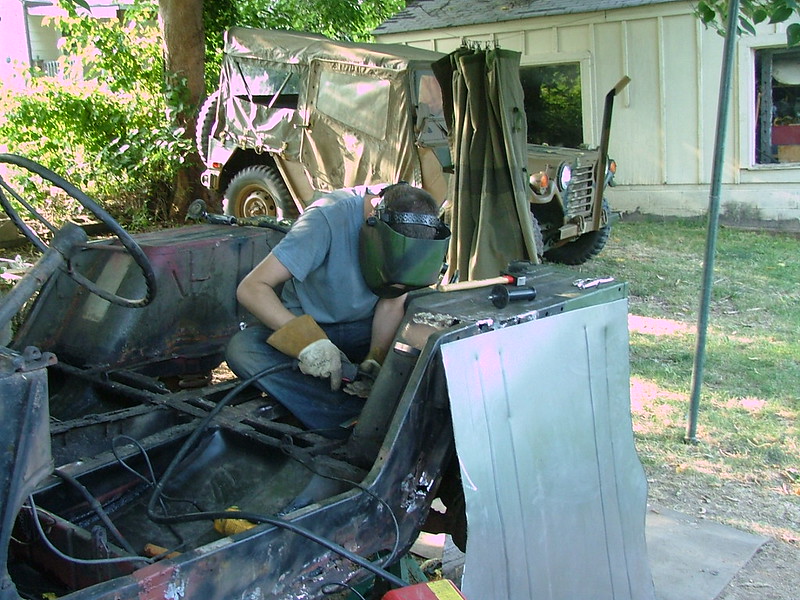
Curfman tying tabs in to the newly made rear structure to the rust repair panel in the back.
Curfman and Stagg adding in the corner braces. They had been pulled off, cleaned up and painted a while back. Obviously, prior to installing them the area underneath had to be painted up as well.
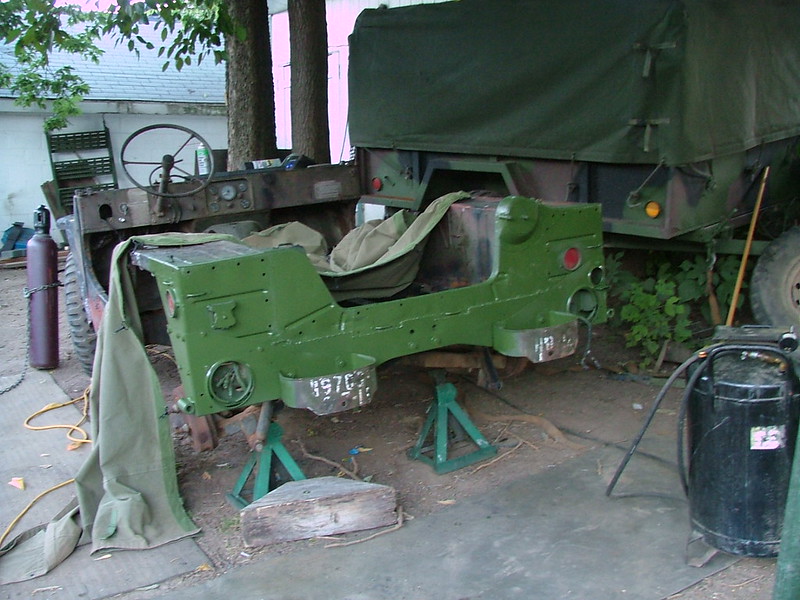
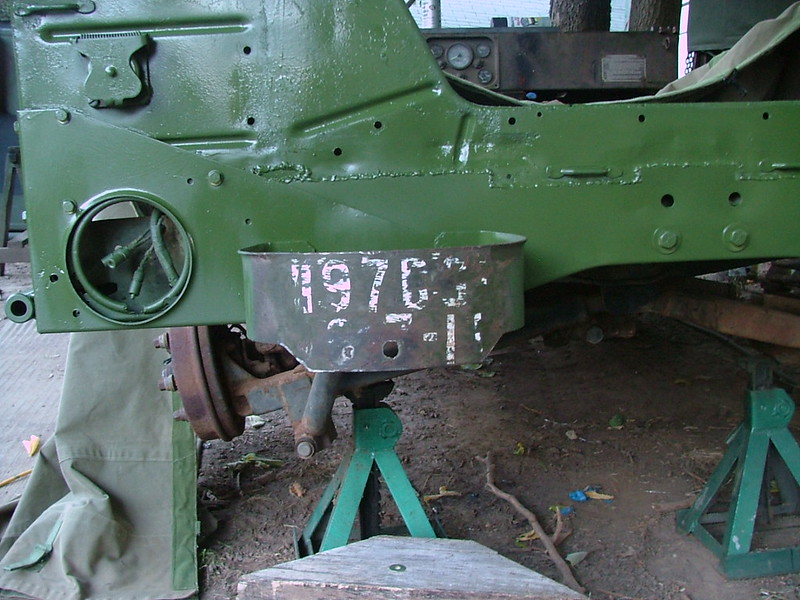
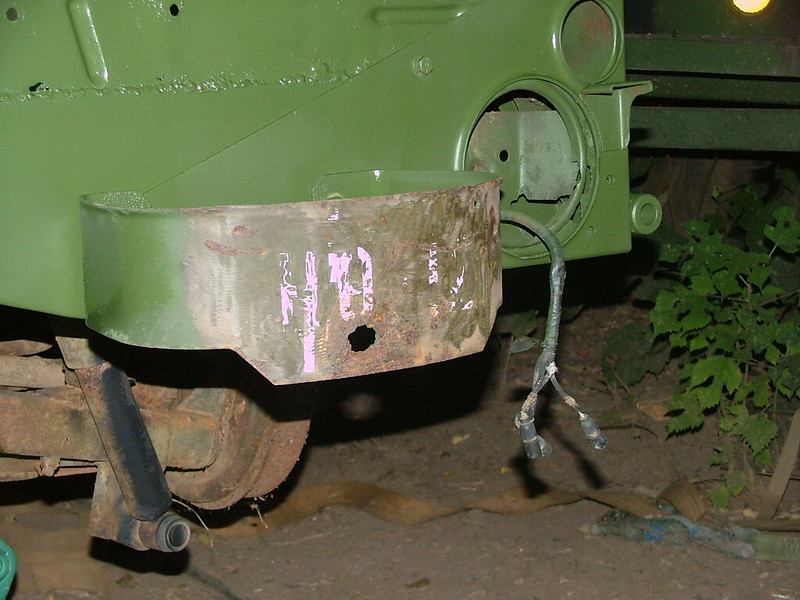
Next up bumperettes get added then a quick coat of 383 green since this area will be in the shadow of the extension and will be harder to paint later. We did not bother grinding the welds along the top since the ambulance extension is basically right above there (you can see the bolt holes) so the weld is pretty well out of sight out of mind.
Are they perfect? No.
Are they good ? No.
Are they ideal? No.
Are they an efficient use of time? No.
Would we rather be doing it another way? Yes.
Everyone would like to ride into battle atop a white horse, sabers gleaming, uniforms perfect, fight that straight up, honorable, pitched battle, then ride home to parades and glory.
Sometimes you get to do that. Other times, your problem is big, your goals are in all reality beyond your reach, your resources are slight and you must resort to an insurgency. Not because you want to be that guy who fires one shot from his Pennsylvania rifle from behind a log and runs for it but because you only had one round ball and your powder horn is getting low. You could give up, you could decide that your goals are beyond your reach or you could double down and do the best you can with what you’ve got.
An insurgency is hard. Conditions are bad, resources are slim, but you can eventually succeed.
Anyhow, enough of my ranting. The M718 insurgency continued over the weekend.
Curfman got the sides all patched up and I got the new framing installed in the back to replace all the rotted away metal. We then fitted the patch panel then tied everything back in structurally to it to make certain that it’s as strong as it can be since it’ll have the ambulance extension back there.
Curfman then capped the back edges all up and has got most of the prep work done for the rear floor. Once he gets the sheet metal cut and the beads rolled, the next step will be installing the rear floor.
Curfman tying tabs in to the newly made rear structure to the rust repair panel in the back.
Curfman and Stagg adding in the corner braces. They had been pulled off, cleaned up and painted a while back. Obviously, prior to installing them the area underneath had to be painted up as well.
Next up bumperettes get added then a quick coat of 383 green since this area will be in the shadow of the extension and will be harder to paint later. We did not bother grinding the welds along the top since the ambulance extension is basically right above there (you can see the bolt holes) so the weld is pretty well out of sight out of mind.
-
Aswayze
- Sergeant First Class
- Posts: 288
- Joined: July 10th, 2013, 7:50 am
- Location: Kansas City, Kansas
- Contact:
Re: Tangible progress on the M718!
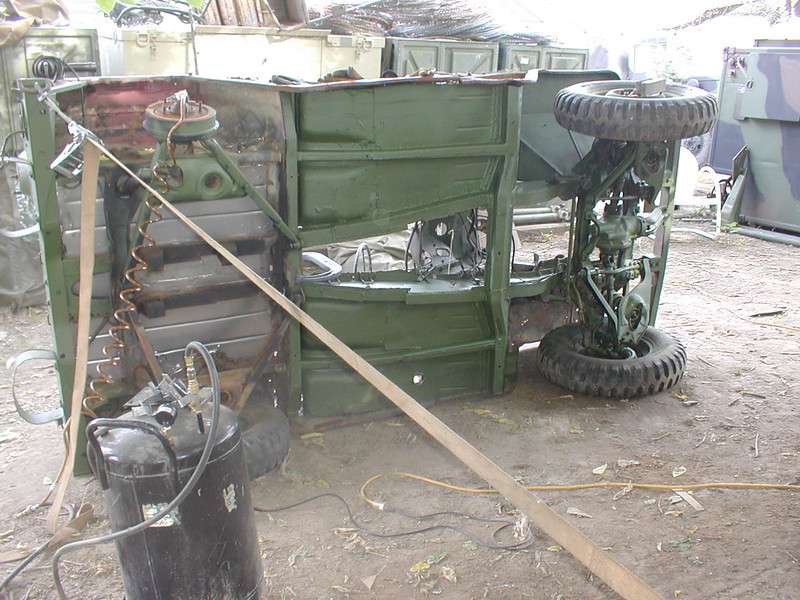
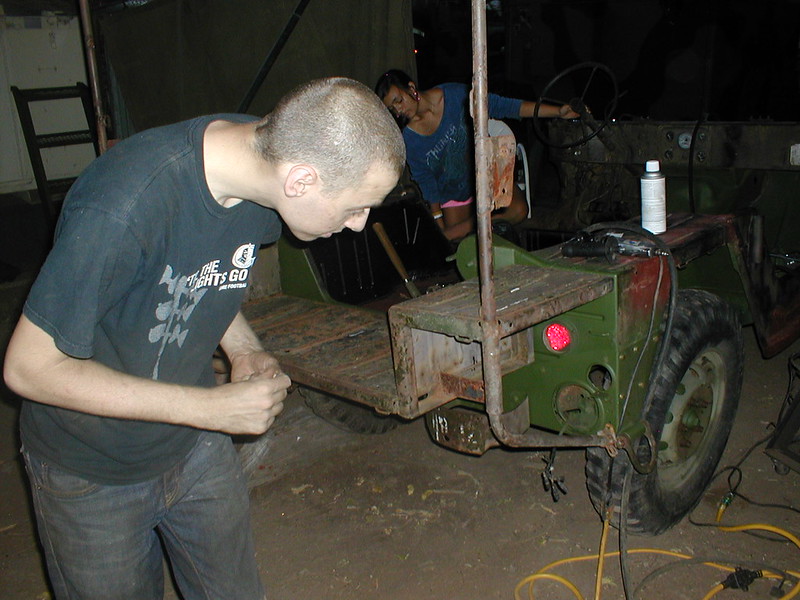
Rear floor install time!
Curfman is back at school now so doesn’t have all the time he used to have but at the same time is now showing up full of a lot more piss and vinegar so it’s still working out pretty well in the long haul.
Curfman had made up a pattern out of cardboard earlier in the week so for the most part, we got the metal about 90% right just by transferring the pattern onto the sheet metal then plasma cutting it out.
Once cut out initially, the floor was installed and tight spots were marked. Then back out it comes and thing were trimmed a bit and back in it went. Total of 3 iterations of this which is not really too bad all things considered.
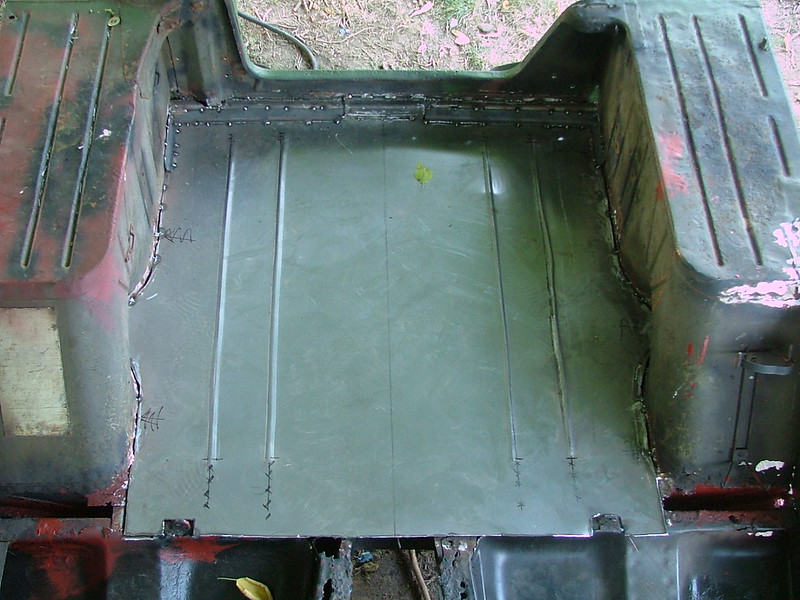
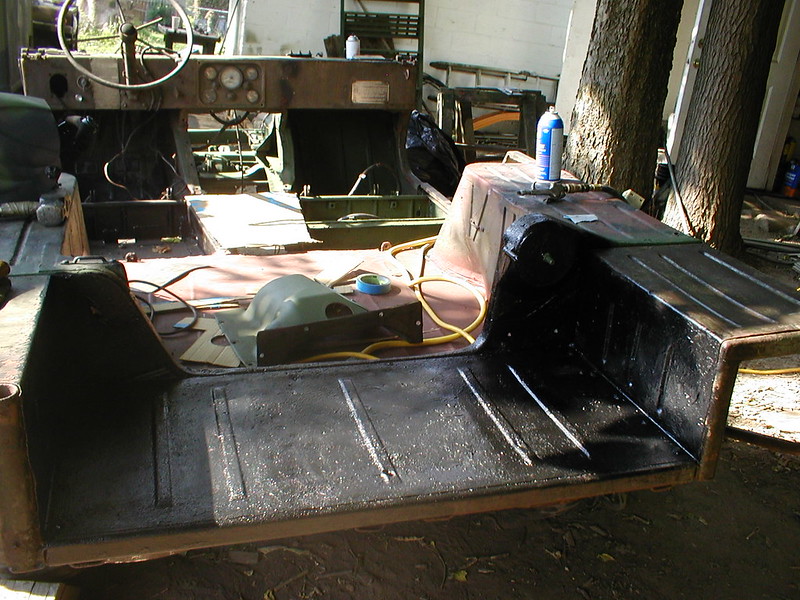
Once everything was cut to fit, we bead rolled the floor in 4 out of 6 of the locations the original was done. Didn’t have enough throat to get the middle one and we just plain forgot the small one that goes perpendicular to the rest up close to the trans tunnel (oops). In spite of being well practiced at bead rolling by now we still managed to screw up one of them but by the time it gets covered with truck bed liner and paint it shouldn’t be too obvious. After that Curfman set to work grinding and prepping the metal along the edge for welding. A few more minor touch ups to the unibody frame underneath just because it’s sometimes easier to do from the top and the floor was ready to go in.
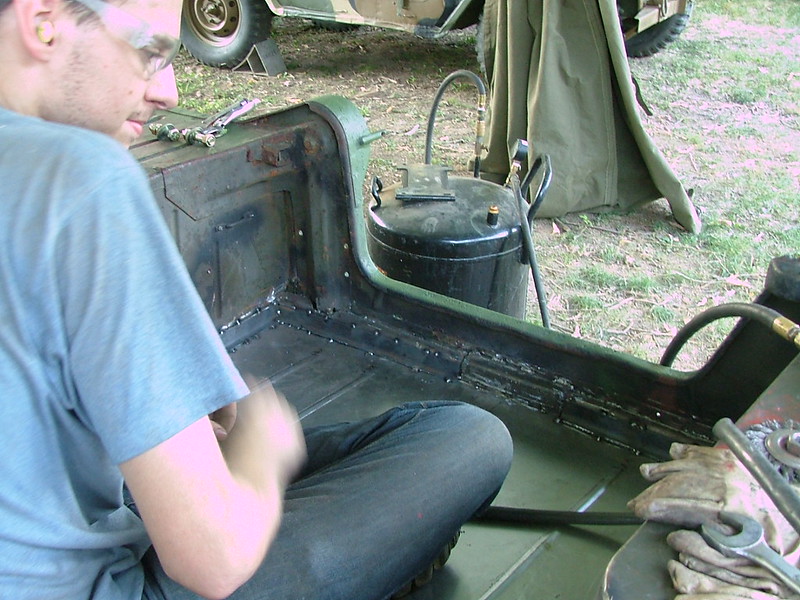
Rear floor in and Curfman is sitting in the back of his Mutt for the first time! We cut some little angle steel bits to help sort of box in the back edge and cap some spots where we had cut away rusted metal then all along the edges it was tacked in a spot at a time while making sure that it was all laying flat.
Rear floor in place. From here, we lured Hoober over and flipped the Mutt over on it’s side again so Curfman can weld the floor in along the bottom edge then move back over to the top and tie it all together moving around enough to let the heat disperse and hopefully not warp the panel. We’ll probably pull the rear differential to get better access and we may even weld in a reinforcement piece on the bottom to make up for the missing middle bead. Curfman’s got class today, including machine shop II where he plans to manufacture more of his missing Mutt parts as projects. He ought to be free Thursday and Friday afternoons to get this part all finished off then move to making the tunnel cover. Once that is done, all major holes in the M718 are closed and he can move on to the minor stuff.

One day I may even get my back yard back… There used to be grass here…
Curfman is back at school now so doesn’t have all the time he used to have but at the same time is now showing up full of a lot more piss and vinegar so it’s still working out pretty well in the long haul.
Curfman had made up a pattern out of cardboard earlier in the week so for the most part, we got the metal about 90% right just by transferring the pattern onto the sheet metal then plasma cutting it out.
Once cut out initially, the floor was installed and tight spots were marked. Then back out it comes and thing were trimmed a bit and back in it went. Total of 3 iterations of this which is not really too bad all things considered.
Once everything was cut to fit, we bead rolled the floor in 4 out of 6 of the locations the original was done. Didn’t have enough throat to get the middle one and we just plain forgot the small one that goes perpendicular to the rest up close to the trans tunnel (oops). In spite of being well practiced at bead rolling by now we still managed to screw up one of them but by the time it gets covered with truck bed liner and paint it shouldn’t be too obvious. After that Curfman set to work grinding and prepping the metal along the edge for welding. A few more minor touch ups to the unibody frame underneath just because it’s sometimes easier to do from the top and the floor was ready to go in.
Rear floor in and Curfman is sitting in the back of his Mutt for the first time! We cut some little angle steel bits to help sort of box in the back edge and cap some spots where we had cut away rusted metal then all along the edges it was tacked in a spot at a time while making sure that it was all laying flat.
Rear floor in place. From here, we lured Hoober over and flipped the Mutt over on it’s side again so Curfman can weld the floor in along the bottom edge then move back over to the top and tie it all together moving around enough to let the heat disperse and hopefully not warp the panel. We’ll probably pull the rear differential to get better access and we may even weld in a reinforcement piece on the bottom to make up for the missing middle bead. Curfman’s got class today, including machine shop II where he plans to manufacture more of his missing Mutt parts as projects. He ought to be free Thursday and Friday afternoons to get this part all finished off then move to making the tunnel cover. Once that is done, all major holes in the M718 are closed and he can move on to the minor stuff.
One day I may even get my back yard back… There used to be grass here…


Re: Tangible progress on the M718!
Ever since I mentioned buying new sheet metal you guys have been going hog wild with it. A lot easier to work with isn't it?  On welding the sheet metal and heat build up. Do you use or know about back stepping?
1964 M151A1
1984 M1008
1967 M416
04/1952 M100
12/1952 M100- Departed
AN/TSQ-114A Trailblazer- Gone
1984 M1008
1967 M416
04/1952 M100
12/1952 M100- Departed
AN/TSQ-114A Trailblazer- Gone
-
Aswayze
- Sergeant First Class
- Posts: 288
- Joined: July 10th, 2013, 7:50 am
- Location: Kansas City, Kansas
- Contact:
Re: Tangible progress on the M718!
To be fair, we did know that there was no getting around buying new metal for some of those spots. Just not much getting around missing floors. 
We have mostly just been working in spurts, managing our heat as best we can partially for the sake of the work and partly because that little welder is pretty low duty cycle so we try not to get it too hot. That said, after reading up on back stepping off of the Lincoln sight that may well be worth giving a try as well at least on the jobs where we can run the welder whole hog for a bit and not be stuck letting it cool off for 30 minutes.
We have mostly just been working in spurts, managing our heat as best we can partially for the sake of the work and partly because that little welder is pretty low duty cycle so we try not to get it too hot. That said, after reading up on back stepping off of the Lincoln sight that may well be worth giving a try as well at least on the jobs where we can run the welder whole hog for a bit and not be stuck letting it cool off for 30 minutes.
-
Aswayze
- Sergeant First Class
- Posts: 288
- Joined: July 10th, 2013, 7:50 am
- Location: Kansas City, Kansas
- Contact:
Re: Tangible progress on the M718!
With the Mutt upended, I set to work truck bed lining the underside (I guess that makes it undercoating now) then painting everything with 383 green paint while Curfman did his prep work on the bed area.
Another shot of the bottom looking mostly at the new floor in the back. It is so nice. The strap you see is just a safety strap to keep silly neighbor kids or that "Hey KoolAide!" guy from flipping the mutt back level on us while we are under it. It’s actually quite stable up on its side but better safe than sorry. The air tank you see down there is our surge tank, it helps separate out water and also keeps the air flowing a bit better since it accumulates some air and we don’t just end up with the tool starving for air at the end of 150 feet of air line just because something got a little pinched along the way.

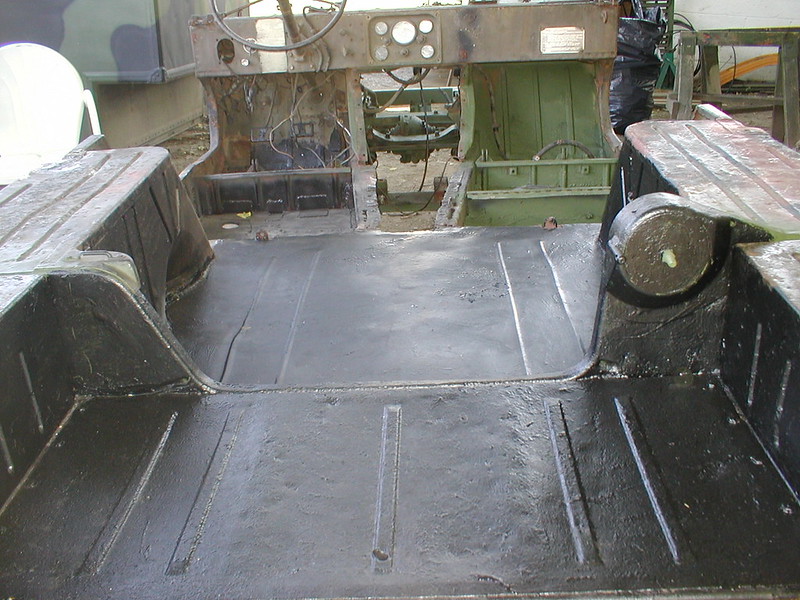
Rear floor most of the way spotted in. We used some tabs along some of the underside as well as made up a few trips of metal with beads rolled in them to stick in here and there to reinforce the floor based on what we have seen on some of our Mutts that came out of rough farm service New floor should hold up pretty well backed up the way it is.
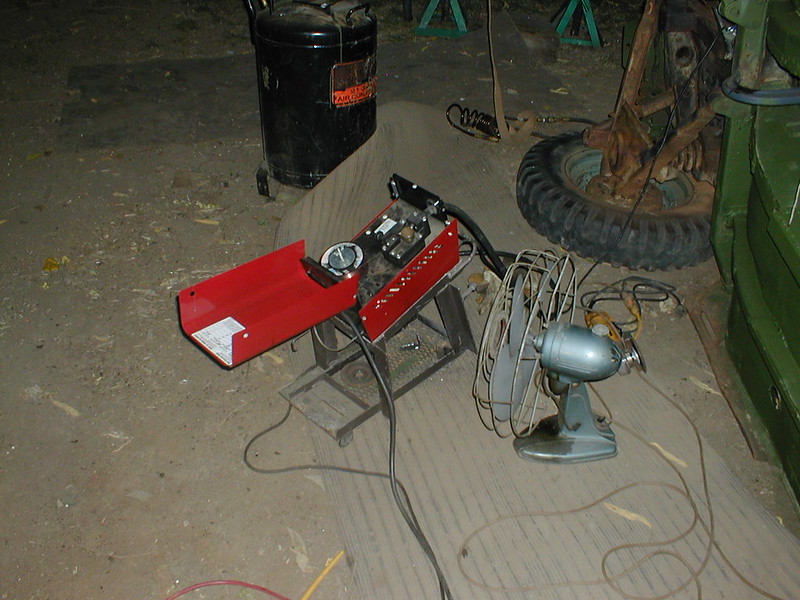
Poor little welder. It really did not sign up for projects like this... Fan helps it a bit but we still end up having to pause and let it cool off fairly frequently.
Today after work (for me) and school (for Curfman) the plan is to finish up the welding on the underside then prime it. After that stuff is dry, we add the truck bed liner, then after that the 383 green then we flip it down then back up on the opposite side to paint all the spots that were hard to hit when it was up this way, then with a mighty plop the mutt will be down on all four tires to stay.
@ Rick, we did some messing around with the back stepping on the ribs we installed on the bottom and that did work quite well. Thanks for the tip!
Re: Tangible progress on the M718!
No problem, glad I could help. What brand and size is the welder? Also, how long of an extension cord are you running to it if it is 110 volt? A long cord will kill the voltage and give you some of the problems you are having.
1964 M151A1
1984 M1008
1967 M416
04/1952 M100
12/1952 M100- Departed
AN/TSQ-114A Trailblazer- Gone
1984 M1008
1967 M416
04/1952 M100
12/1952 M100- Departed
AN/TSQ-114A Trailblazer- Gone
-
Aswayze
- Sergeant First Class
- Posts: 288
- Joined: July 10th, 2013, 7:50 am
- Location: Kansas City, Kansas
- Contact:
Re: Tangible progress on the M718!
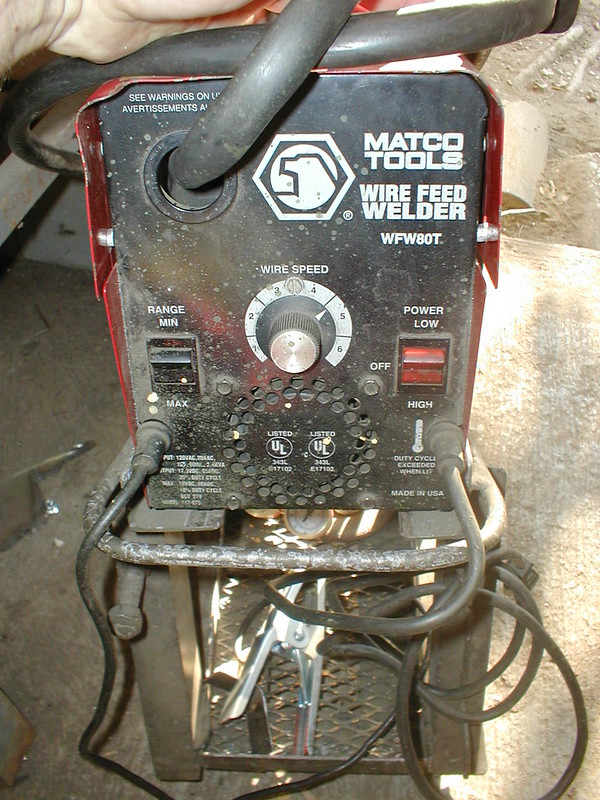
Welder is a Matco WFW-80T
Max output is a fairly measly 80 amps and only a 10% duty cycle. I have had this one for years and mostly got it at the time just because it was small and fit into my also small shop. Up until Curfman showed up wanting to weld up the Eifel Tower in my back yard, it really did not see any major use. After this job, I am sure it will likely remain mostly dormant. Would I buy it again? Probably not but it IS the welder I currently have and there is that whole monetary inertia effect...
Cord is a 16awg 50 footer. Most of my heavier ext cords are all 100 footers but I do have one 12awg 25 footer that reaches so I just swapped that one out.
Re: Tangible progress on the M718!
85 amp is really pushing it. I hope the welds you are getting are fully penetrating. The 16 gauge wire is way to small. The bigger cord may help but the welder is really too small. I do not like 110 volt welders because you are limited to 90 amps. If you buy another one get a 220 volt model and then work out the house wiring, you will never look back.
1964 M151A1
1984 M1008
1967 M416
04/1952 M100
12/1952 M100- Departed
AN/TSQ-114A Trailblazer- Gone
1984 M1008
1967 M416
04/1952 M100
12/1952 M100- Departed
AN/TSQ-114A Trailblazer- Gone
-
Aswayze
- Sergeant First Class
- Posts: 288
- Joined: July 10th, 2013, 7:50 am
- Location: Kansas City, Kansas
- Contact:
Re: Tangible progress on the M718!
We've got 220 all over the place in the shop. Lathe is 220, plasma torch is 220, old stick welder (gone now) was 220 compressor is 220. several 220 outlets scattered here and there and we even have 220 extension cords.
But like I said, there is a certain inertia to the unit we already have. We're getting decent results (full penetration) out of this guy and given that we are nearing the end of the major welding for the foreseeable future I doubt I'll be updating any time soon. We just generally do not do that much welding out here. Getting a new welder when were down to the last 5% of the job here just means having one more piece of machinery to step around in the shop once the cold weather hits and we're all compressed inside.
Shorter cord did help with the duty cycle time a bit.
Curfman made it out this morning and set to work finishing off the welding on the bottom and along the edges of the bed on the top. Once he ran out of squirrel power I sent him off to take a nap then took over for a while getting the last of the welding up top taken care of, all the seams sealed with caulk on the bottom, everything undercoated with truck bed liner and finally a coat of 383 green paint down there. With that, we gave it a mighty shove and it's was back on it's 4 wheels to stay now.
About that time, we broke for dinner and after returning set to finishing off some of the smaller patches on the inside namely the small panels right behind both front seats then one more spot on the rear corner that needed tying together.
Then with nightfall approaching we took advantage of Hoober and his adopted daughter showing up to dig the ambulance extension off of the top of the container where it had been hanging out with all the C-wire coils for the last few months then put everyone to work holding and bolting, nudging and aligning until the extension was finally affixed again.
Tomorrow the last major patch panel goes in, the transmission tunnel cover then it's on the myriad of small jobs here there and everywhere to make sure it's ready for paint by next weekend. Heck, we might even manage to get engine bay done and have the power pack back in by then too.
I think we are FINALLY over the hump on this one...
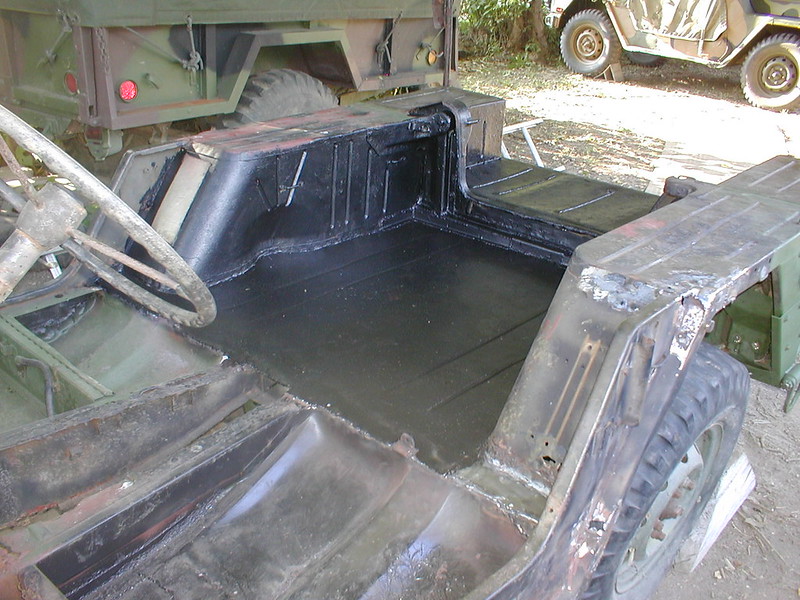
Floor in and primed, you can see the two smaller patch panels in too, just need to grind those two out and prime them as well. Extension getting installed on the back.
Curfman carefully checking under the extension for demons. It's funny that the extension looks like such a POS now, when we got this thing, it was the only "good" piece of metal on the whole darn truck.
We've even got the last gallon of paint that we were waiting for (flat black). Snidely the cat is waiting in ambush for the unlucky soul who tries to get it from his coffee table.
But like I said, there is a certain inertia to the unit we already have. We're getting decent results (full penetration) out of this guy and given that we are nearing the end of the major welding for the foreseeable future I doubt I'll be updating any time soon. We just generally do not do that much welding out here. Getting a new welder when were down to the last 5% of the job here just means having one more piece of machinery to step around in the shop once the cold weather hits and we're all compressed inside.
Shorter cord did help with the duty cycle time a bit.
Curfman made it out this morning and set to work finishing off the welding on the bottom and along the edges of the bed on the top. Once he ran out of squirrel power I sent him off to take a nap then took over for a while getting the last of the welding up top taken care of, all the seams sealed with caulk on the bottom, everything undercoated with truck bed liner and finally a coat of 383 green paint down there. With that, we gave it a mighty shove and it's was back on it's 4 wheels to stay now.
About that time, we broke for dinner and after returning set to finishing off some of the smaller patches on the inside namely the small panels right behind both front seats then one more spot on the rear corner that needed tying together.
Then with nightfall approaching we took advantage of Hoober and his adopted daughter showing up to dig the ambulance extension off of the top of the container where it had been hanging out with all the C-wire coils for the last few months then put everyone to work holding and bolting, nudging and aligning until the extension was finally affixed again.
Tomorrow the last major patch panel goes in, the transmission tunnel cover then it's on the myriad of small jobs here there and everywhere to make sure it's ready for paint by next weekend. Heck, we might even manage to get engine bay done and have the power pack back in by then too.
I think we are FINALLY over the hump on this one...
Floor in and primed, you can see the two smaller patch panels in too, just need to grind those two out and prime them as well. Extension getting installed on the back.
Curfman carefully checking under the extension for demons. It's funny that the extension looks like such a POS now, when we got this thing, it was the only "good" piece of metal on the whole darn truck.
We've even got the last gallon of paint that we were waiting for (flat black). Snidely the cat is waiting in ambush for the unlucky soul who tries to get it from his coffee table.
-
Aswayze
- Sergeant First Class
- Posts: 288
- Joined: July 10th, 2013, 7:50 am
- Location: Kansas City, Kansas
- Contact:
Re: Tangible progress on the M718!
True to our Cold War US Army themed event...
"We do more Mutt work before 9 am than most people do all day"
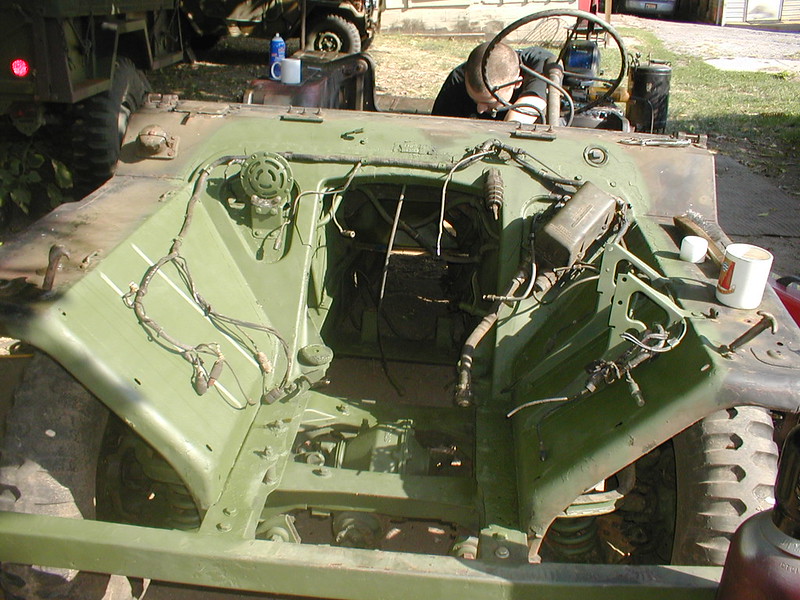
Engine bay cleaned out scrubbed up and painted, repairs made to front wiring harness.
Curfman hard at work making his transmission tunnel pattern.
Extension cleaned up, gaps filled, minor repairs made and truck bed liner applied.
Just wait and see what all we can get done once it becomes socially acceptable for us to make noise out there!
"We do more Mutt work before 9 am than most people do all day"
Engine bay cleaned out scrubbed up and painted, repairs made to front wiring harness.
Curfman hard at work making his transmission tunnel pattern.
Extension cleaned up, gaps filled, minor repairs made and truck bed liner applied.
Just wait and see what all we can get done once it becomes socially acceptable for us to make noise out there!
-
Aswayze
- Sergeant First Class
- Posts: 288
- Joined: July 10th, 2013, 7:50 am
- Location: Kansas City, Kansas
- Contact:
Re: Tangible progress on the M718!
Got a good bit done in the middle part of the day. Now semi-resting in wait for Ready, Bryce and Goering to show up so we can rook them into helping us push everything around and stuff the power pack back in.
Pics:
Truck bed liner all across the back end now. Second coat going on as I type this. You can see some of the little spots along the fender that Curfman has been working on too.
Dug around the bones pile and managed to dig up enough bits and pieces to get us a complete set of operational rear tail lights as well as a black out brake. We're starting to really get low on the older style lights, better start investing in A2s for a while after this...
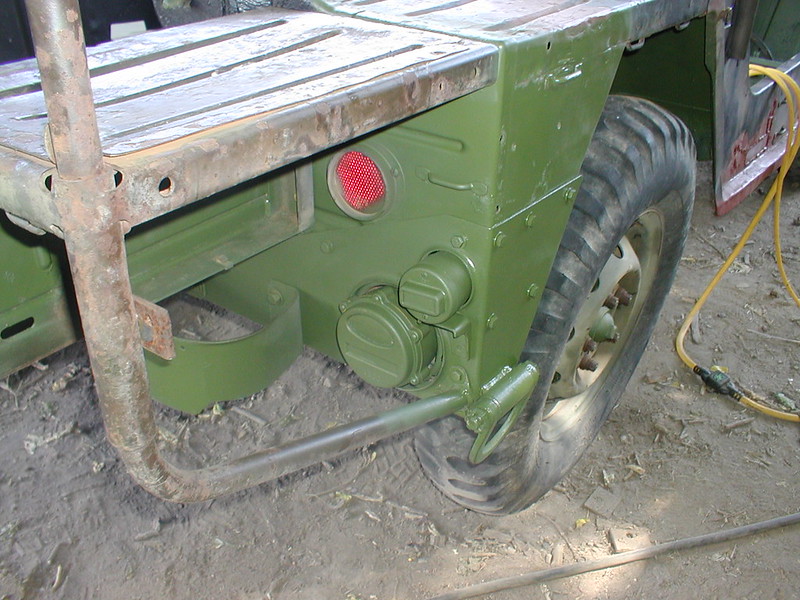

Newly fixed up tail lights installed. Curfman tried like hell to kill me with his angle grinder every time I tried to slip in there and install the drivers side one...
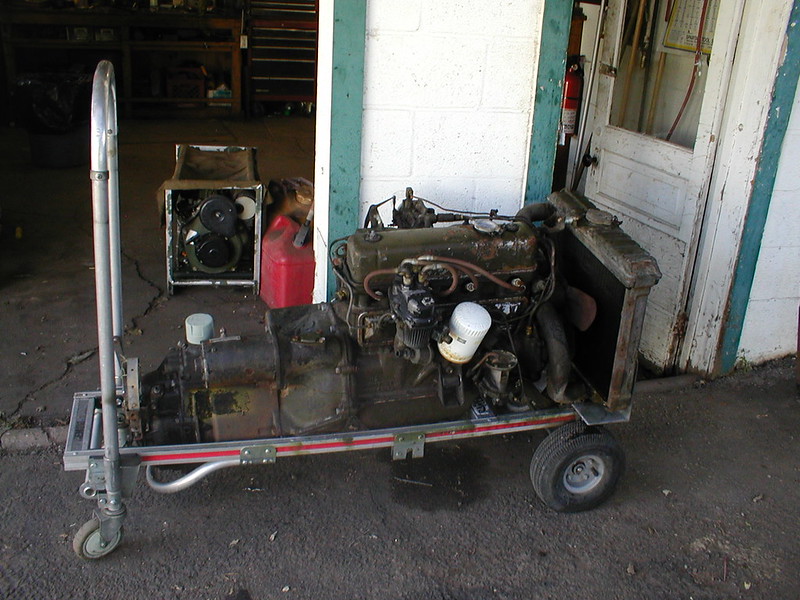
Power pack all washed down and ready to go back in.
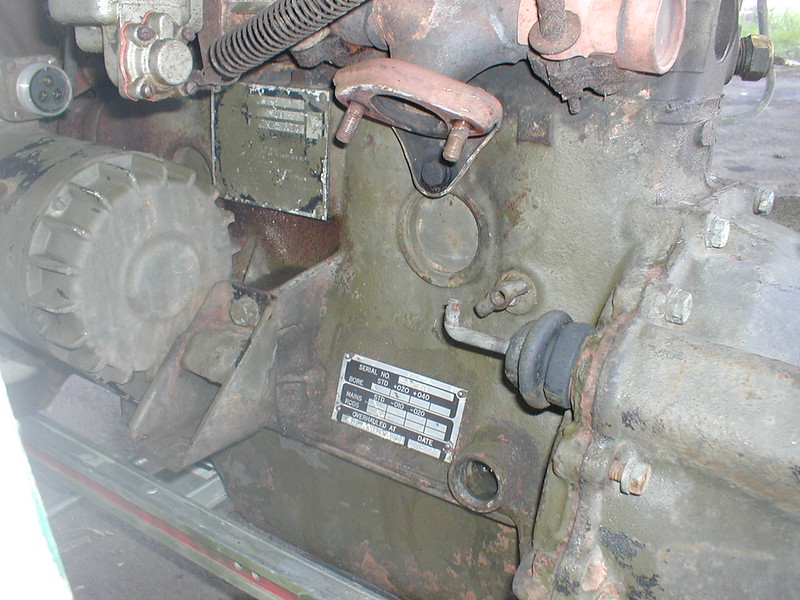
Rebuild tag. Ft. Benning 1971, all std bores.
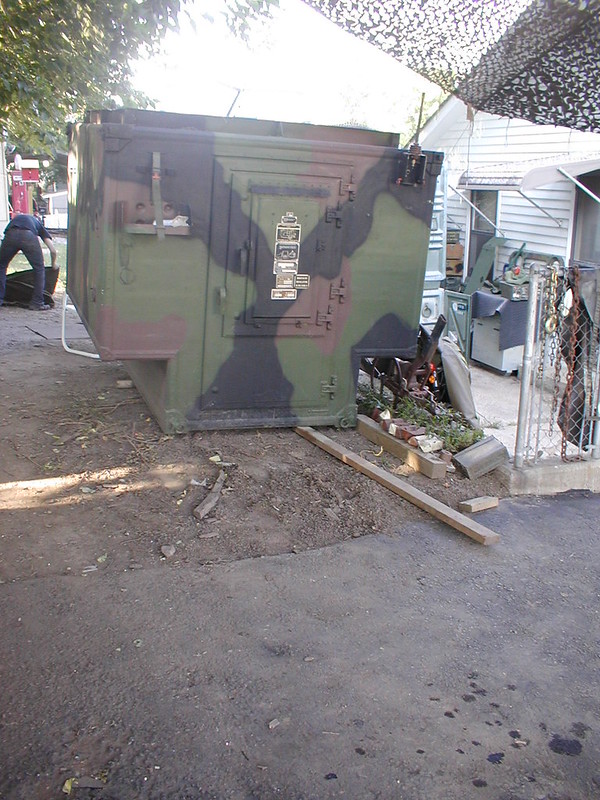
Had to shove the shelter back a bit to get enough clearance to get the taller M718 past the garage awning and over to the asphalt driveway. New spot actually works out quite well. Probably going to shove it back another foot then over to the right a foot or so to give us LOADS of maneuver room through there. While we were at it, we rigged the camo net up a bit higher tying it off to a nearby tree and using a fence post as a stand for the spreader pole. Really opens things up over there and should give us ample room for painting next weekend.
Pics:
Truck bed liner all across the back end now. Second coat going on as I type this. You can see some of the little spots along the fender that Curfman has been working on too.
Dug around the bones pile and managed to dig up enough bits and pieces to get us a complete set of operational rear tail lights as well as a black out brake. We're starting to really get low on the older style lights, better start investing in A2s for a while after this...
Newly fixed up tail lights installed. Curfman tried like hell to kill me with his angle grinder every time I tried to slip in there and install the drivers side one...
Power pack all washed down and ready to go back in.
Rebuild tag. Ft. Benning 1971, all std bores.
Had to shove the shelter back a bit to get enough clearance to get the taller M718 past the garage awning and over to the asphalt driveway. New spot actually works out quite well. Probably going to shove it back another foot then over to the right a foot or so to give us LOADS of maneuver room through there. While we were at it, we rigged the camo net up a bit higher tying it off to a nearby tree and using a fence post as a stand for the spreader pole. Really opens things up over there and should give us ample room for painting next weekend.
-
Aswayze
- Sergeant First Class
- Posts: 288
- Joined: July 10th, 2013, 7:50 am
- Location: Kansas City, Kansas
- Contact:
Re: Tangible progress on the M718!
Note: Pics suck due to darkness but you'll get the idea.
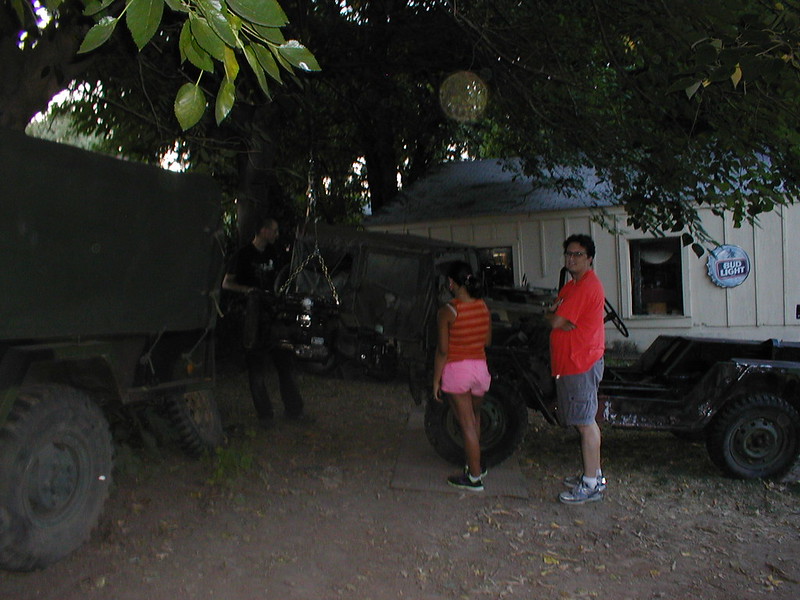
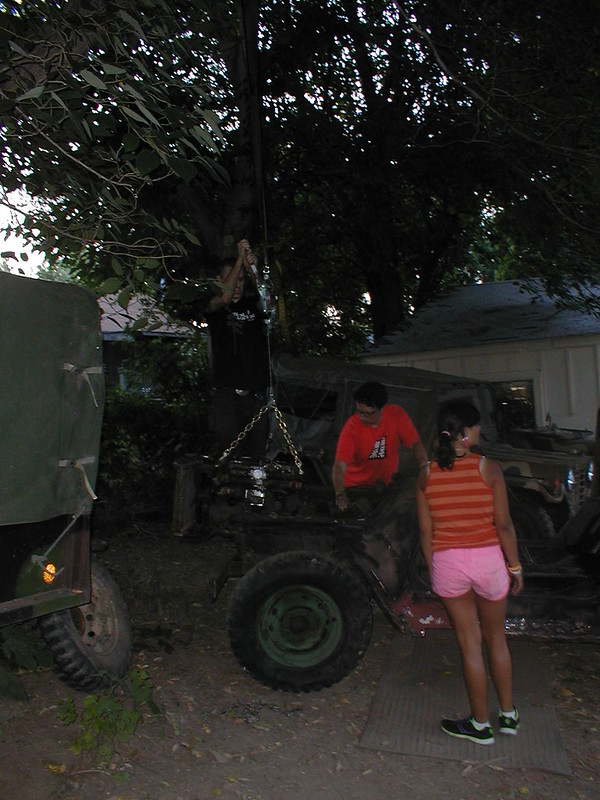
We ended up giving up on Ready and just called Hoober and his daughter back over again. Sling goes over the big branch, power pack gets wheeled over, come along scoops up power pack, mutt moves along under it, power pack is lowered in place. Everything gets bolted up.
Every time I do this, it still amazes me just how easily it goes...
M718 now staged up in front of the shop on the pavement. Power pack in, grill on, hood is just sitting there to keep bats out but none the less it is really starting to look like a real truck now instead of just random parts. If we skipped school/work tomorrow we could be driving this thing by the end of the day.
-
Aswayze
- Sergeant First Class
- Posts: 288
- Joined: July 10th, 2013, 7:50 am
- Location: Kansas City, Kansas
- Contact:
Re: Tangible progress on the M718!
Quick question if any of you guys happen to be near an M151 right this second...
I am sort of stuck killing some time up at work and thought I would see if I could make up a basic spare tire carrier for this thing.
I need to know:
What the thread diameter and pitch of M151 lug studs?
What's the center to center distance between any two lug studs on a wheel?
With that info not only will I not be bored at work, I can actually get something positive done too.

Re: Tangible progress on the M718!
Ok the m151 lug studs are 7/16"dia,20 pitch(I think),5 1/4" stud to stud?
mark
PS my memory could be wrong
mark
PS my memory could be wrong
mark
1968 m274A5
1960 m151
1981 m151A2
1964 m416
1971 m416
1968 m274A5
1960 m151
1981 m151A2
1964 m416
1971 m416