Beverly Hillbillies
Moderators: rickf, raymond, Mr. Recovery


Re: Beverly Hillbillies
You say the driveshafts have been modified, did they maintain the phasing for the u joints on the front shaft that the M151 used? I am assuming the differentials and transfer case are in the same general plane as before but maybe further apart? I am sure you must have noticed the odd phasing of the u-joints on the front shaft of your other 151's. This is due to the offset front differential which causes compound angles on the shaft. Instead of using double cardin joints that did the complicated math and phased the shaft to match the angles.
1964 M151A1
1984 M1008
1967 M416
04/1952 M100
12/1952 M100- Departed
AN/TSQ-114A Trailblazer- Gone
1984 M1008
1967 M416
04/1952 M100
12/1952 M100- Departed
AN/TSQ-114A Trailblazer- Gone


Re: Beverly Hillbillies
Yeah, the phasing (at least on the back shaft) did appear a little wonky. I wasn't too concerned about it because whoever did the shafts did work that appeared to be superior in quality, so I concluded that work was done by a professional.
As we discussed earlier, all of this mechanical stuff continues to be on the same plane, just as it did in the MUTT. But, I'm still thinking of adding a couple of safety hoops just in case a U-joint lets loose.
There are at least two people who worked on this machine (not including Terratek). The first guy who made it had skills. The second guy, not so much... and maybe even a third guy who was the one who let it go to ruin. The 'why' of it is the big question. Why did it get parked? There's a lot of goodness in this rig. The only thing I've seen so far is the business with those wheels which were a country mile off-center from the hubs. That alone would have lead most people to park it. Frankly, I'm hoping that's all it ever was.
I'm going to do something fun with this rear drive shaft. Alas, none of you will get to see it for quite some time..
Cheers,
TJ
Re: Beverly Hillbillies
The rear shaft should be phased normally but the front one was the weird one with the u-joints about a quarter turn out.
1964 M151A1
1984 M1008
1967 M416
04/1952 M100
12/1952 M100- Departed
AN/TSQ-114A Trailblazer- Gone
1984 M1008
1967 M416
04/1952 M100
12/1952 M100- Departed
AN/TSQ-114A Trailblazer- Gone
Re: Beverly Hillbillies
One word, Chainlink!m3a1 wrote: ↑April 14th, 2020, 12:17 amYeah, the phasing (at least on the back shaft) did appear a little wonky. I wasn't too concerned about it because whoever did the shafts did work that appeared to be superior in quality, so I concluded that work was done by a professional.
As we discussed earlier, all of this mechanical stuff continues to be on the same plane, just as it did in the MUTT. But, I'm still thinking of adding a couple of safety hoops just in case a U-joint lets loose.
There are at least two people who worked on this machine (not including Terratek). The first guy who made it had skills. The second guy, not so much... and maybe even a third guy who was the one who let it go to ruin. The 'why' of it is the big question. Why did it get parked? There's a lot of goodness in this rig. The only thing I've seen so far is the business with those wheels which were a country mile off-center from the hubs. That alone would have lead most people to park it. Frankly, I'm hoping that's all it ever was.
I'm going to do something fun with this rear drive shaft. Alas, none of you will get to see it for quite some time..
Cheers,
TJ
https://www.youtube.com/watch?v=w_F7QrR4Ur8
https://www.youtube.com/watch?v=0zXpDOmuXXM
1964 M151A1
1984 M1008
1967 M416
04/1952 M100
12/1952 M100- Departed
AN/TSQ-114A Trailblazer- Gone
1984 M1008
1967 M416
04/1952 M100
12/1952 M100- Departed
AN/TSQ-114A Trailblazer- Gone
Re: Beverly Hillbillies
Yep. There is no problem so large that it cannot be overcome by a large amount of money! 
Re: Beverly Hillbillies
Speaking of overcoming problems, (and particularly referencing brake parts) I'm trying to locate four nylon bushings that go over the eccentric cam on the transverse bolt that goes through the push-rod eye on the master cylinder.
These can be seen in the 34P manual, page 84-1, at the bottom center of Figure 84, indicated as #21 (part number 7017616) and properly described as bushing, brake.
What have you?
Cheers,
TJ
These can be seen in the 34P manual, page 84-1, at the bottom center of Figure 84, indicated as #21 (part number 7017616) and properly described as bushing, brake.
What have you?
Cheers,
TJ
Re: Beverly Hillbillies
STILL waiting on parts!
But, no sooner did I post this, the UPS guy arrived with a brand new USB adaptor for the computer I'm using at the moment so y'all WILL see some new pics later in the day. Lucky you!
Cheers,
TJ
But, no sooner did I post this, the UPS guy arrived with a brand new USB adaptor for the computer I'm using at the moment so y'all WILL see some new pics later in the day. Lucky you!
Cheers,
TJ
Re: Beverly Hillbillies
Here we are again with photos. Lots and lots of lovely photos...and a brief retrospective, fast forwarding to present.
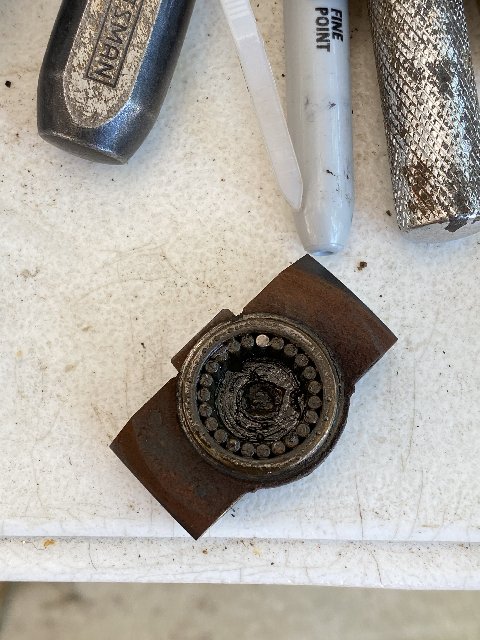
It pays to look things over carefully. Here's that U-joint cap that was found to be short one little roller bearing.
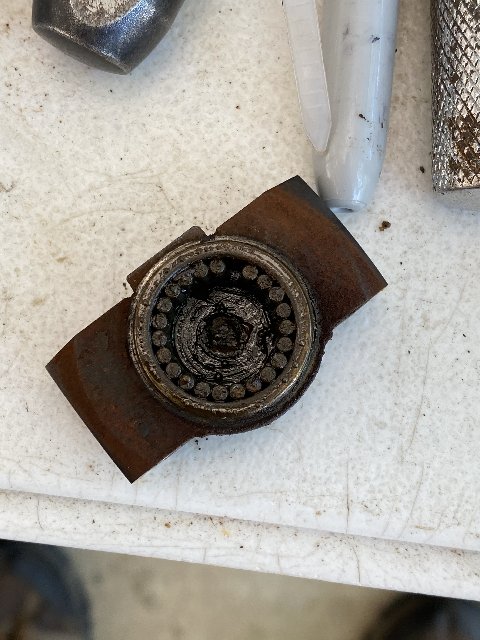
Which was replaced with a spare from The Great Big Box Of Everything...
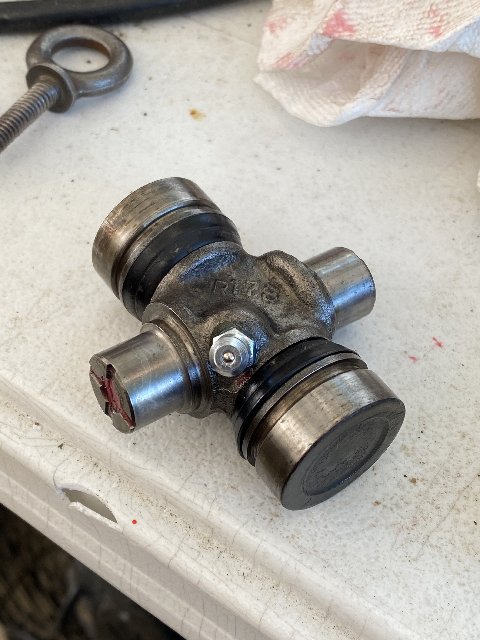
And the resurrection of a perfectly good U-joint with a broken zerk. As I said in an earlier post, the EZ Out method failed spectacularly..

And now, ready to rock...ahhh...roll.... TURN! That's the word I was looking for!
Poor little cap....all alone in the world.. and destined for the spares box.

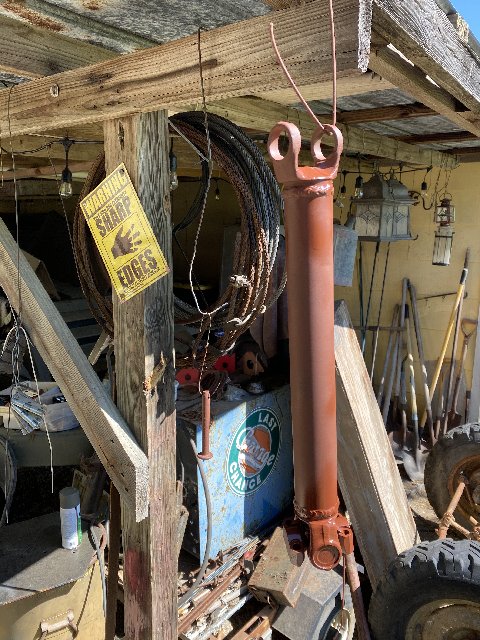
This gets a stellar clean up with my dremel buffing pads and the rough edges all cleaned up to perfection.
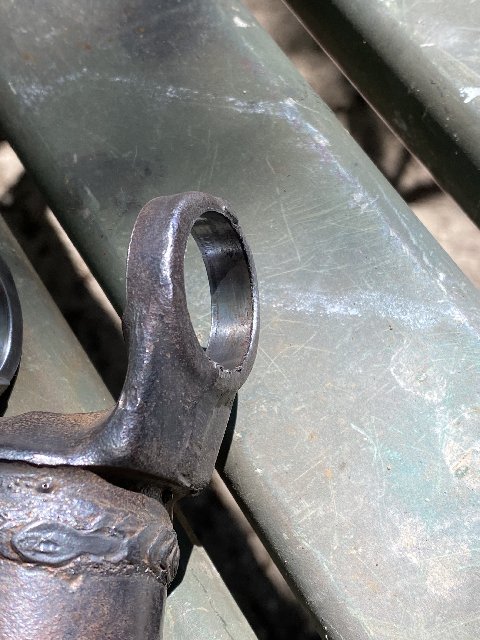
Followed by primer and finally, paint.. Wait till you see the color I chose!
(Rick, this is the rear shaft and and you can see, it has been built 1/4 turn out.)
I will soon be pulling the front shaft to look over its U-joints and service them....maybe tomorrow.
I had to go out to CVS Pharmacy today which had me going right by Tractor Supply so I masked up and went in there for some much-needed hardware and lubricants because we are oh-so-close to getting lube in that transmission and letting her innards swim in it for a while.
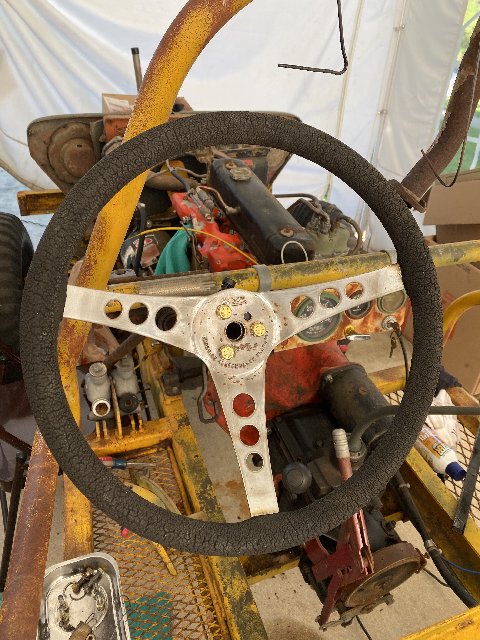
The steering wheel quick release hub is back to 100% in form and function.
And the steering wheel (such as it is) is back on with some new fasteners. I'm not going to replace the steering wheel until the very last thing, I reckon. It's pretty awful but this is a largely unproven vehicle. Putting a new steering wheel on at this stage of the game would be like putting a prom dress on a pig.
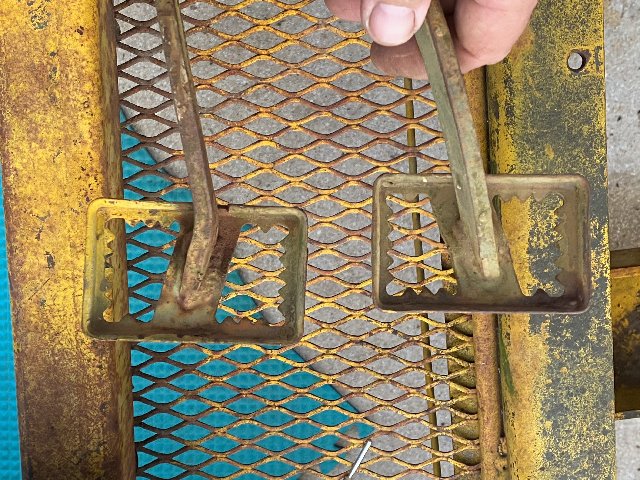
The pedal hangers were absolutely rusted to the point where they wouldn't move. Several problems were at work here. Exposure to the elements, tolerances all off and some rather questionable hardware decisions. The new bolts have a shank that spans the entire mount.
No matter how much I work to clean this up and sort it out, it's always going to be a high maintenance area. Still, we're gonna put it back the way it was and see how it behaves. If it's tolerable, I'll leave it alone. A couple spritzes with PB Blaster from time to time really isn't too hard a thing to have to do.

Nasty.

Here we see how close the toe-pads of the pedals are. Coupled with how close they are to the vertical member of the roll cage and the generally cramped space, it gets pretty sketchy, especially if the driver is wearing boots. I may excise a section out of each of these pads and then reweld them back to create a smaller pad and thereby create more separation between them in order to help ensure that careless placement of a shoe doesn't inadvertently depress two pedals at once.
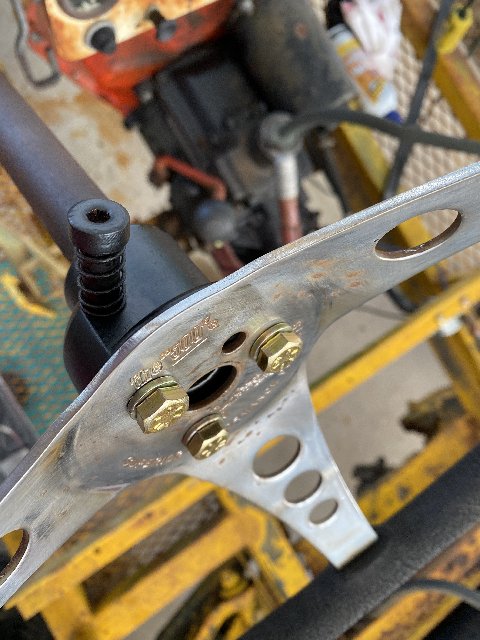
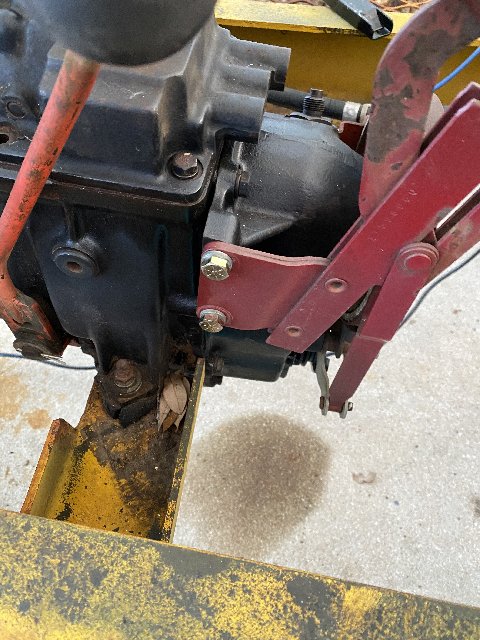
In the spirit of making this machine look a bit more businesslike, I removed the stack of flat washers, lock washer and the longish bolt being used to mount the trans brake and replaced all that hardware with two new bolts of proper length and two lock washers. There is really no point in putting a flat washer (or multiple flat washers) on a piece of metal 1/4" thick. (Yes, I've noticed the condition of the engine and transmission mounts. Most of the rubber on this rig needs to be replaced.)
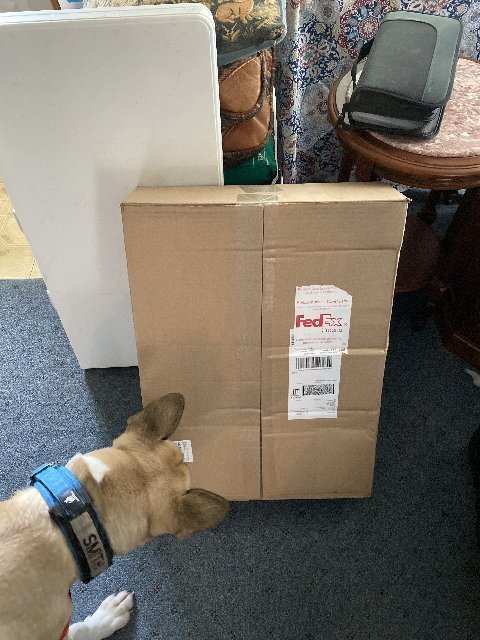
Bucky sez, "DUDE! This print is really tiny...and anyway, you know I can't read...but I don't think there are parts for the Doom Buggy in this box." Good BOY, Bucky!
In all, the Doom Buggy is a really good example of what can be achieved with a collection of parts from what would be an otherwise unsalvageable vehicle.
Keeping my fingers crossed for parts coming tomorrow.
Cheers,
TJ
It pays to look things over carefully. Here's that U-joint cap that was found to be short one little roller bearing.
Which was replaced with a spare from The Great Big Box Of Everything...
And the resurrection of a perfectly good U-joint with a broken zerk. As I said in an earlier post, the EZ Out method failed spectacularly..
And now, ready to rock...ahhh...roll.... TURN! That's the word I was looking for!
Poor little cap....all alone in the world.. and destined for the spares box.
This gets a stellar clean up with my dremel buffing pads and the rough edges all cleaned up to perfection.
Followed by primer and finally, paint.. Wait till you see the color I chose!
(Rick, this is the rear shaft and and you can see, it has been built 1/4 turn out.)
I will soon be pulling the front shaft to look over its U-joints and service them....maybe tomorrow.
I had to go out to CVS Pharmacy today which had me going right by Tractor Supply so I masked up and went in there for some much-needed hardware and lubricants because we are oh-so-close to getting lube in that transmission and letting her innards swim in it for a while.
The steering wheel quick release hub is back to 100% in form and function.
And the steering wheel (such as it is) is back on with some new fasteners. I'm not going to replace the steering wheel until the very last thing, I reckon. It's pretty awful but this is a largely unproven vehicle. Putting a new steering wheel on at this stage of the game would be like putting a prom dress on a pig.
The pedal hangers were absolutely rusted to the point where they wouldn't move. Several problems were at work here. Exposure to the elements, tolerances all off and some rather questionable hardware decisions. The new bolts have a shank that spans the entire mount.
No matter how much I work to clean this up and sort it out, it's always going to be a high maintenance area. Still, we're gonna put it back the way it was and see how it behaves. If it's tolerable, I'll leave it alone. A couple spritzes with PB Blaster from time to time really isn't too hard a thing to have to do.
Nasty.
Here we see how close the toe-pads of the pedals are. Coupled with how close they are to the vertical member of the roll cage and the generally cramped space, it gets pretty sketchy, especially if the driver is wearing boots. I may excise a section out of each of these pads and then reweld them back to create a smaller pad and thereby create more separation between them in order to help ensure that careless placement of a shoe doesn't inadvertently depress two pedals at once.
In the spirit of making this machine look a bit more businesslike, I removed the stack of flat washers, lock washer and the longish bolt being used to mount the trans brake and replaced all that hardware with two new bolts of proper length and two lock washers. There is really no point in putting a flat washer (or multiple flat washers) on a piece of metal 1/4" thick. (Yes, I've noticed the condition of the engine and transmission mounts. Most of the rubber on this rig needs to be replaced.)
Bucky sez, "DUDE! This print is really tiny...and anyway, you know I can't read...but I don't think there are parts for the Doom Buggy in this box." Good BOY, Bucky!
In all, the Doom Buggy is a really good example of what can be achieved with a collection of parts from what would be an otherwise unsalvageable vehicle.
Keeping my fingers crossed for parts coming tomorrow.
Cheers,
TJ
Re: Beverly Hillbillies
No ORD label on the box? I am surprised.
1964 M151A1
1984 M1008
1967 M416
04/1952 M100
12/1952 M100- Departed
AN/TSQ-114A Trailblazer- Gone
1984 M1008
1967 M416
04/1952 M100
12/1952 M100- Departed
AN/TSQ-114A Trailblazer- Gone
-
terratek
- Sergeant

- Posts: 62
- Joined: January 29th, 2019, 5:36 am
- Location: San Antonio, TX & Terlingua, TX
Re: Beverly Hillbillies
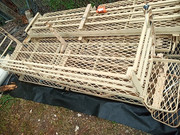
Took me a bit, but finally got the racks moved and have been working on the f240, so... got pics today.

1967 United Tractor CN-40-A
1972 M109A3
1987 M105A2
19?? M151 Sand Rail (passed on to the next victim)
1972 M109A3
1987 M105A2
19?? M151 Sand Rail (passed on to the next victim)
Re: Beverly Hillbillies
Lawdy, those are monsters!
Re: Beverly Hillbillies
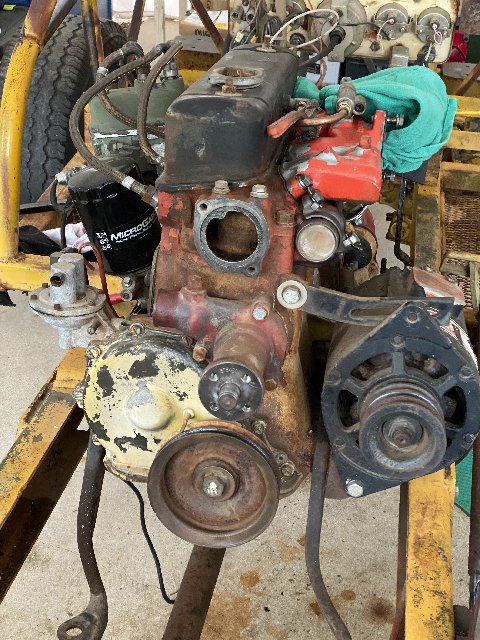
Here's a little update for those of you who might be following along -
I've found myself wandering around this thing, just looking it over and trying to determine what's next on the agenda. I decided since I have new V belts and new foundation bushings for the radiator and new hoses and new hose clamps, I might just as well get that radiator off. The hoses were being real stinkers so I made some cuts and wasn't especially surprised to find they offered very little resistance to the box cutter, even though the blade wasn't exactly new. So, Yeah...they were rotten.
Took the old clamps over and cleaned them up, soaked them with Metal Save, let them dry and tagged and bagged
'em. They go in the Great Big Box of Everything.
Not only were the hoses rotten, they were loaded with all sorts which was kind of a preview, as it turned out.
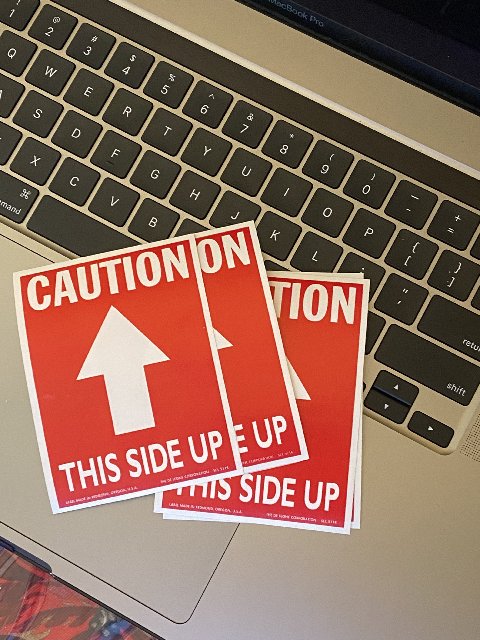
Some fun stickers for the Doom Buggy.. Appropriate, no?
More good earth in the depths of the radiator.. Let's plant potatoes!
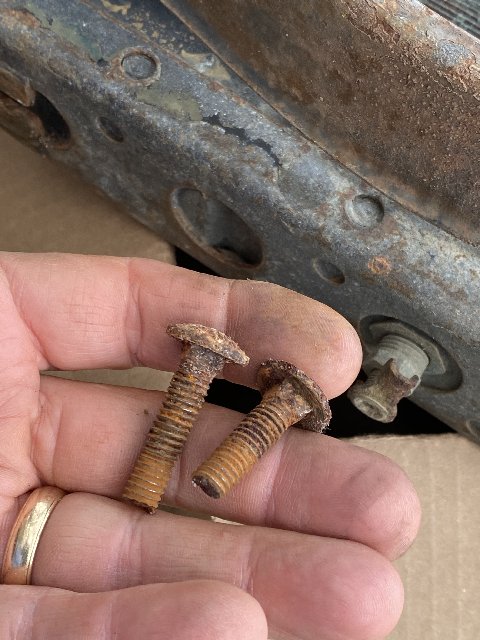
With the radiator off I find a little treasure that was being employed as a simple washer.... on the wrong side of the engine.

I find that more new hardware is needed..
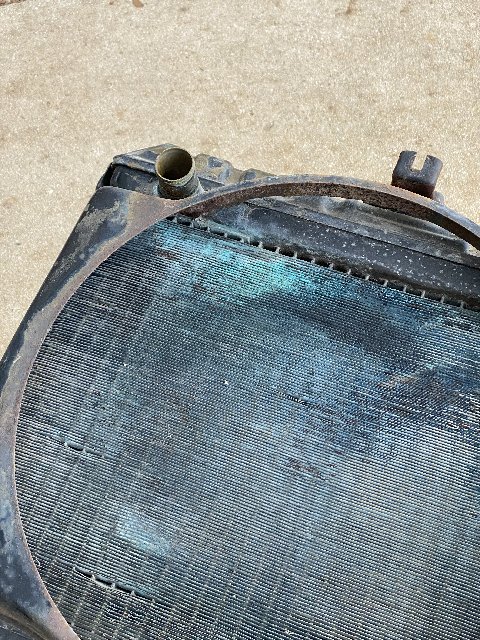
And I find a leak in what otherwise looks like a really stellar radiator (from the outside).
More crud from the depths.

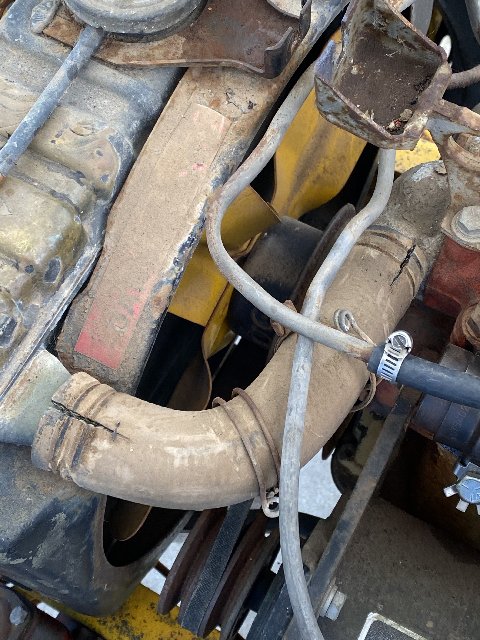
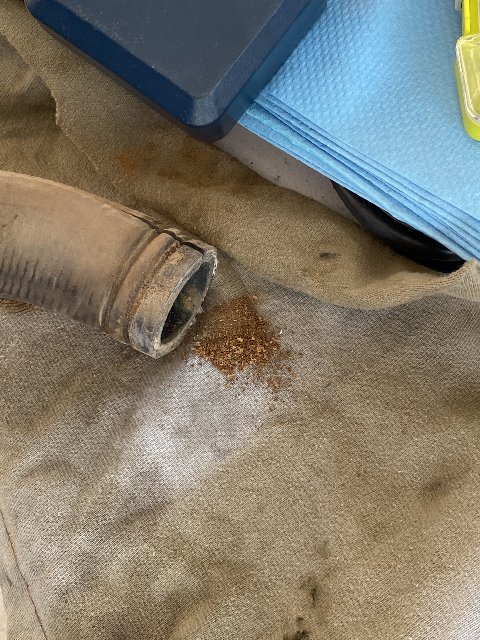
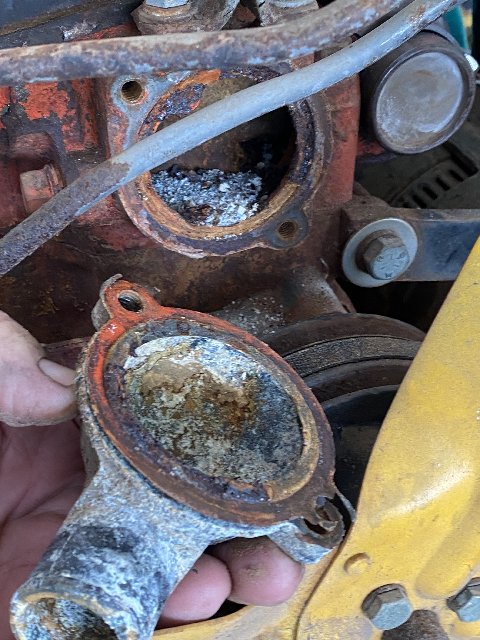
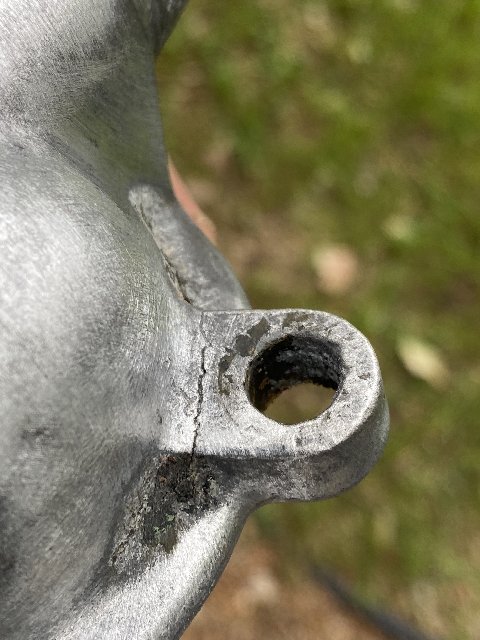
And while I like my stuff a little smutty...this awful thing has got to come off! Yes, it was a gooseneck, used to conduct coolant and yes, it was formerly made of aluminum. Now it is made of aluminum oxide and now it is used to conceal an awful truth...
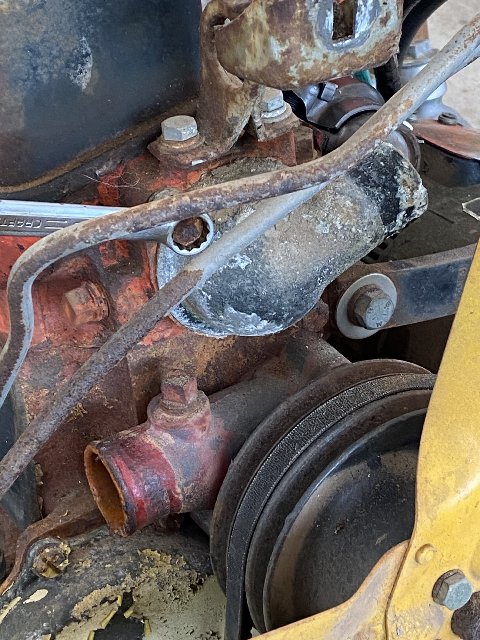
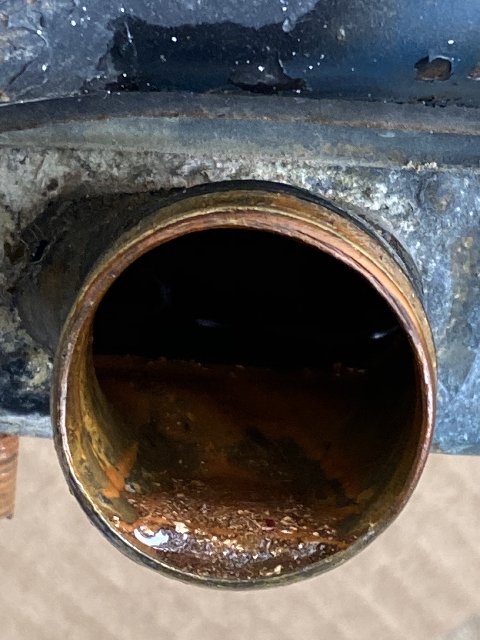
Call me crazy, but I'm pretty sure there is supposed to be a thermostat in there!
Have I mentioned that this thing is awfully easy to work on, what with there being no body in the way..? Such a pleasure.
Another fun sticker...

And yet another disaster neatly side-stepped... Could it be that coolant is escaping here and spraying on the inside of the radiator? I couldn't possibly be that lucky!
And, perhaps the best sticker of them all. This one is DEFINITELY going on the Doom Buggy!
MORE new parts on order and yup, lots of usable goodies in the Great Big Box of Everything!
Cheers,
TJ
I've found myself wandering around this thing, just looking it over and trying to determine what's next on the agenda. I decided since I have new V belts and new foundation bushings for the radiator and new hoses and new hose clamps, I might just as well get that radiator off. The hoses were being real stinkers so I made some cuts and wasn't especially surprised to find they offered very little resistance to the box cutter, even though the blade wasn't exactly new. So, Yeah...they were rotten.
Took the old clamps over and cleaned them up, soaked them with Metal Save, let them dry and tagged and bagged
'em. They go in the Great Big Box of Everything.
Not only were the hoses rotten, they were loaded with all sorts which was kind of a preview, as it turned out.
Some fun stickers for the Doom Buggy.. Appropriate, no?
More good earth in the depths of the radiator.. Let's plant potatoes!
With the radiator off I find a little treasure that was being employed as a simple washer.... on the wrong side of the engine.
I find that more new hardware is needed..
And I find a leak in what otherwise looks like a really stellar radiator (from the outside).
More crud from the depths.
And while I like my stuff a little smutty...this awful thing has got to come off! Yes, it was a gooseneck, used to conduct coolant and yes, it was formerly made of aluminum. Now it is made of aluminum oxide and now it is used to conceal an awful truth...
Call me crazy, but I'm pretty sure there is supposed to be a thermostat in there!
Have I mentioned that this thing is awfully easy to work on, what with there being no body in the way..? Such a pleasure.
Another fun sticker...
And yet another disaster neatly side-stepped... Could it be that coolant is escaping here and spraying on the inside of the radiator? I couldn't possibly be that lucky!
And, perhaps the best sticker of them all. This one is DEFINITELY going on the Doom Buggy!
MORE new parts on order and yup, lots of usable goodies in the Great Big Box of Everything!
Cheers,
TJ
Re: Beverly Hillbillies
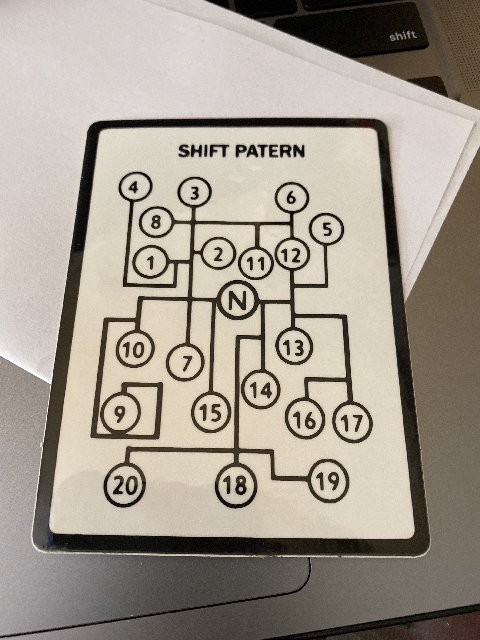
Hey! I used to drive a farm tractor with a shift pattern pretty similar to that. Running without a thermostat was something a lot of people did thinking it would run cooler. Sometimes it did but in V8's they usually overheated because the thermostat also regulates how long the coolant stays in the radiator so it can be cooled instead of quickly flowing through before having a chance to cool.On the little 4 bangers they ran too cool and ran like crap. That is why I tell everyone to run a 180 thermostat and they will be amazed at how much better they run. It also eliminates the famous "flat spot".
1964 M151A1
1984 M1008
1967 M416
04/1952 M100
12/1952 M100- Departed
AN/TSQ-114A Trailblazer- Gone
1984 M1008
1967 M416
04/1952 M100
12/1952 M100- Departed
AN/TSQ-114A Trailblazer- Gone
Re: Beverly Hillbillies
As you probably have also noticed, there really is no air box on the front, either. The jeep grill that has been sitting up there still has the original air box which I thought might be modified to more closely encompass the front of the radiator though the benefit of that usually only comes when the vehicle is motivating right along and this truck appears really best-suited to crawling. So, once I get this thing sorted out, we'll see what its capabilities and limitations are.
I'm finding the Summit Racing seat is probably going to be not quite what is needed owing to the molded in shoulder bolsters which are competing with the B-pillar for space at the moment. So, it's back to the drawing board on that. Best laid plans and all that... Luckily those seats are inexpensive.
I must say that I really despise how the pedals are located. The go-foot is fine but everything else is a bit tricky owing to limitations of space; limitations which are largely a result of trying to squeeze everything between the engine and the base of the A pillar. One solution would be to excise the base of the A pillar, rotate it so that it turns outward, then turn it down and then turn it back in and reattach it to the side of the sponson, rather than the top of the sponson as it is now. That would create a lot of additional space for the driver's feet.
But for the moment, I'll try it as-is (but I think narrowing the foot pad of the brake pedal is going to have to happen in any case).
Cheers,
TJ
I'm finding the Summit Racing seat is probably going to be not quite what is needed owing to the molded in shoulder bolsters which are competing with the B-pillar for space at the moment. So, it's back to the drawing board on that. Best laid plans and all that...
I must say that I really despise how the pedals are located. The go-foot is fine but everything else is a bit tricky owing to limitations of space; limitations which are largely a result of trying to squeeze everything between the engine and the base of the A pillar. One solution would be to excise the base of the A pillar, rotate it so that it turns outward, then turn it down and then turn it back in and reattach it to the side of the sponson, rather than the top of the sponson as it is now. That would create a lot of additional space for the driver's feet.
But for the moment, I'll try it as-is (but I think narrowing the foot pad of the brake pedal is going to have to happen in any case).
Cheers,
TJ
Re: Beverly Hillbillies
That rear driveshaft has me bothered. If the transfer output is in line with the rear differential then those joints should line up. With what you have there the shaft with be eating u-joints on a (Very) regular basis and it will also have a very jerky feel to the forward motion. That is how the front should look due to the compound angles but the rear should be straight. The fact that there are no real appreciable angles on the joints it may be livable but it is still not right and it will wear. I know how you like everything RIGHT.
1964 M151A1
1984 M1008
1967 M416
04/1952 M100
12/1952 M100- Departed
AN/TSQ-114A Trailblazer- Gone
1984 M1008
1967 M416
04/1952 M100
12/1952 M100- Departed
AN/TSQ-114A Trailblazer- Gone