Beverly Hillbillies

Vehicles and items that do not fall into the general M151 categories

Moderators: rickf, raymond, Mr. Recovery

Post Reply
User avatar
m3a1
Lt. General
Lt. General
Posts: 4046
Joined: August 7th, 2014, 6:36 pm

Re: Beverly Hillbillies

Unread post by m3a1 » April 18th, 2020, 10:28 pm

We had a rather damp-ish day today. It was trying hard to rain but happily, it just couldn't quite make it.

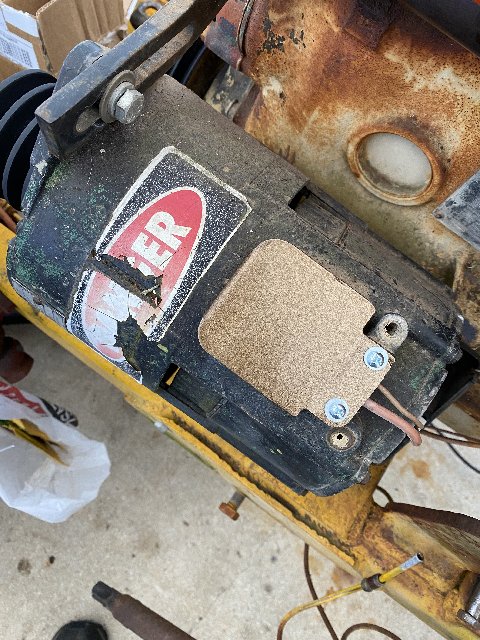
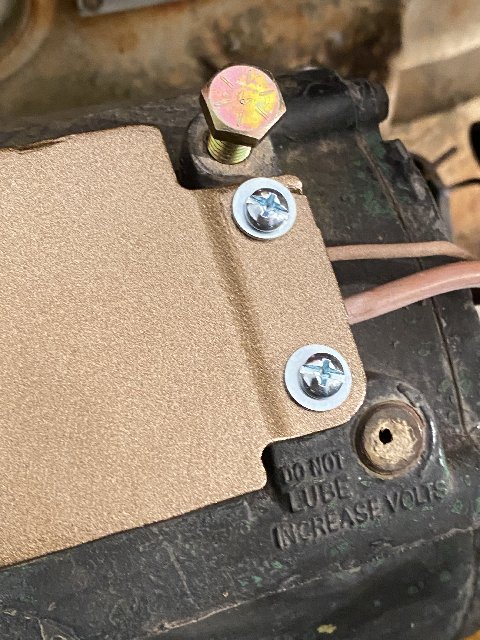
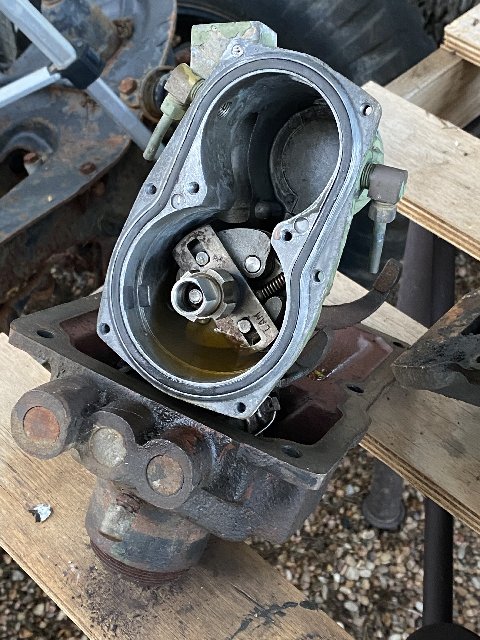
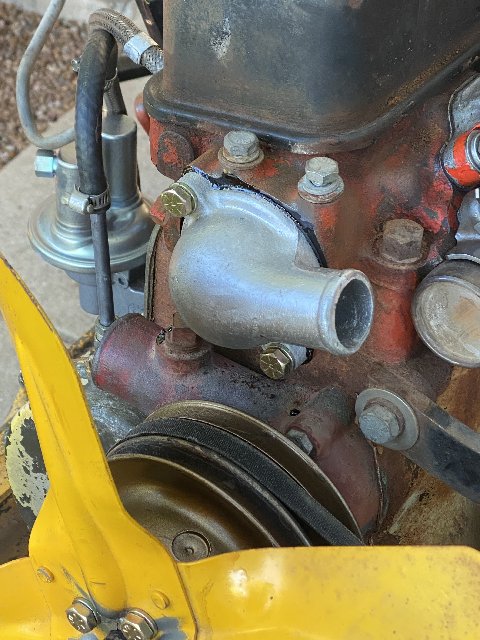
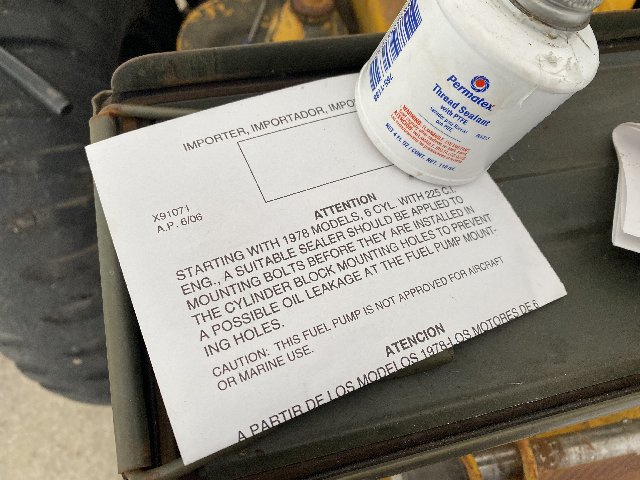
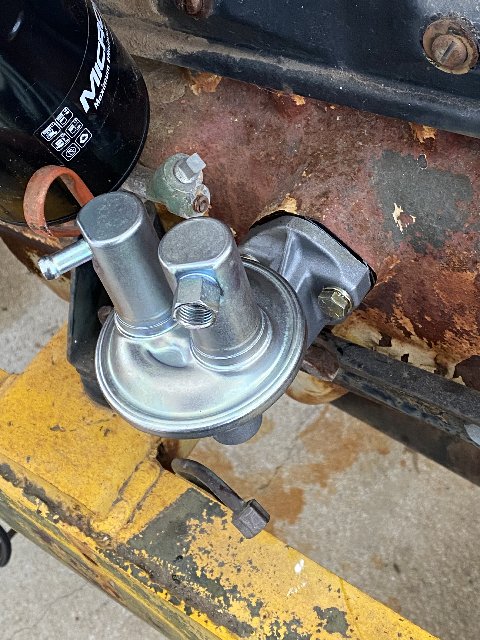
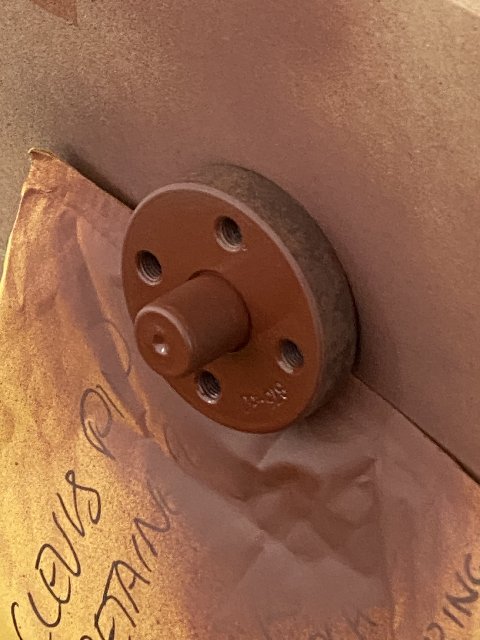
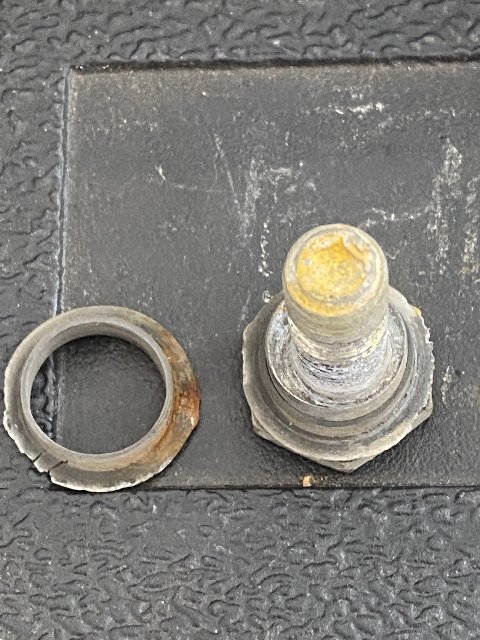
Began with putting a brand new Airtex 60577 on. The bolt holes are through and through the block wall, making it necessary to put some thread sealer on the bolts so that oil doesn't migrate out along the threads - something that coarse threads are more than willing to allow. I doped up the cam lobe with some Lucas Assembly Lube before installation.

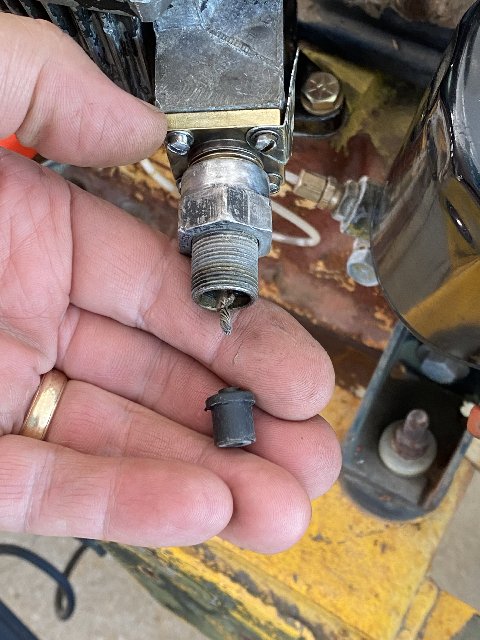
To its credit, the old pump was still pumping, but for how long? I figure it would conk out just as I was getting everything going well and I really hate to be disappointed in that way. Soooo...new pump it is!

Image

One step forward.

Image

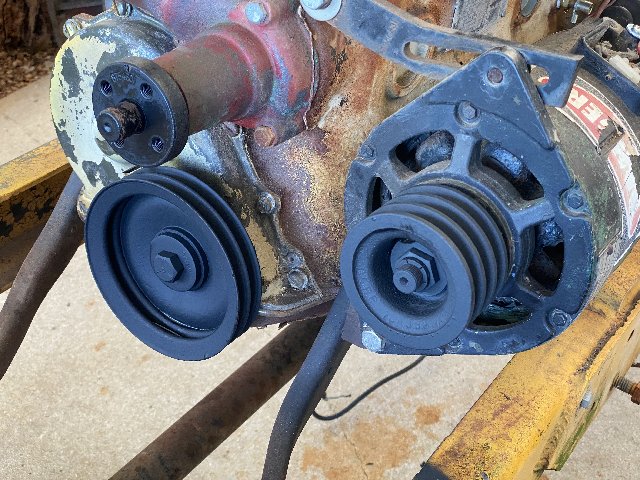
Decided to clean up the face and the hub of the shaft of the water pump. It was quite a chore getting that pulley off due to rust build-up on the hub of the shaft. So, with this cleaned up and the inner face of the pulley cleaned up things should come back together just a bit more nicely when it comes time.

Image

Image

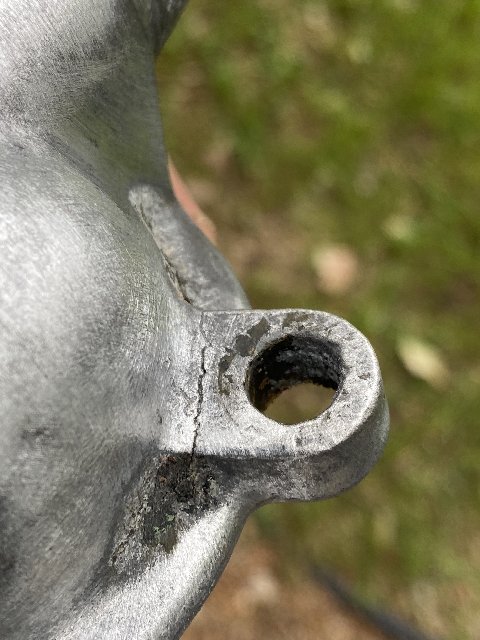
After cleaning up the fan a close inspection revealed a crack. One step back. Doggone it! But, the good news is, that pretty radiator isn't going to be chewed up by a fan blade coming off so there is a little ray of sunshine with this discovery.

I actually took a stab at drilling down through the outer blade centering my holes at the crack and then welding these new holes up, rejoining both sides of the crack as well as the front blade to the back blade.... Not a bad idea but, after I put the wire wheel to it to clean it up, I could see that the crack had progressed, in two directions, far further than I could see in this picture. That crack is gonna go where that crack is gonna go and I won't be able to see it when everything is reassembled so, I'm simply not going to risk it.

This fan going to the scrapper where it can never, ever harm anyone again....probably with a big bend in it just to make sure somebody doesn't try to reuse it.

Yet another disaster neatly side-stepped and one brand new fan blade on the way.

Image

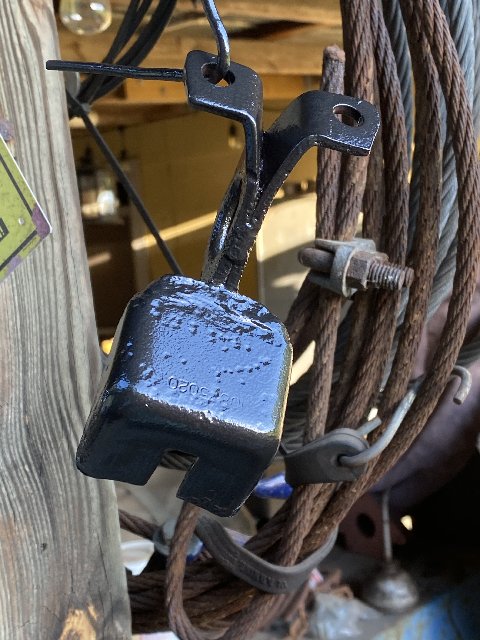
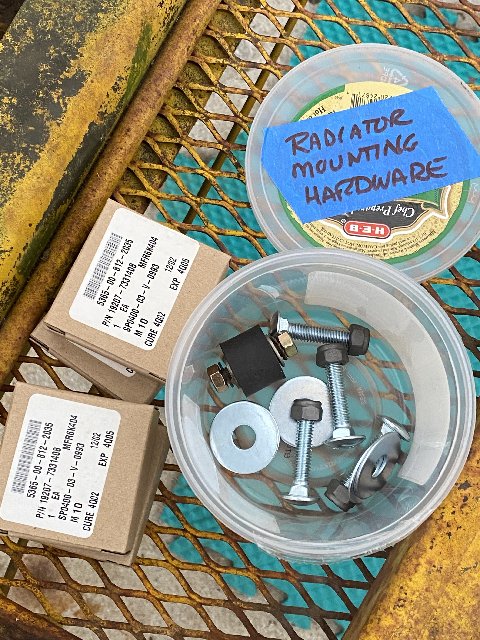
Made a trip to Tractor Supply for some new hardware. Getting things organized. A brand new bushing for the top of the radiator and new everything for the bottom. (yeah, I know....there's extra hardware in there)

Image

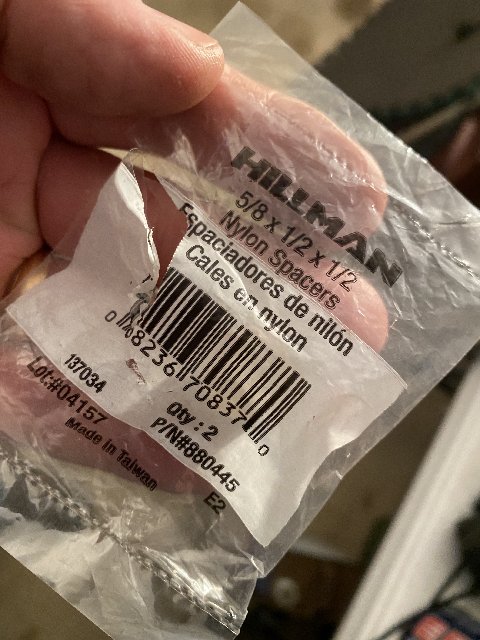
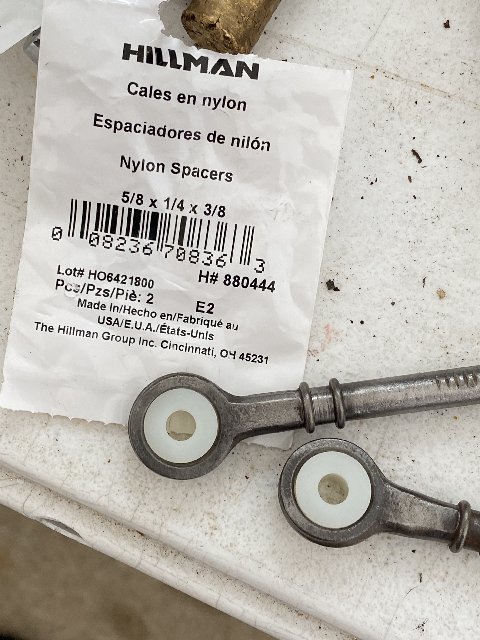
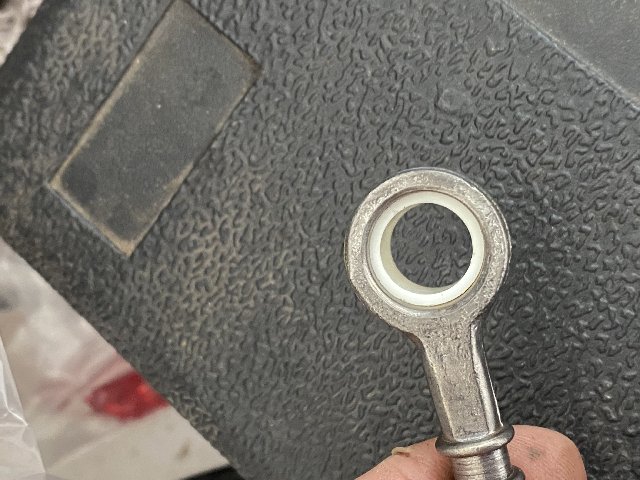
And look what I found at Tractor Supply! inner diameter of the ring eye is 5/8". Inner diameter of the bushing is 1/4". These will need to be drilled out to accomodate a metal sleeve through which will pass the mounting bolt. This is my favorite option thus far and happily, it isn't going to be a lot of work. Best of both worlds.

Image

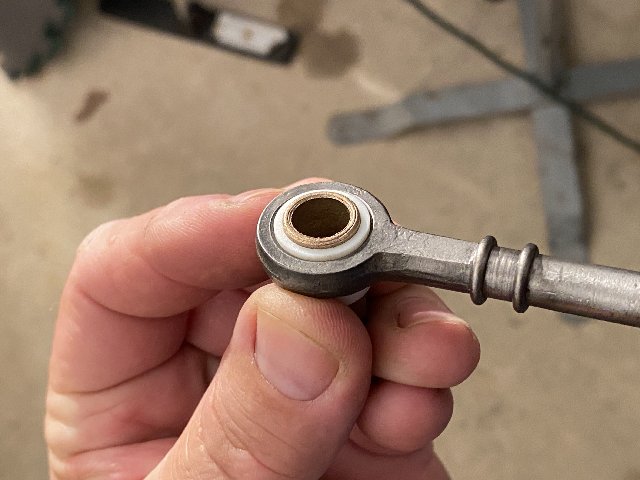
As you can see here, the original bushings are surprisingly thin, even when brand new.

Image

In this second option, these bushings would have to be thinned down to accommodate the eccentric lobe on the original mounting bolt. As I mentioned before, in this application the eccentric is not needed and I like the idea of having a bit more bushing in there (as is provided in Option #1, above) especially since all of this is kind of farm-boy engineering and everything is half a bubble off plumb.

Image

Image

Lots of new hardware and other goodies staged where I can't forget them. I have a lot going on all at once and no particular continuity going on any one part of this project, largely due to parts that haven't arrived or parts that have been painted and are still drying. Doing this helps me stay better organized.

Image

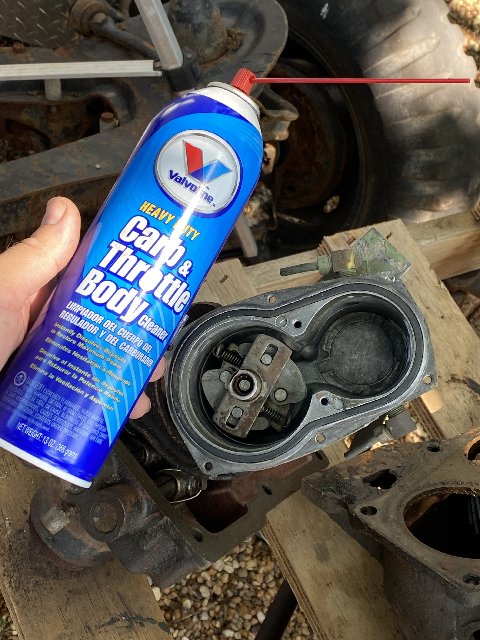
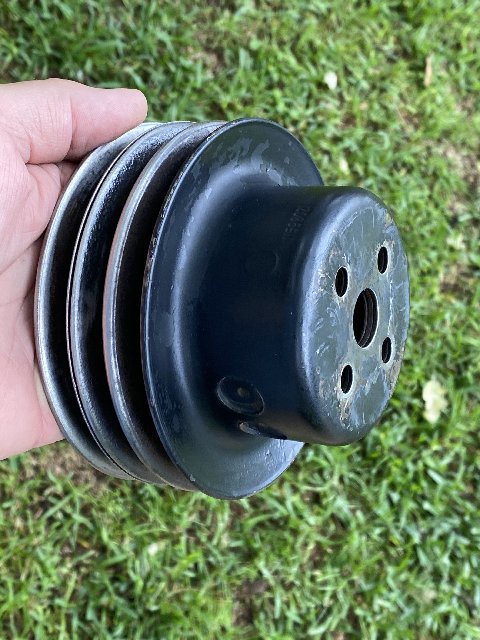
This pulley gets a makeover inside and out. The grooves and the inside mounting face had a lot of rust. I didn't like the idea of huge chunks of rust making my new matched set of V-belts into an old matched set of V-belts in a mere 10 minutes of run time. Not perfect, but pretty good... Far better than it was.

Image

Now to the issue of driveshaft phase. I'm not an expert on the matter but this link explains it pretty well and by the way, KUDOS to Rick for bringing the matter up in the first place. Thank you Rick!

https://www.youtube.com/watch?v=Idk3BVDVHq4

In the case of the Doom Buggy, we are using a FRONT suspension in the rear and the rear output shaft on the transmission is very much in-line with the input of the rear differential. If I recall correctly, the general rule for vehicles with differentials that travel up and down is - having some angle is good, provided those angles are the same at both ends of the shaft but a dead-straight line between output and input are the devil's own playground. But this is a vehicle where the output and input are fixed in place and probably only a few degrees out of line so maybe, just maybe we can get away with a few little irregularities. Doubtful, but you never know.

Image

When they built the rear drive shaft for the Doom Buggy (as Rick put it, "there was probably beer involved") they took what was originally a front drive shaft, cut it down and replicated the 1/4-turn-out-of-phase configuration without giving much consideration to where this drive shaft was going to serve. 1/4-turn-out-of-phase would be entirely correct for a stock M151 front drive shaft. This 'error' MAY be why this came to me with the rear drive shaft out of the truck. Between the wheels being off center on the hubs and the rear shaft yammering away, this might have been a really interesting ride, eh?

All that said, what I intend to do is put it back together and see how it behaves. If it's wonky, well, it's not like it's hard to get to! I'll pull it back out and make some changes. We'll get it sorted. I can promise you that.... No dramas.

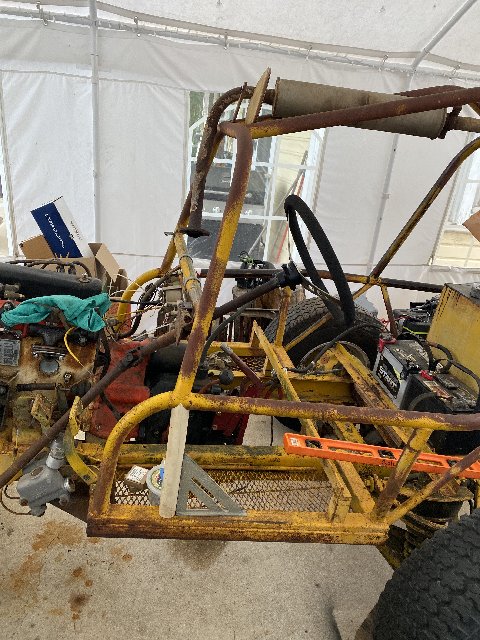
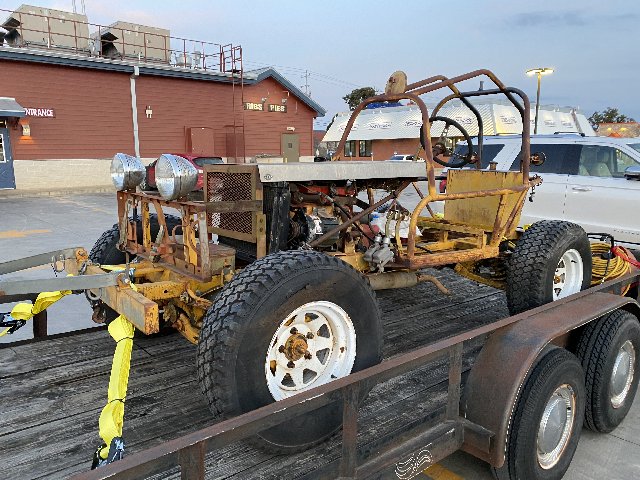
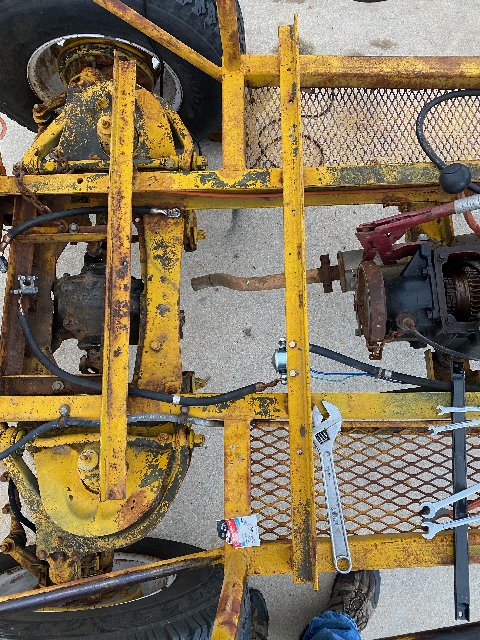
Now, for a moment, let's revisit the issue of the clutch and brake pedals and the limits to the available free space around them. The most pressing issue at the moment is having space for one's feet so as to be able to operate these pedals independently of one another..

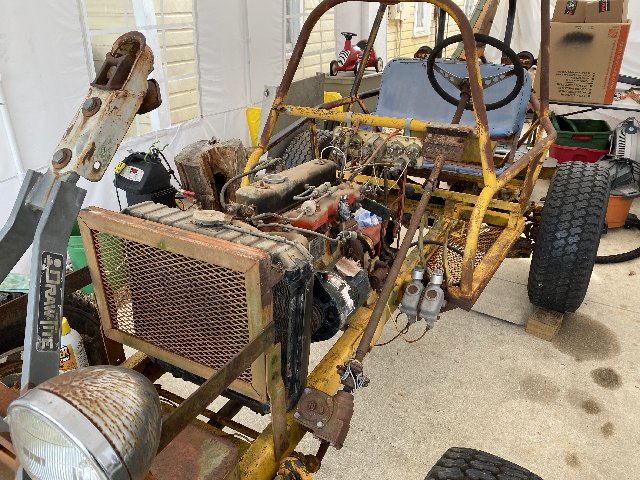
(Photo below) - The vertical tube in the top right corner of the photo is the A pillar. It terminates at a horizontal member that forms the driver's side of the cockpit. Presently, a forward continuation of the horizontal member is a turn-down which terminates at the top of the sponson frame. It is a mirror of the one on the right side of the vehicle. The real fly in the ointment is the location of that turn-down tube because it really intrudes into the space one needs to get on that clutch pedal (and be able to do it without having to look at it to be sure one is not also on the brake). The turn down tube causes the driver's foot to have to be too far to the right which, in turn, leaves part of the driver's foot on the brake pedal as well. Which is very disconcerting when there are lots of other things going on.

I'm quickly coming to the conclusion that the turn-down tube on the driver's side needs to be removed altogether and a linear continuation of the A pillar be installed in the form of a tube going almost straight down to the frame of the sponson. The strength of the roll cage would certainly benefit from it. Some gussets wouldn't hurt either but I'm not going to be driving it in that way so for now it is what it is.

Image

Developing some additional protection for the driver's feet is on the to-do list as well.

Image

More mechanical mayhem tomorrow!

Cheers,
TJ

User avatar
rickf
General
General
Posts: 19777
Joined: November 26th, 2007, 1:28 pm
Location: Pemberton, NJ.

Re: Beverly Hillbillies

Unread post by rickf » April 19th, 2020, 7:57 am

I see another MAJOR problem. This problem is going to cause you all kinds of steering issues. As it sits it is going to want to turn left all the time. The wire grating on the floors is laid in different directions on the right and left!

Looking at the top view pic it almost looks like the engine is not in line with the rear differential, sort of like the engine is in on an angle with the front to the left and rear to the right. I am assuming this is camera angle?
1964 M151A1
1984 M1008
1967 M416
04/1952 M100
12/1952 M100- Departed
AN/TSQ-114A Trailblazer- Gone

User avatar
m3a1
Lt. General
Lt. General
Posts: 4046
Joined: August 7th, 2014, 6:36 pm

Re: Beverly Hillbillies

Unread post by m3a1 » April 19th, 2020, 10:23 am

As to the steering issues, at first I thought I might just wear some of those cheap 3D glasses. But I think I'll just keep my eyes closed while I drive. Problem solved.

You are correct on the matter of the motor (good eye!). And the issue there is that the isolators on the motor mounts are really in a rather sorry condition. I have new ones for up front. Nothing yet for the trans. And by appearances, there is some wriggle rom to get this lined back up.

Remember, I already mentioned that every bit of rubber on this rig is highly degraded. That is what happens under the west Texas sun. 8)

Image

Cheers,
TJ

User avatar
rickf
General
General
Posts: 19777
Joined: November 26th, 2007, 1:28 pm
Location: Pemberton, NJ.

Re: Beverly Hillbillies

Unread post by rickf » April 19th, 2020, 11:43 am

When mounts degrade they usually just drop down, not go sideways. Then again, you ARE in Texas. :roll:
1964 M151A1
1984 M1008
1967 M416
04/1952 M100
12/1952 M100- Departed
AN/TSQ-114A Trailblazer- Gone

User avatar
m3a1
Lt. General
Lt. General
Posts: 4046
Joined: August 7th, 2014, 6:36 pm

Re: Beverly Hillbillies

Unread post by m3a1 » April 19th, 2020, 1:03 pm

Are you suggesting the Doom Buggy 'rides side-saddle'' ?

Them's fightin' words!

User avatar
rickf
General
General
Posts: 19777
Joined: November 26th, 2007, 1:28 pm
Location: Pemberton, NJ.

Re: Beverly Hillbillies

Unread post by rickf » April 19th, 2020, 1:40 pm

Your words, not mine! :lol: :lol: :lol:
1964 M151A1
1984 M1008
1967 M416
04/1952 M100
12/1952 M100- Departed
AN/TSQ-114A Trailblazer- Gone

User avatar
m3a1
Lt. General
Lt. General
Posts: 4046
Joined: August 7th, 2014, 6:36 pm

Re: Beverly Hillbillies

Unread post by m3a1 » April 21st, 2020, 1:14 am

Here we are again with some good things to report.

First, things are still chugging along with Covid-19 and the meme hits just keep on comin'!

Image

Still waiting on come critical parts so I'm just doing busy work here and there. My pulleys are looking far better....

Image

As is the timing marker (which will eventually be painted white.

Image

A lot of really good stuff was made in Ohio. As a matter of fact, I was made in Ohio. Therefore, by extension, I am also really good. The logic is inescapable.

Image

I popped the top off this, chiefly because it was being held on by two weird screws with a small mountain of washers under each screw.
I cleaned up the cover and painted it with the first can of spray paint that came to hand. (don't judge me :lol: ). Down under there was a wire that to my eye looks rather small, considering what it's being called upon to do and it was a just a quick twist-n-tape connection to the original black wire.

Owing to the fact that this original wire, while in good shape, is cut rather short, I elected to reconnect it with a mechanical joint, which is just a neat little screw-clamp junction I salvaged off of who-knows-what. This removable junction will allow me to go back in later and connect a new wire properly without having to cut an already short wire even shorter. As an added bonus, it just happens to be precisely as deep as the area it how sits in which means it should stay put very nicely.

Image

What I also discovered was that the two screws employed to hold the cover in place were actually the wrong size. Yeah, I know. Weird, huh? :roll:

Image

In case you were wondering what the proper screw size is...here ya go.

Image

Decided I didn't like the other screws and washers and switched over to this style for now. If you are curious, under the little bit of mud on the lower right is a hex-cap screw.

Image

I'm starting to get away from some bad habits, such as my Ready, Fire, Aim Method of assuming all is right with the world and forging blindly ahead without checking parts for fit, first. So, when I got this aftermarket thermostat housing I decided to check it against the original. Guess what...the holes are just a smidge too close together. I thought maybe it might still be Ok so I tried to bolt it on. No dice. When you try to put it on, the bolts gall against the outer edges of the holes.

Image

Here's a view of the manufacturer's holes, as compared to what they should be..using an original gasket for reference. Not a good match. *sigh* In some plane of existence, manufacturers actually recheck their settings and tolerances from time to time....just not here.

Image

As many of you probably already know, these castings have a nasty habit of breaking at the ears, just as we saw in one of my earlier posts.

Image

Further, there is a limited amount of metal there at the ears, so boring these holes out with a slightly larger drill bit would remove a lot more metal than I would care to take away. So, I chucked up this Dremel Tool bit on the drill press and carefully took just a bit of metal off the outer edges of each hole. The work is extremely easy to do by moving the part against the bit, by hand. It's aluminum and as it turns out, the bit isn't too aggressive. Everything fits perfectly now and the bolts go in without hanging up on the casting. The added benefit is that I kept the basic integrity of the ears intact.

Image

In case anyone is interested, these hose clips are a perfect fit for our brake hoses. Like every other rubber component on The Doom Buggy, the brake hoses are shot and their clips are a rusty mess so yeah, I'm replacing those too.

Image

And here is the spectacular good news of the day. THIS...

Image

Along with a 1/2" OD x 3/8" ID bronze bearing... come together to form an off-the-shelf solution to my problems with the link between the brake / clutch pedals and their respective master cylinders. Both these bits and pieces can be found at Tractor Supply Company. But I will remind everyone that I am not using the original bolt with the eccentric cam lobe. I love it when a plan comes together.

Image

And finally, I will leave you with this.... If Covid-19 has got you down, remember some people had it far, far worse.

Image

Cheers,
TJ

terratek
Sergeant
Sergeant
Posts: 62
Joined: January 29th, 2019, 5:36 am
Location: San Antonio, TX & Terlingua, TX

Re: Beverly Hillbillies

Unread post by terratek » April 21st, 2020, 6:52 pm

It's looking good :) Glad you took it instead of it becoming a donor vehicle (if it becomes a donor vehicle later, so be it).


I fixed the brakes on the f250 (it's an 85, so fixed is relative), took it for a test drive, and.... Managed to dump diesel everywhere (50 gallon tank, drained around 30-40 gallons)... Opened the rear tank, nothing, opened the front tank, cap blew off and diesel sprayed about 2 feet. Luckily I was standing to the side.

Long story short, when i bypassed the 2 factory tanks, i didn't bypass the greasecar system, hooked my new return to the wrong fitting, and was pumping diesel to my fuel filter, injector pump, injectors, and back to the front factory tank. Took care of that and pumped everything out of the factory front tank back into the bed tank. Took it out again, seems to be running pretty smooth. Starts right up every time, no more stumbling, have a slight leak somewhere in the back (either the greasecar tank or the new one) which i will troubleshoot later. Next test trip is to take it up to garden ridge to pick up my concrete board saw and scaffolding. Then hopefully out to lincoln to pick up my next long term screwing around project.
1967 United Tractor CN-40-A
1972 M109A3
1987 M105A2
19?? M151 Sand Rail (passed on to the next victim)

User avatar
m3a1
Lt. General
Lt. General
Posts: 4046
Joined: August 7th, 2014, 6:36 pm

Re: Beverly Hillbillies

Unread post by m3a1 » April 22nd, 2020, 12:52 am

Did very little today. Another humid one...too humid to be standing in one place working on one thing. Basically, walked around and knocked out a great many small things around here - things that I have neglected, left laying about or have failed to dispose of. But, I promised myself that I would do something on the Doom Buggy.

I decided that the matter of the roll cage, and the issue of the turn-down tube intruding on the operational space of the control pedals needed to progress at least in some small way. So I got some scrap Schedule 40 PVC and decided to mock up the piece that could be added, in preparation for removing the turn-down. PVC is far easier to work with in terms of mocking things up and I didn't end up expending a lot of energy creating a piece that had to be perfect the first time around.

So the photo below shows the PVC mock-up with a 90 degree saddle cut installed at right angles to the horizontal bar. But I think I would want this piece to follow the slight rake of the A pillar rather than go straight down (as shown here) which would will mean a change of a few degrees in the saddle cut and the same change at the cut across its base. The fly in the ointment is the horizontal member would be prone to crushing between the upper and lower sections which goes contrary to the whole idea of a cage whose real purpose is to provide protection if the rig turns turtle. So, the best plan (and perhaps the easiest) would be to remove the original A pillar altogether, including the turn-downs on both sides and bend a a new monolithic A pillar with the horizontal member tied into it rather than the other way around. Obviously, there is still plenty to figure out.

Plan B might be to turn down a slug of metal and insert it into the horizontal tube which would provide a fill for that junction, preventing the crushing effect discussed above. That slug would also provide a good point to join roll cage struts that would go forward to the frame at or about the fish plate.

Image

This photo illustrates the spacial problems associated with the present location of the turn-down member. Now imagine that gone. A great many spacial problems will be solved with its removal. Once all this is corrected (and the rest of the buggy proves itself) I'll look into what must be fabricated to protect the driver's feet and the pedal assemblies.

Image

Cheers,
TJ

User avatar
m3a1
Lt. General
Lt. General
Posts: 4046
Joined: August 7th, 2014, 6:36 pm

Re: Beverly Hillbillies

Unread post by m3a1 » April 23rd, 2020, 10:13 pm

SOoooooooo......what's going on? I know you wanna know so here goes. It's been an interesting two days.

Yesterday the carb kit came in and I did a little massage on the carb. I put that on this morning which left me wanting to hear this thing run while I was flushing out the block. So I hooked up a few things and threw the gooseneck on just to kind of direct the flushed water somewhere other than the fan (yes, that fan). No thermostat, no gasket, just the gooseneck.

I had my son hold the garden hose taking great care to remind him that that fan would happily take a finger or three. So we flushed it from the top without the engine running and we got...TEA. Then we fired it up and flushed it from the pump side and we got....MORE tea! Meanwhile, the engine was sounding a little fussy.

The moment I tried to give it a little gas the engine would stall. Knowing darned well this was not a fuel flow problem I gave her a shot of starting fluid while it was running and the moment the RPMs went up, she died. Well, I have been over this bridge before and some of you know where this is heading...

Why is a MUTT distributor like a box of chocolates?
.
.
.
.
.
.
.
.
.
.
.
Wait for it!
WAIT FOR IT!!
WAIT FOR IT!!!
.
.
.
.
.
.
.
.
.
.
.
.
Because you never know what you're gonna get! And where did the coating go?

Image

Well, it melted and gravity did the rest. (Somebody left the key on!) And after dribbling down and glueing the counterweights in place...

Image

...it flowed down into the coil-well...kinda like Chernobyl.

Image

(Excuse me, but where can we find the can openers?)

Image

Happily, the coil is just fine...which is just as well because this little box of boogers is going to need a major clean-up. The counter-weights are pretty much frozen in place by all the goop. Tighter than a gnat's....

Image

And so, I let it soak in solvent and it will come loose once more. I promise you that. I've been through this before and I'm not shedding a tear because it's not like I have to stand there and scrub.. I just go out every half hour or so and give her a turn and a tickle.

By the way, here we have yet another use for a top cover that no longer shifts.

Image

The soaking is just as well because....well, this! Now, there are TWO things that need to be drilled out and retapped on this housing. But, I have another housing in the Great Big Box of Everything; one with a junk shaft. Maybe at some point, I'll take the two and make one good one out of it.

Image

The Great Big Box of Everything yields yet another treasure....forever and ever, AMEN!

Image

Image

And as an added bonus, the adaptor gets a makeover...

Image

And the top mount for the radiator gets painted at the same time.

Image

And since I'm now waiting for paint to dry, the thermostat and the housing get a gasket and everything gets put on.

Image

So, as always, it seems like two steps forward and one step back but HEY!, we're wearing this thing down!

As to the matter of the ignition, we all know this is a result of leaving the master switch on...except I haven't been leaving the switch on because (a) there is NO master switch and (b) there is no alternative method for power to get to the distributor and (c) I have dutifully and without error, been disconnecting the batteries between run-ups, chiefly because run-ups have been so very few and far between.

I'm beginning to think I have finally found out why they finally threw in the towel on this rig. It just wouldn't run. Yes, it fires right up like it's eager to go and then all hope is crushed when the RPMs go up. So, if this is all it is, I will be very VERY satisfied.

Hoping the new fan comes in a few days and then we can get it, and the new belts and hoses and radiator back on. And the drive shaft U-joint is God-only-knows-where... Still lots of other things to do but I would like to get the drive shaft on and get this thing up on jack stands and let it idle while the transmission loafs along with some ATF fluid churning around in there. That would be a very fine, very satisfying thing.

Cheers,
TJ
Last edited by m3a1 on April 24th, 2020, 11:51 am, edited 2 times in total.

User avatar
rickf
General
General
Posts: 19777
Joined: November 26th, 2007, 1:28 pm
Location: Pemberton, NJ.

Re: Beverly Hillbillies

Unread post by rickf » April 24th, 2020, 9:32 am

That potting goo problem is not from leaving the ignition on, that was a problem with the material they used on the Prestolite modules and it degrades over the years. I have seen NOS units that were never used do that. I always advocated using wood based epoxy resin to refill the module but someone on here or the 503 mentioned that there is a specific silicone potting material. I think it may have been Kurt Lesser on the 503?
1964 M151A1
1984 M1008
1967 M416
04/1952 M100
12/1952 M100- Departed
AN/TSQ-114A Trailblazer- Gone

User avatar
m3a1
Lt. General
Lt. General
Posts: 4046
Joined: August 7th, 2014, 6:36 pm

Re: Beverly Hillbillies

Unread post by m3a1 » April 24th, 2020, 11:11 am

Whatever the cause of the melt...heat, degradation, (both?) the passenger side of the Doom Buggy is without a doubt the side that got the most sun as it sat parked for such a long time. Most of our distributors just don't ever get baked for long periods like that. In between runs, the typical MUTT distributor sits in the shade of the engine compartment.

Google "silicone potting compound for electronics and you'll get an eyeful. This module isn't done yet and I'd like to try some of that stuff just to see if it can be salvaged.

What I have in this spare distributor is the Swiss style electronic ignition. I'm not sure if I've even run this particular unit, though the seller made assurances that it was good to go. We shall see.

I've gotta say this project seems like it has been one long haul. I'm sitting here with my morning coffee, thinking about all the little things that have been buggered on this rig... Not that I'm complaining. This has project has been absolutely perfect in terms of keeping me busy and engaged but I'm beginning to wonder when I can declare I see some light at the end of the tunnel.

Today I'll try to work toward a good run-up because I would like to get those intakes re-torqued and the manifold bolts locked up. Something I did not mention on my last post was the fact that there appears to be no blow-by in the usual spots on the exhaust manifold from yesterday's fun, so maybe, just maybe I nailed it.

Meanwhile, a little retrospective..

Off to its new home... What a crazy machine!

Image

And this looked so nice from above! Unfortunately, there's a hidden problem down below!
(I knew a girl just like that, once... :lol: :lol: :lol: )

Image

Cheers,
TJ

User avatar
rickf
General
General
Posts: 19777
Joined: November 26th, 2007, 1:28 pm
Location: Pemberton, NJ.

Re: Beverly Hillbillies

Unread post by rickf » April 24th, 2020, 5:47 pm

And this looked so nice from above! Unfortunately, there's a hidden problem down below!
(I knew a girl just like that, once... :lol: :lol: :lol: )

That was a fairly common problem in Vietnam. :roll: :roll: :roll: :twisted: :twisted: :twisted:
1964 M151A1
1984 M1008
1967 M416
04/1952 M100
12/1952 M100- Departed
AN/TSQ-114A Trailblazer- Gone

User avatar
m3a1
Lt. General
Lt. General
Posts: 4046
Joined: August 7th, 2014, 6:36 pm

Re: Beverly Hillbillies

Unread post by m3a1 » April 24th, 2020, 6:12 pm

Not just Vietnam, brother!

User avatar
m3a1
Lt. General
Lt. General
Posts: 4046
Joined: August 7th, 2014, 6:36 pm

Re: Beverly Hillbillies

Unread post by m3a1 » April 25th, 2020, 2:29 am

It has been quite a day.

I am now officially qualified to work in the pits of the MUTT500. My speciality? Distributors. More specifically, removing and replacing MUTT distributors. Which is to say I can remove and replace a distributor in less than 5 minutes (AND get it properly oriented). Okay, maybe 6 minutes...provided no one is distracting me....and no wires just magically come off in my hand.

Image

But, let's start at the start. I made my coffee and went out to see how things were looking with the superfund site that was yesterday's original distributor and YES! we again had a fully functional spark advance. The Carb & Throttle Body Cleaner did its work and the goop is gone. So I gave her a final spray just to rinse out any remnants left behind by the evaporation of yesterday's juicing and declared victory.

Now a word to the wise....if you find yourself in a similar situation this cleaner is the kind of stuff where you would want to make sure there weren't any lingering residuals left behind as you hurry to put your distributor back together. BIG mistake. BOOM.

In other words, let it all evaporate before putting the spark to it...

Image

I decided to see what could be done about the carburetor's vent distribution manifold (that big block of brass that screws into the top of the the throat of our MUTT's Zenith carburetors.

Image

Now, as I came to find out (after consultation with Rick) these all have a coarse thread...none of them EVER had a fine thread and yet, my carb, which came to me without a vent distribution manifold, had apparently been retapped for fine thread. Oh GOODY! Another ding-danged problem to solve because...well, we don't have enough of those ALREADY :roll:

So when i got to the auto parts store, the temporary solution presented itself. I say "temporary" because another better solution may come along. But for now, this will screw right in and it will accept a hose barb. So the connection won't be a hard line but it will be connected. And with the addition of an appropriate tee, I will also be able to vent the distributor. More photos when my final plumbing is done. I'm not too keen on having a soft line that close to the manifolds but I'm satisfied the theory is sound.

Image

While I was out, I also got some new hardware for this..

Image

...and this. By the way, have you ever looked at one of these closely? These are the most ridiculous contraptions EVER. If anyone knows the back story on these, I'm sure it would be worth sharing with the rest of us.

Image

So began the long process of doing some plumbing for the crankcase ventilation and the installation of the radiator, and the radiator hoses and so on and so forth (all of which will have to come off for the new fan) because, why do anything once when you can do it twice and get some extra practice in as a bonus. Right? :lol:

Finally, with everything hooked up I put distributor #2 in and it was at that point I realized that I had lost the correct orientation of the distributor from the day before :oops: Hey, man...I'm not as sharp as I used to be...

And when you find you've lost the orientation of your distributor, you can pull the cap and fool around trying to get the rotor turned just so, or you can slam that thing in there and hope you get lucky. After all, there is a 50-50 chance that the Gods will smile and you get it right the first time. It ends up being far quicker just trying it one way and if the engine coughs out through the carb, you pull the distributor (and pluck out the distributor shaft extension with a magnet) and re-install it 180 degrees the other way. Quicker, easier, faster...

And remember, this shaft extension only goes on the distributor ONE WAY but the extension will go in the engine EITHER WAY so, to pull the 180, BOTH have to come out.

Image

All of this is 'quicker, easier, faster'...until this happens...without it becoming readily apparent... In my case the wire separated without falling completely out and my distributor suddenly didn't work for no immediately identifiable reason which left me wondering what the heck just happened because it was obviously backwards in one direction and wouldn't fire at all in the other. Finally, if you're really lucky, the wire comes completely off in your hand and the trouble, formerly hidden from any possible view, is now revealed. No juice. No spark.

Naturally, before it came off in my hand, I went to distributor #3 (one that I knew definitely worked) because distributor #2 was unproven and I was beginning to think I had installed a clinker. (In the clarity provided hours later by several stiff drinks, it became obvious that the severed wire had been the culprit.)

Grrr! Sometimes it just doesn't pay to get out of bed in the morning...but if you must rise AND shine, a little judicious lubrication doesn't necessarily hurt.

Image

So I got busy with the soldering gun and made the repair to that bloody wire. By the way, this little slug of rubber I'm holding just happens to have almost the exact same external dimensions of the little rubber barrel that can be found on most Dremel sanding drums....so if you're doing this job and lose the rubber bit or if it's 'toast', there is another resource for a replacement and, happily, an inexpensive replacement at that.

Once the solder joint was made, I slid this rubber slug tightly over it giving it all the support one could possibly ask for and finished it off at the tail end with some RTV. Done and done.

Image

With the distributor #3 installed (and the wire soldered), i finally got a great run-up at the end of the day and fellas, by then...I was just beat. In fact, I was SO beat I didn't have the energy, or the focus, to get in there and re-torque the manifolds. Sometimes it's just best to call it quits for the day.

I do think it will be worthwhile proof testing distributor #2 which means yet ANOTHER distributor swap but hey, I'm getting REALLY good at that!

Cheers,
TJ
Last edited by m3a1 on April 25th, 2020, 5:04 pm, edited 1 time in total.

Post Reply